
Our beautiful script bag labels now also come in our favourite finish, Iridescent Rainbow. I've put together a quick installation video so you can see how easy they are to install.
They are so easy!
Shop HERE for Metal Bag Labels.
Thanks for reading!
Janelle
They are so easy!
Shop HERE for Metal Bag Labels.
Thanks for reading!
Janelle
Bag Hardware
How to Install a Half Moon Magnetic Clasp - A Hardware Video Tutorial
7/25/2018 07:41:00 PMIf you are looking for an interesting closure on a handmade bag or wallet, a Half Moon Magnetic Snap is very easy to install - and gorgeous!
Learn how to install the front part of the closure with the video tutorial below, and use your basic magnetic snap skills to install the back piece. If you haven't installed a basic magnetic snap yet GO HERE to see that video tutorial too! They are so easy!
Shop for our Half Moon Magnetic Clasps on the website here!
Happy Sewing!
Janelle
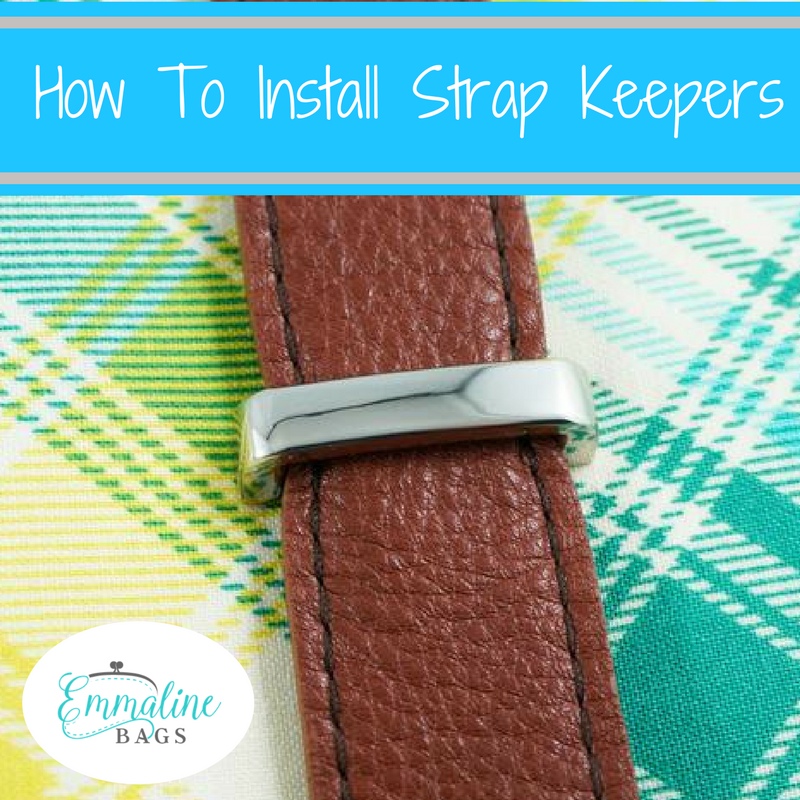
Wondering how to keep those long straps under control or add a polished look to your handmade bags? We’ve got you covered! Emmaline Bags Strap Keepers are the answer, and we are going to show you just how easy these are to add to your next bag.
Supplies:
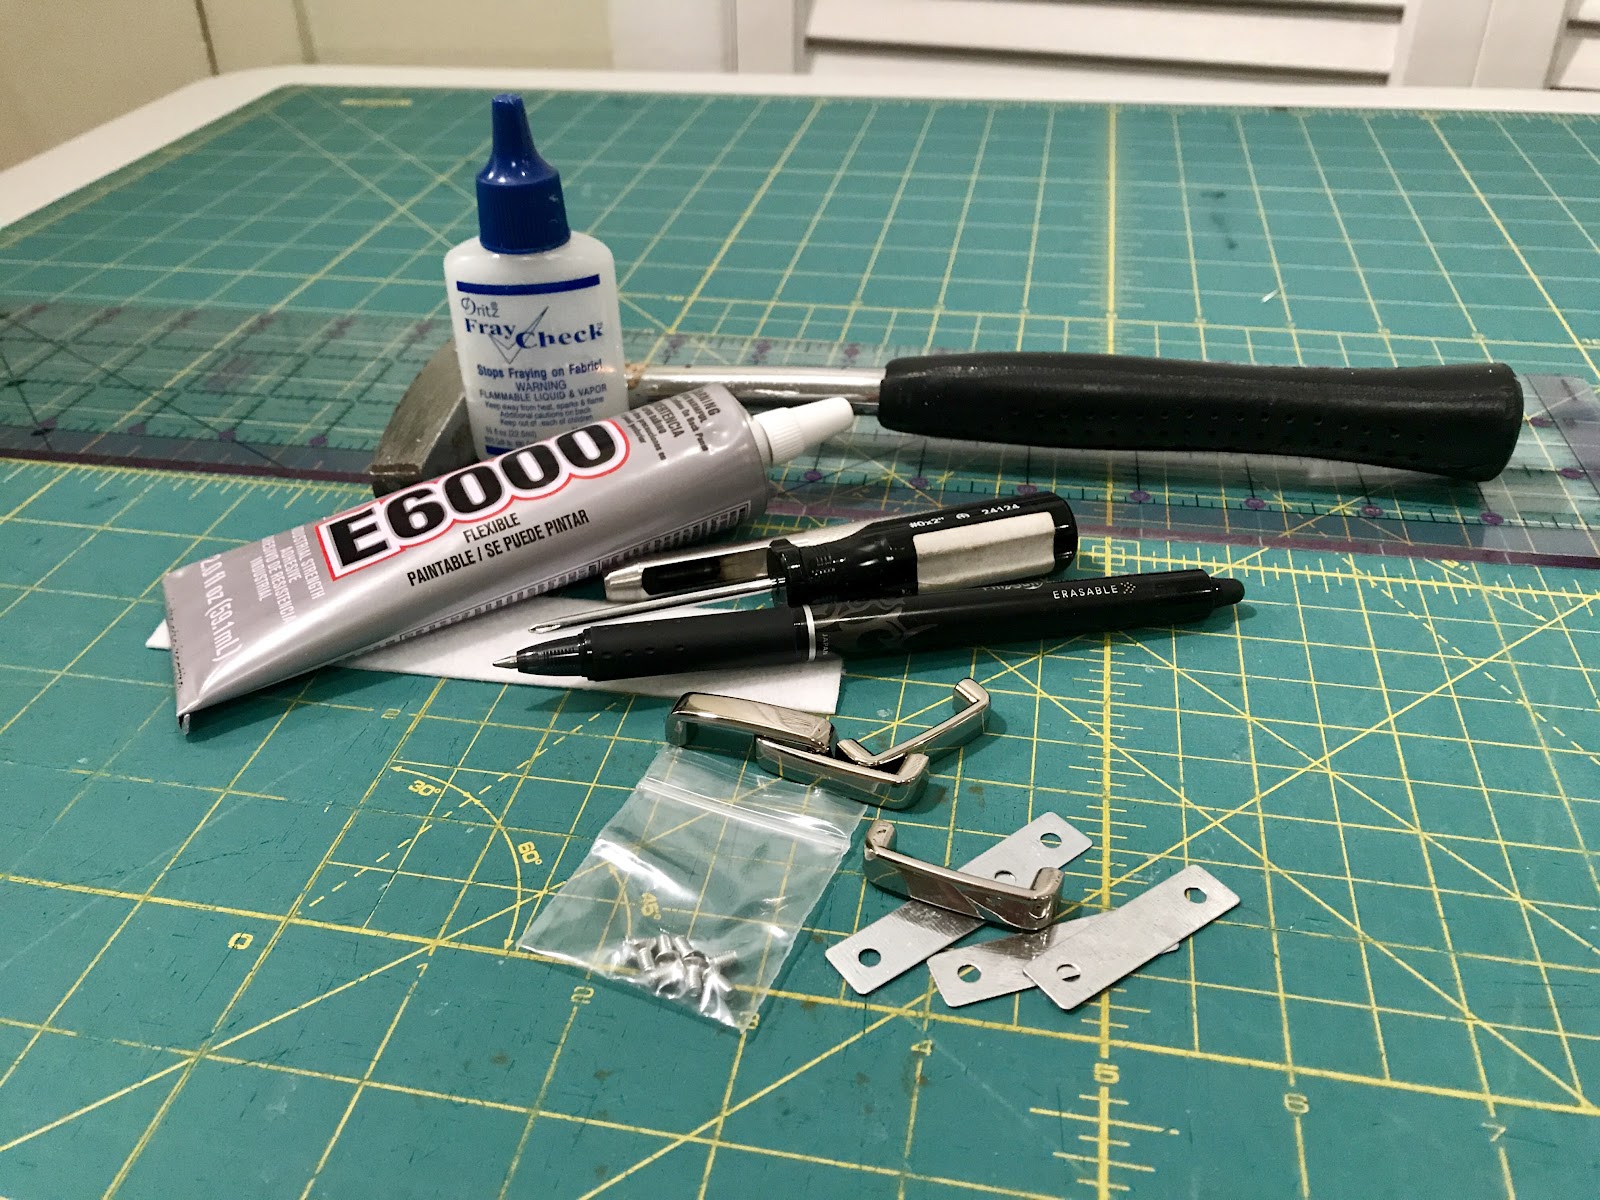
-scraps of peltex and fusible fleece
-a marking pen
-a small screw driver
-a hammer or mallet
-a ruler
When do you install? We are going to install these once you have completed your exterior bag panels, before you sew your exterior together.
Once you've decided on placement, measure and carefully mark a line under both straps to make sure you get them placed at the same point on each panel, no one wants crooked bling!


Double check to ensure you are level and if you are satisfied with your placement, take the washer that is included with the keeper and place it over the line you made.

Using your marking pen, mark the holes in the washer clearly.

Now go to a hard surface (think concrete floor with a wooden cutting board underneath), grab your punch and mallet and making sure you are aligned with the marks for the holes you made, give it several whacks.

Repeat for all the hole marks to punch a total of 8 holes.
Once you have all the holes punched grab your fray check and dab it thoroughly on the holes in your panel.

While that is drying, cut 4 small strips of peltex to be slightly larger than your washers. Using your washers, mark the spots for the holes on each strip on peltex.
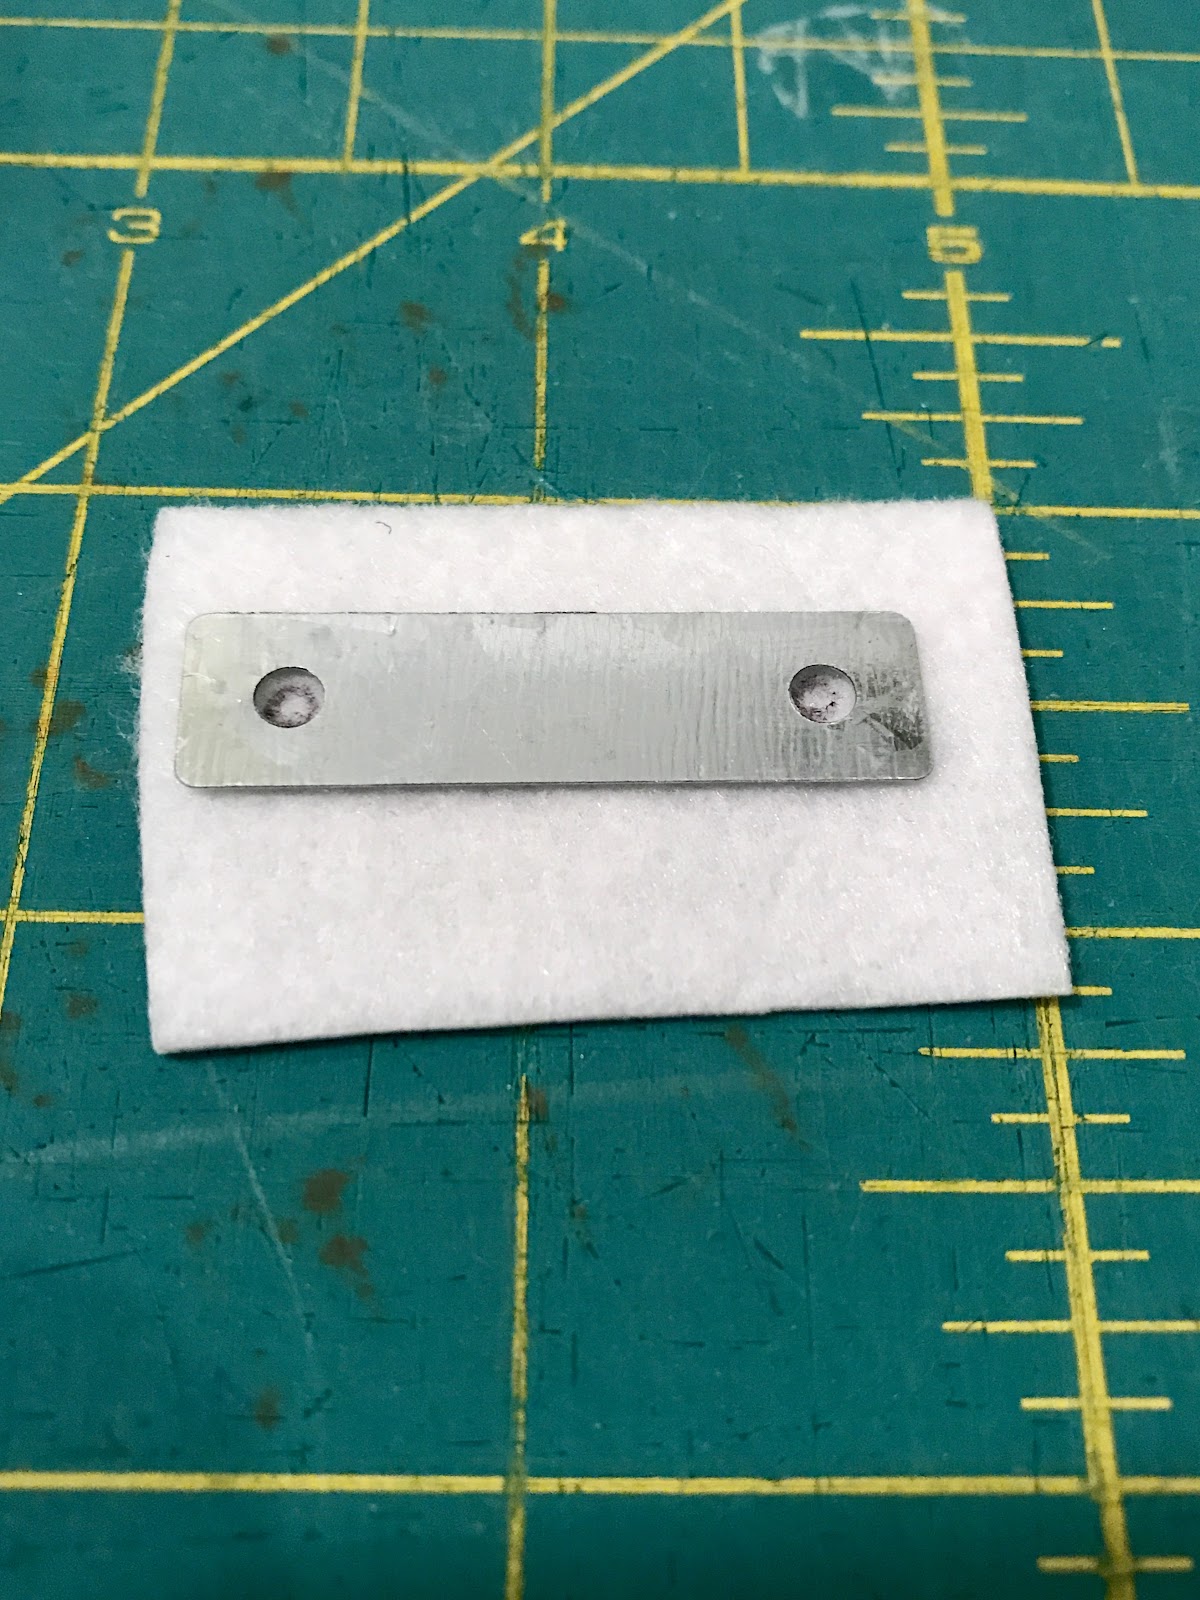
Use your punch to cut the holes or make a slit through the marks in the peltex.
Now we are ready to install your strap keepers! Put a small piece of masking tape on the front of your keepers to protect them from getting scratched while we do this.

Place the keeper with the holes facing up onto your work surface and carefully place your bag panel on top (wrong side facing up). Bonus...the masking tape can help hold your keepers in place while you work.
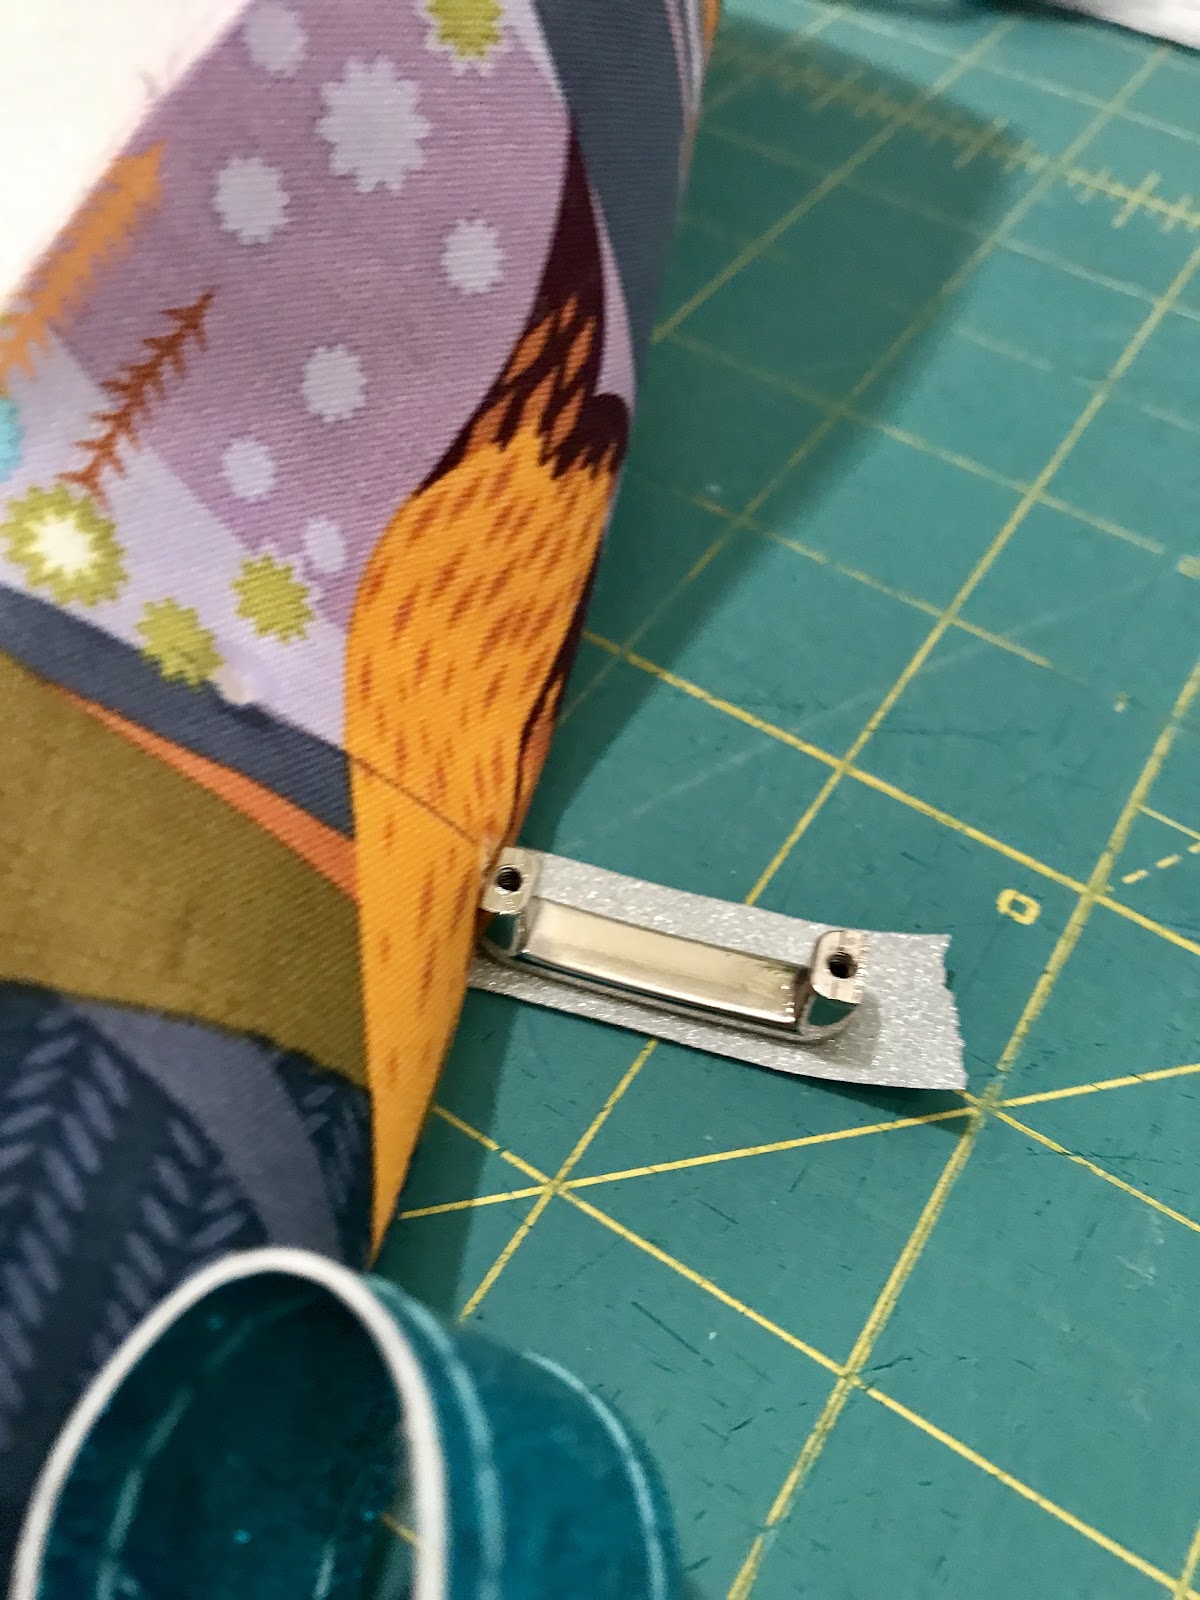
Place your strip of peltex and then your washer over your panel aligning the holes.

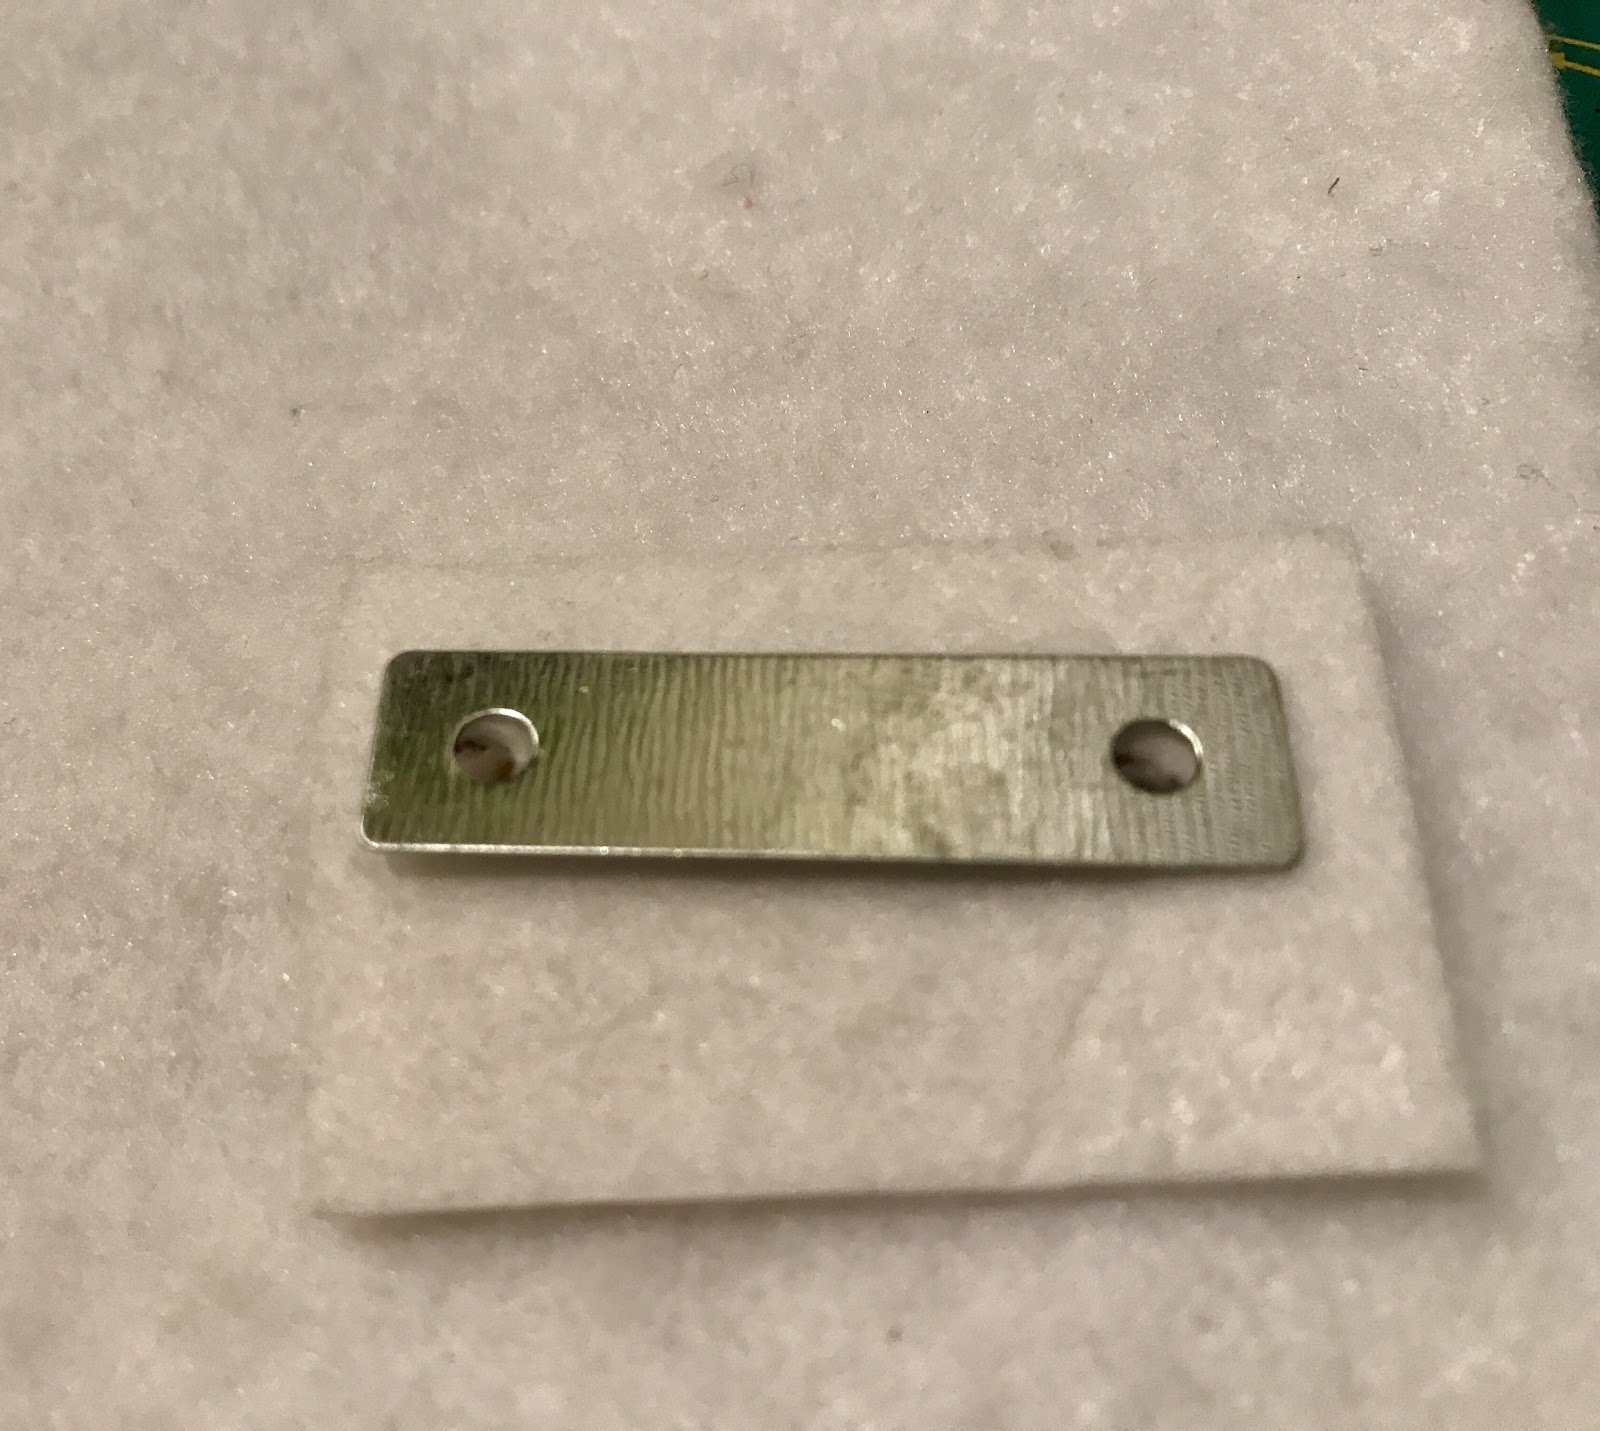
This is a good time to add a dab of locktite into the holes in the strap keeper, you can use some E6000 and apply it carefully with a pin if you are in a pinch, but that can get messy fast.
Carefully screw in your first screw, but don't tighten it all the way yet! (Sometimes the keeper may wiggle a bit when you put that first screw in, so leave yourself a bit of wiggle room before tightening it in so you can get the second one in easily). If you have to, once the first screw is in, adjust the keeper to align with your second hole and then install the second screw. Once both screws are in place, then tighten both screws securely.

And you’ve installed your strap keeper! Repeat with the remaining 3 keepers and finish your bag as you normally would. Once your bag is done just slide your straps into your keepers and you are all done! Remember to keep that masking tape on the keepers until you finish constructing your bag to keep them from getting scratched. How easy was that?
-----------
Photos and content provided and written for Emmaline Bags by Cyndi Farfsing, from The Nosy Pepper. Cyndi's blog is chock is full of more bag photos and make making tips. Check out her bag series "It's in the Bag! Better Bag Making Series," to learn a ton of new bag making skills.
Share your projects made from Emmaline patterns and/or with Emmaline hardware in our facebook group Emmaline Sewing Patterns Group, or on instagram with the hashtags #emmalinehardware, #emmalinepatterns, #emmalinebags, or tag us @emmalinebags.
Bag Making Tutorials
How to Add a Zipper Opening to The Miss Maggie Handbag - a Tutorial
8/15/2017 10:00:00 AM
Have you made our Emmaline Bags Miss Maggie? It's one of my go to sews because it's quick, classy and easy to customize. The best part, Miss Maggie Handbag pattern is FREE! The original pattern uses a magnetic snap but many people prefer a zip top. Luckily adding a zippered panel is so very easy to add to the original pattern and today we are going to show you how!

Supplies:
-15” or longer all purpose zipper
- (4) pieces of lining fabric 2” wide x 12” long
- (4) pieces of shapeflex 101 cut to 2” x 12”

Let's Get Started!
Take your fabric strips and fuse the interfacing according to manufacturer’s directions.
Press each 2” end of your fabric under ¼” towards the wrong side.

Prep your zipper:
We will want to make sure that the edges of our zipper gets encased in the zipper panels before we sew them. At the top of your zipper (the end closest to the end when the zipper is closed, flip the top of your zipper tape at a 90 degree angle and pin.

We are going to add a couple of stitches to hold it in place at this angle. (If you prefer, you may also glue them into this position). Stitch about ⅛” away from the edge of your zipper tape. Be careful not to sew over your pin!

Repeat for the other side of your zipper.
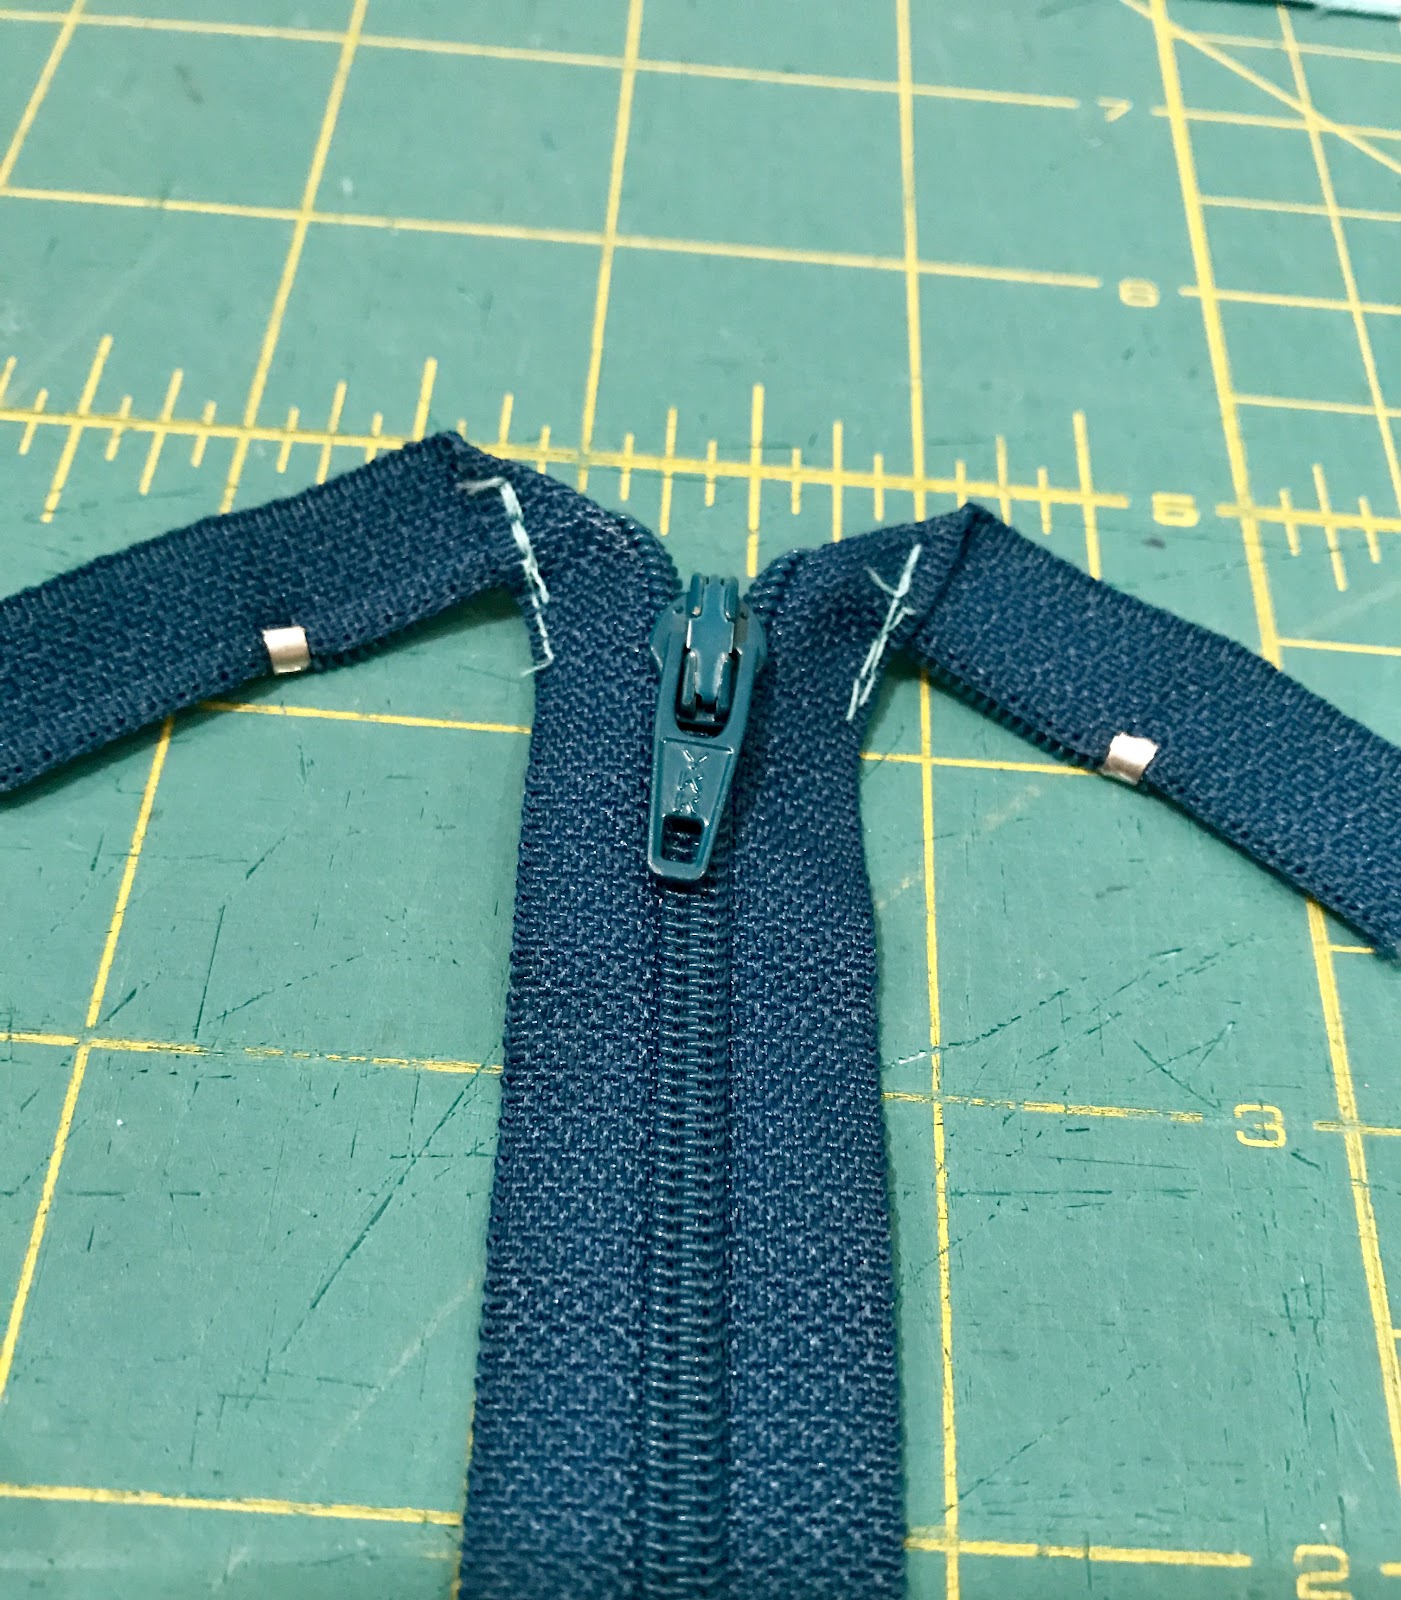
It's ok if your stitching isn't great, it'll all be hidden inside your zipper panel.
Sewing your zipper panel:
Now place one of the 2” x 12” pieces of your lining panel on your table RIGHT side up. Take your zipper and place this on top WRONG side facing you so that the right side of your fabric and the right side of your zipper are together. You want the top of your zipper closest to the pull aligned with your short edge and the top edge of your zipper aligned with the top of your fabric. Pin, clip, or glue in place.

Unzip your zipper all the way, this will keep it out of our way as we sew.
Baste your zipper in place using a ⅛” seam allowance.
Now place this on your table right side up and take another of your lining panel and place this on top WRONG side up, so that it is right side together with the half that you sewed.
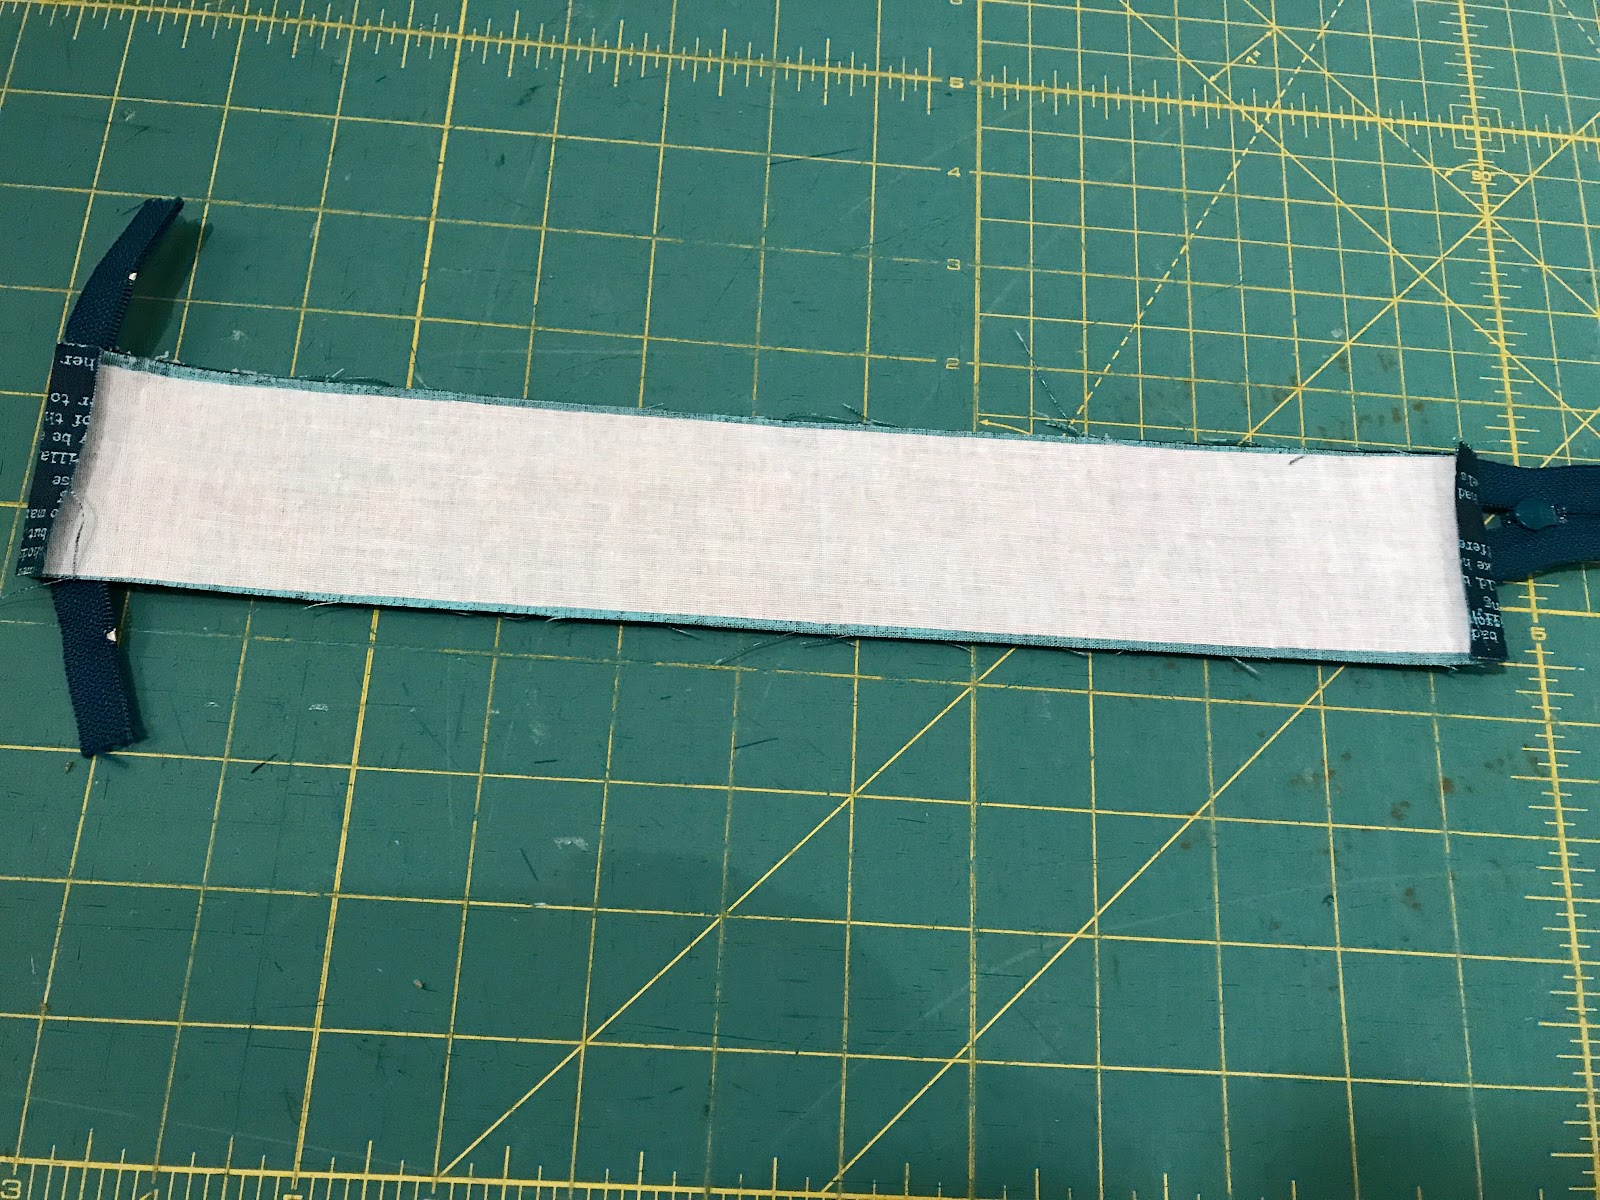
Pin or clip in place and sew using a ¼” seam allowance.

Now, press both sides away from your zipper, so that they are wrong sides together.

Cut off the metal stop at the top of this side so that you don't accidentally stitch into it later.

Pin or clip around the bottom and side edges.
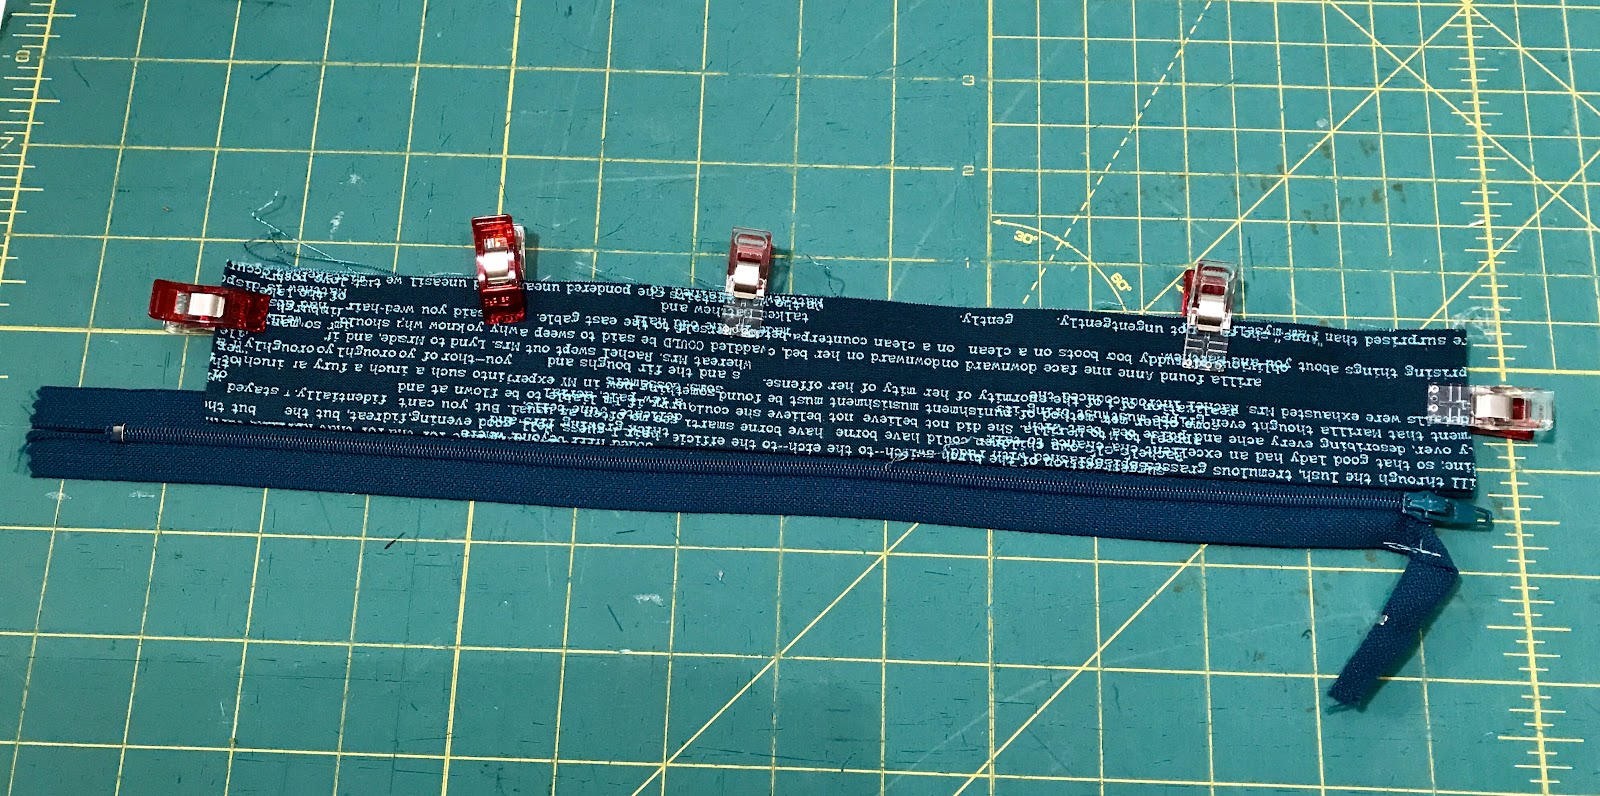
Top stitch along the edge closest to the zipper and the short edges. Baste the bottom raw edges together.

Repeat to attach the other side of your zipper panel. It should now look like this:
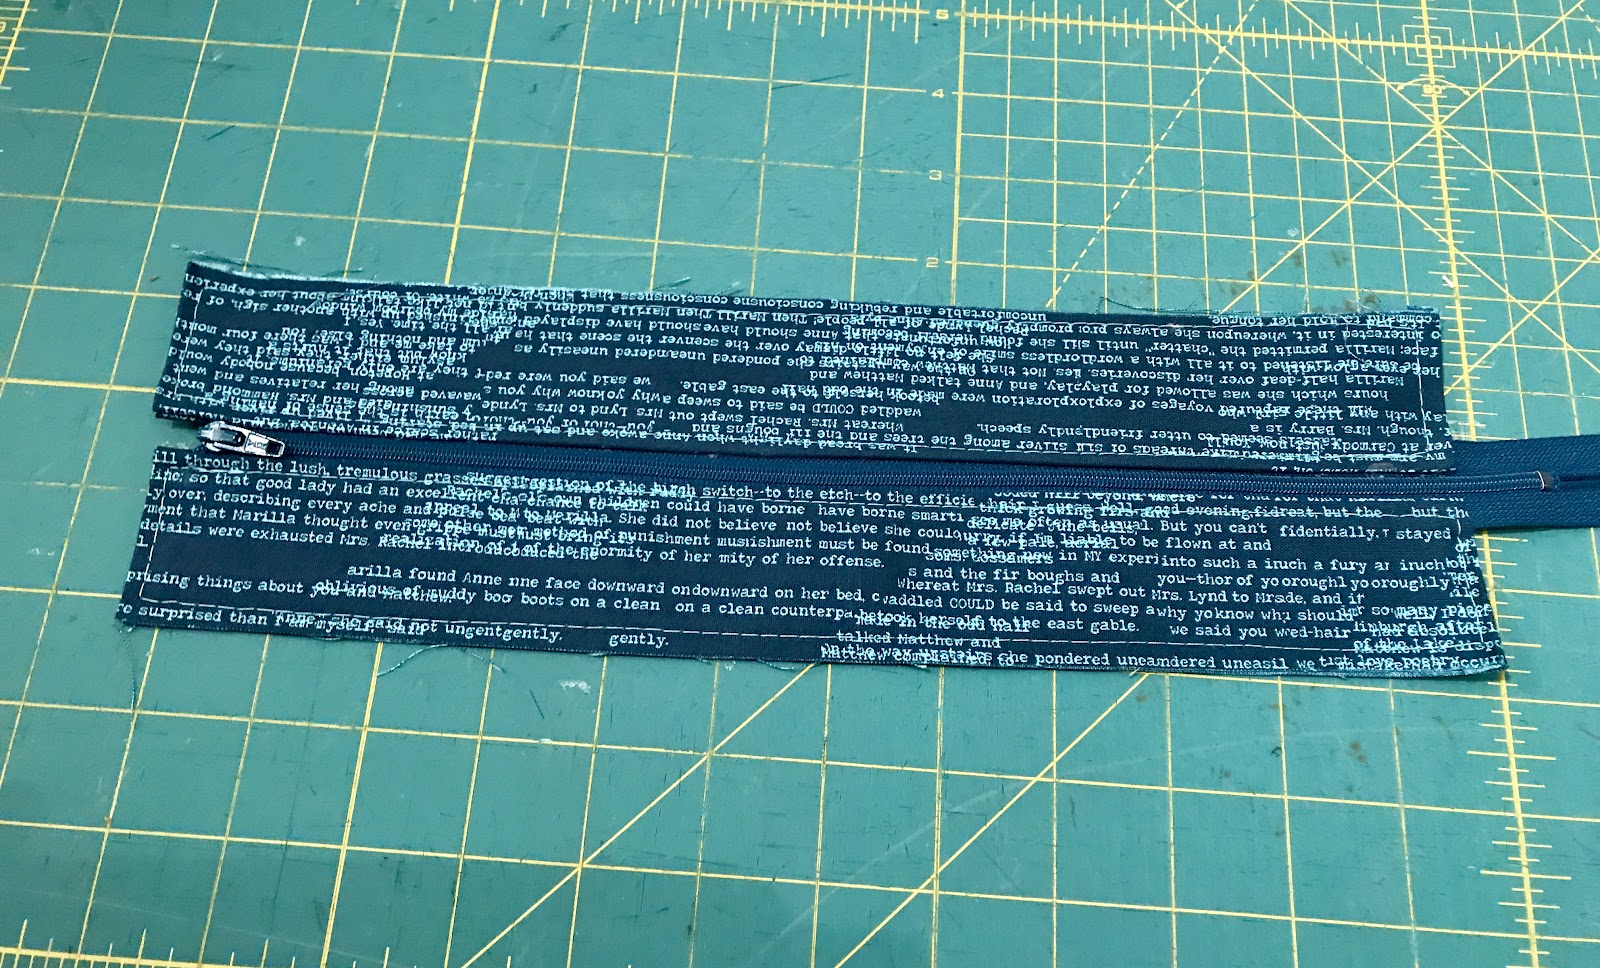
At this point, if you are adding a tab to the end of your zipper this would be the time to do so. Otherwise you can add a zip end once your bag is completed.
Attach to lining panels:
We are going to add our zipper panel to our lining BEFORE we stitch the facing to the 16”x 10.5” pieces of our lining.
Find the center of your lining panel and the completed zipper panel. Mark the center on both pieces.
Place the 16” x 10.5” lining panel on your table right side up. Take your zipper panel and place this on top so that the zipper is facing UP and the bottom of the panel is against the fabric. Align the top edges and match center markings.
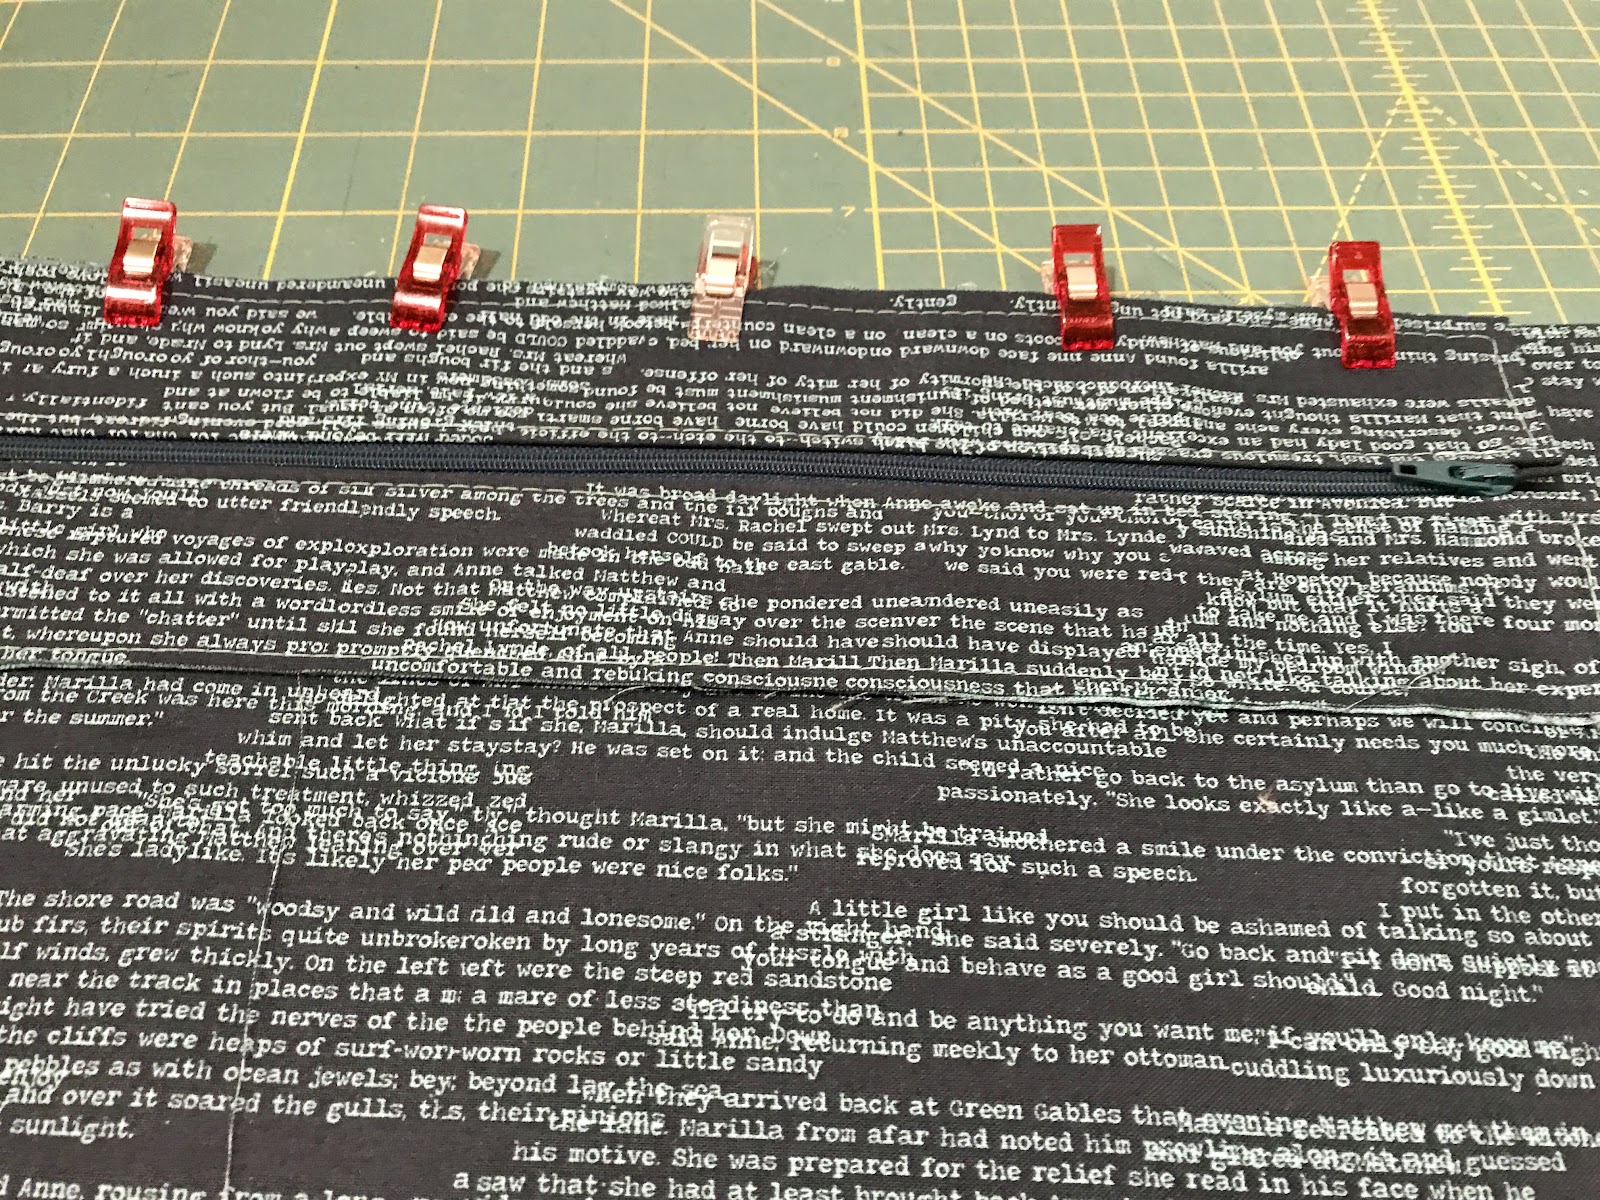
Pin or clip in place and baste these together. Now add your lining facing according to the pattern directions.

Repeat to the attach the other side of your zipper panel.
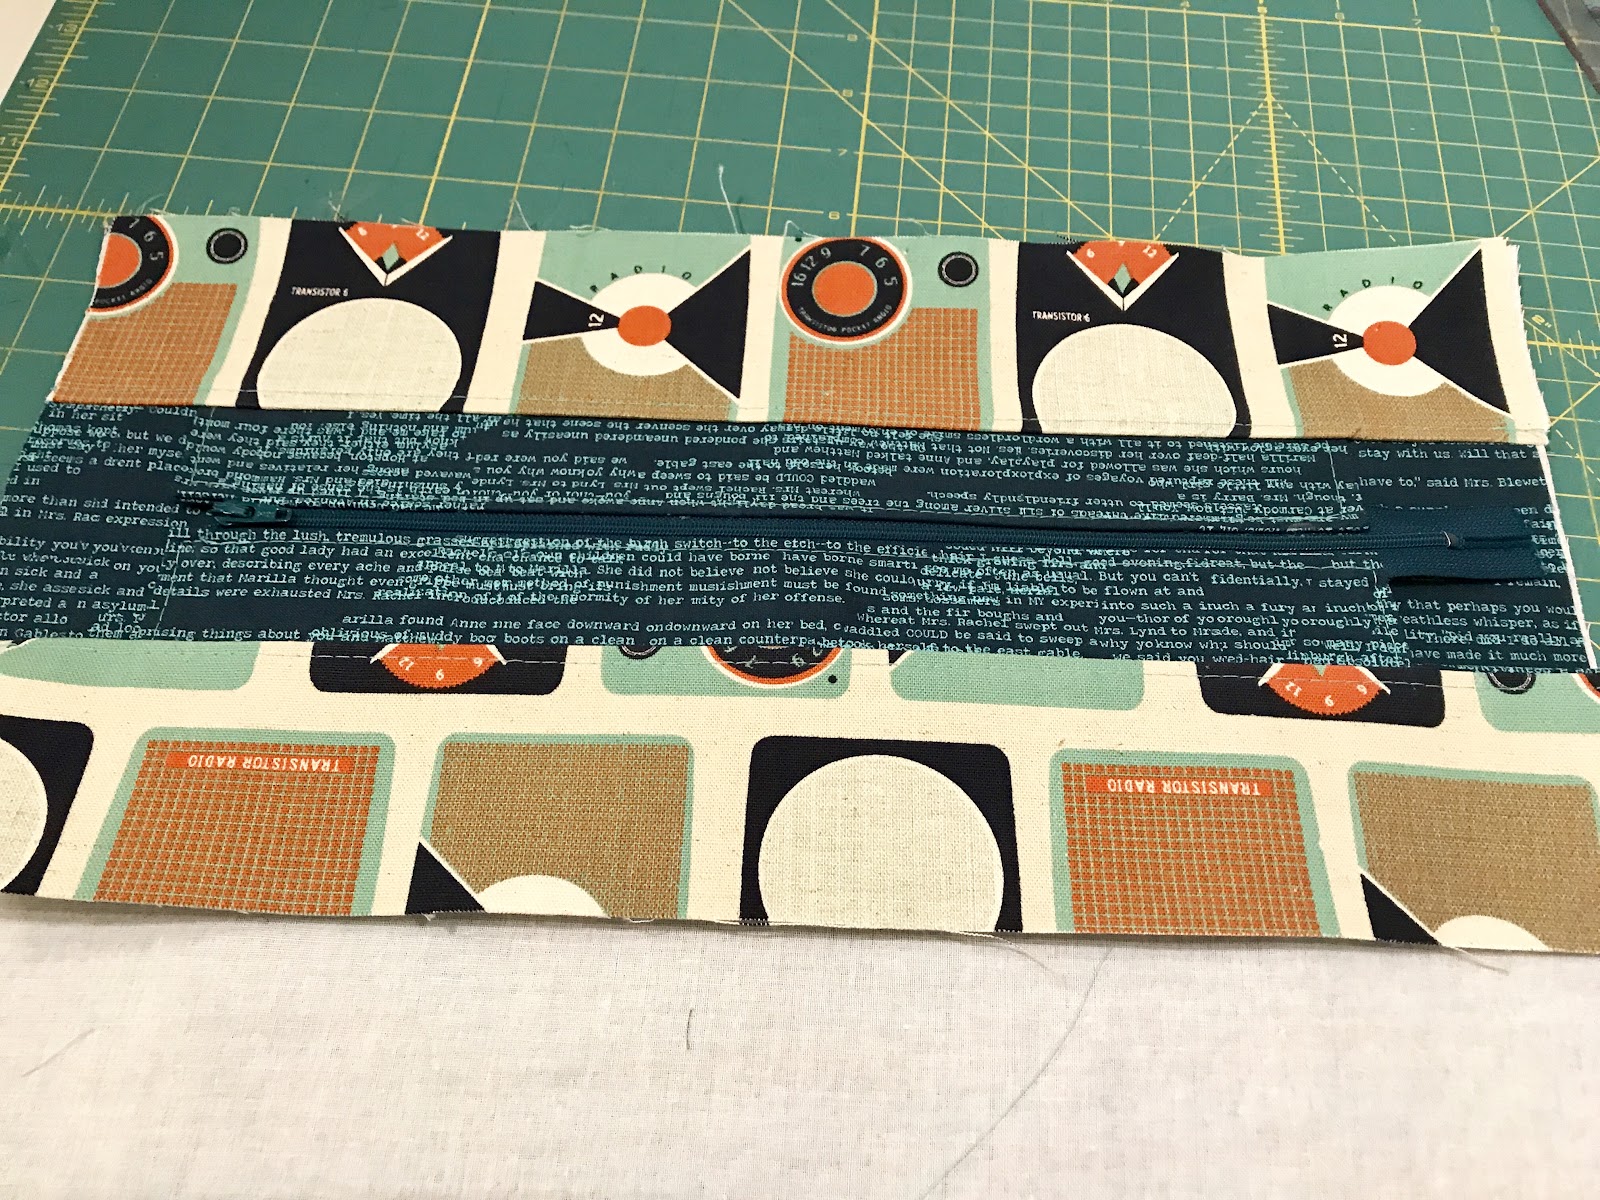
Finish your bag according to the pattern directions and now you have a Miss Maggie with a zippered closure!

-----------
Photos and content provided and written for Emmaline Bags by Cyndi Farfsing, from The Nosy Pepper. Cyndi's blog is chock is full of more bag photos and make making tips. Check out her bag series "It's in the Bag! Better Bag Making Series," to learn a ton of new bag making skills.
Share your projects made from Emmaline patterns and/or with Emmaline hardware in our facebook group Emmaline Sewing Patterns Group, or on instagram with the hashtags #emmalinehardware, #emmalinepatterns, #emmalinebags, or tag us @emmalinebags.


Bag Making Tutorials
How to Attach Press Locks - A Hardware Installation Tutorial
7/21/2017 11:20:00 AM
Have you see the fun baby, mama and papa press locks in the Emmaline shop and wanted to know how to install them? You're in luck! Today we are going to show you how.

Here's what you need:
-a seam ripper
-a small screw driver
-scraps of peltex
-scraps of fusible fleece
-a marking pen
-a strong glue such as E6000

You will want to start by installing the bottom portion of your lock first, as this will be installed before you finish your bag. The top portion will be installed AFTER you've completed construction.
Let's get started:


Grab one of your peltex scraps and using the washer, again mark placement lines for the lock.


Now take your seam ripper and CAREFULLY make a small slit at the marks you made on your fabric AND your peltex. Dab a bit of Fray Check on the slits in your fabric.
From the right side of your fabric push your lock through the slits, then slide the peltex over the prongs, then the included washer. Tip: make sure that the bottom of the lock is installed facing the right way. The top is the portion that has only a bit showing above the bar.

Now push the prongs down over the washer and cover with your scrap of fusible fleece.

Fuse according to manufacturer's instructions. This will keep any edges of your lock from rubbing on your lining fabrics.
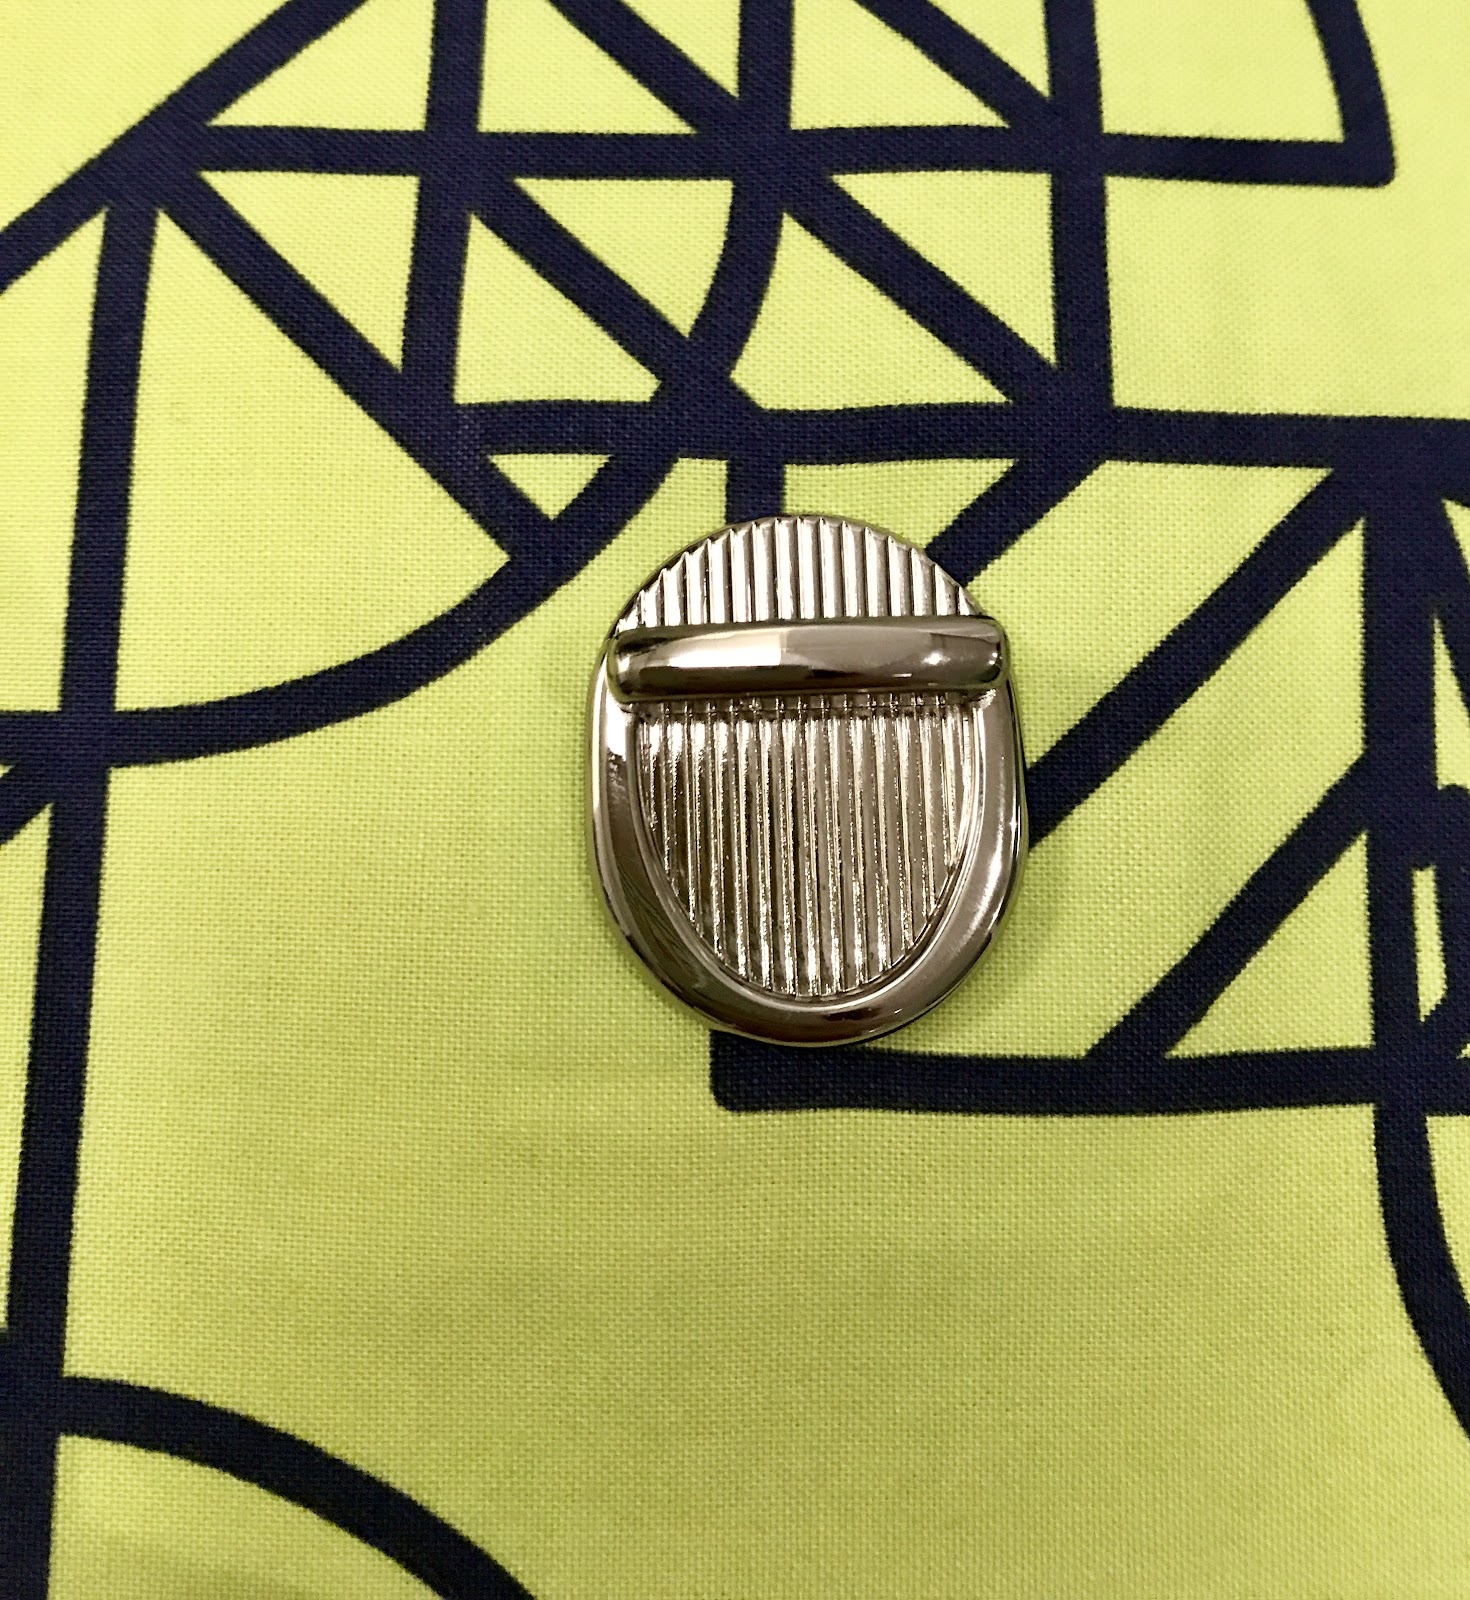
And we are halfway done! Complete your bag as usual, then we will install the top of your lock. Make sure that your flap is strongly interfaced. It is recommended to slide another scrap of peltex where the top will be installed if it is able to fit in the channel (check your fit, it may be too tight if you are using leather or heavy vinyl). This gives the screws something to bite into and reduces the stress on your fabric.
Ready?
Take your completed flap and ensure that you have a good placement by sliding it before we install.
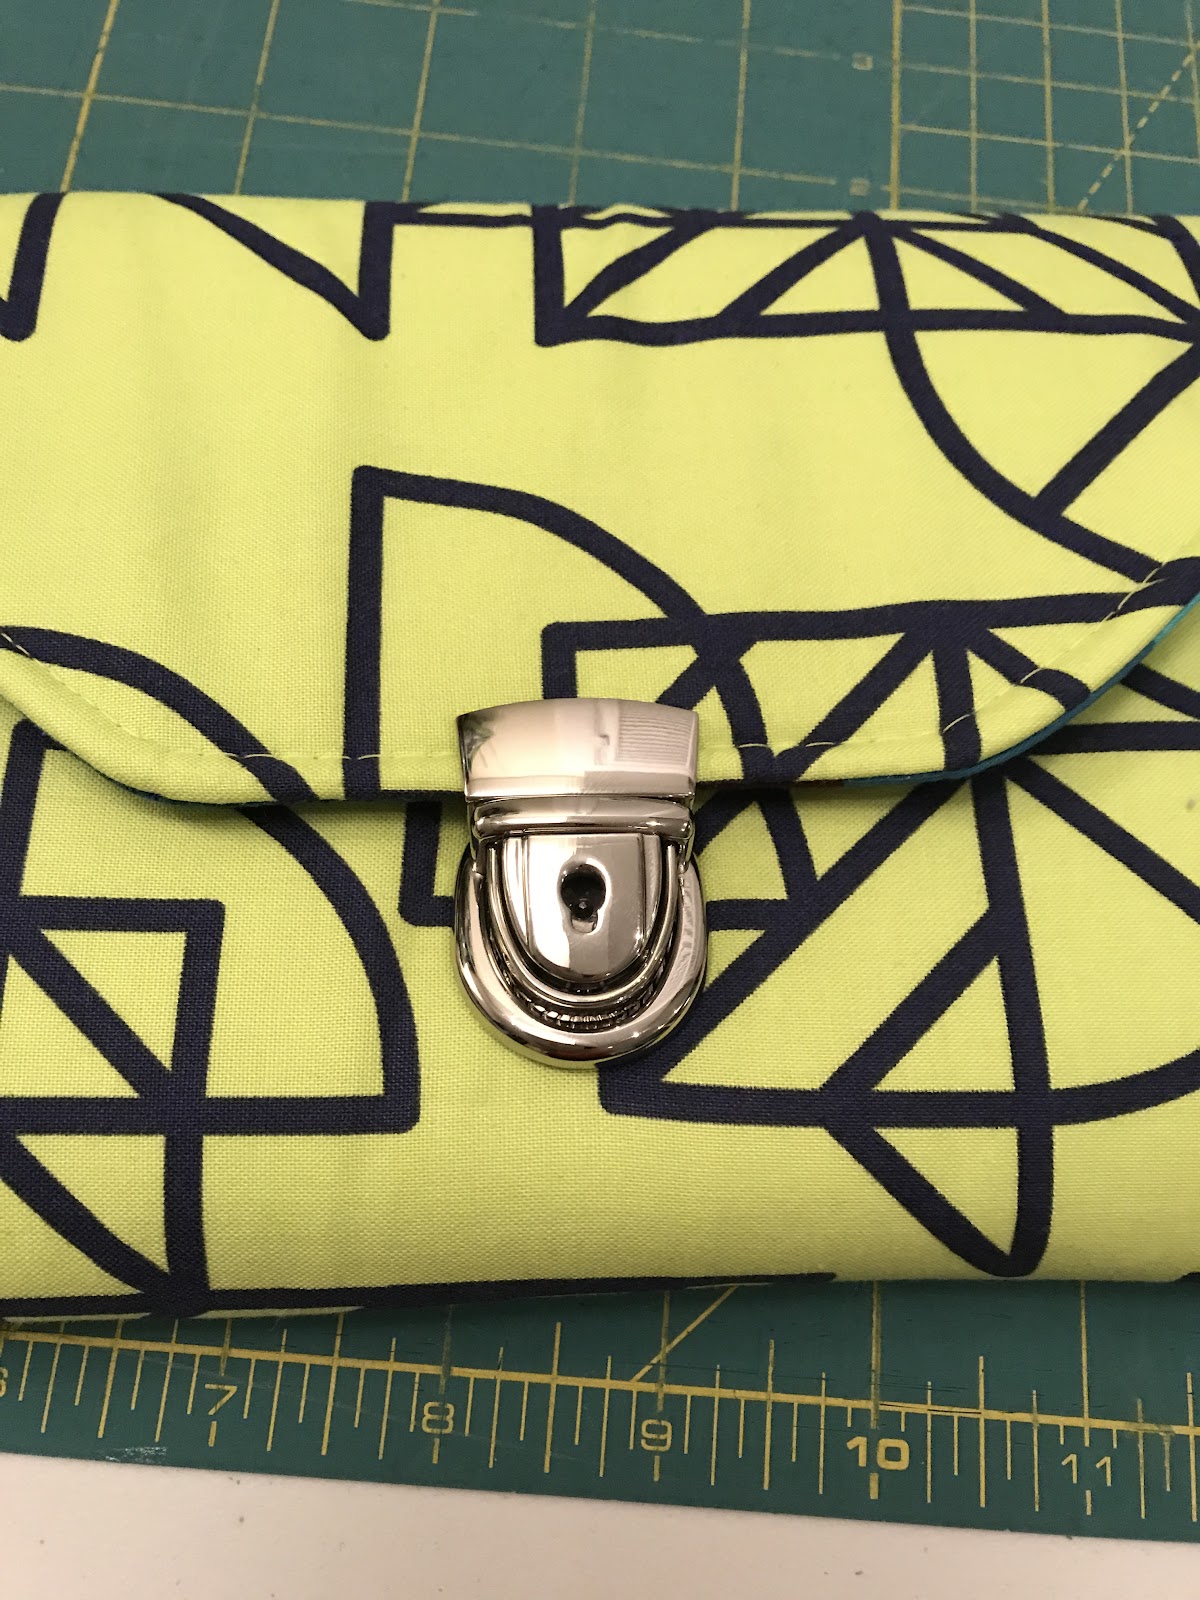
If you are satisfied, then mark your placement by marking a small dot on either side of your lock on the flap.
Slide the top portion off and using your glue, dab a few drops inside the channel.
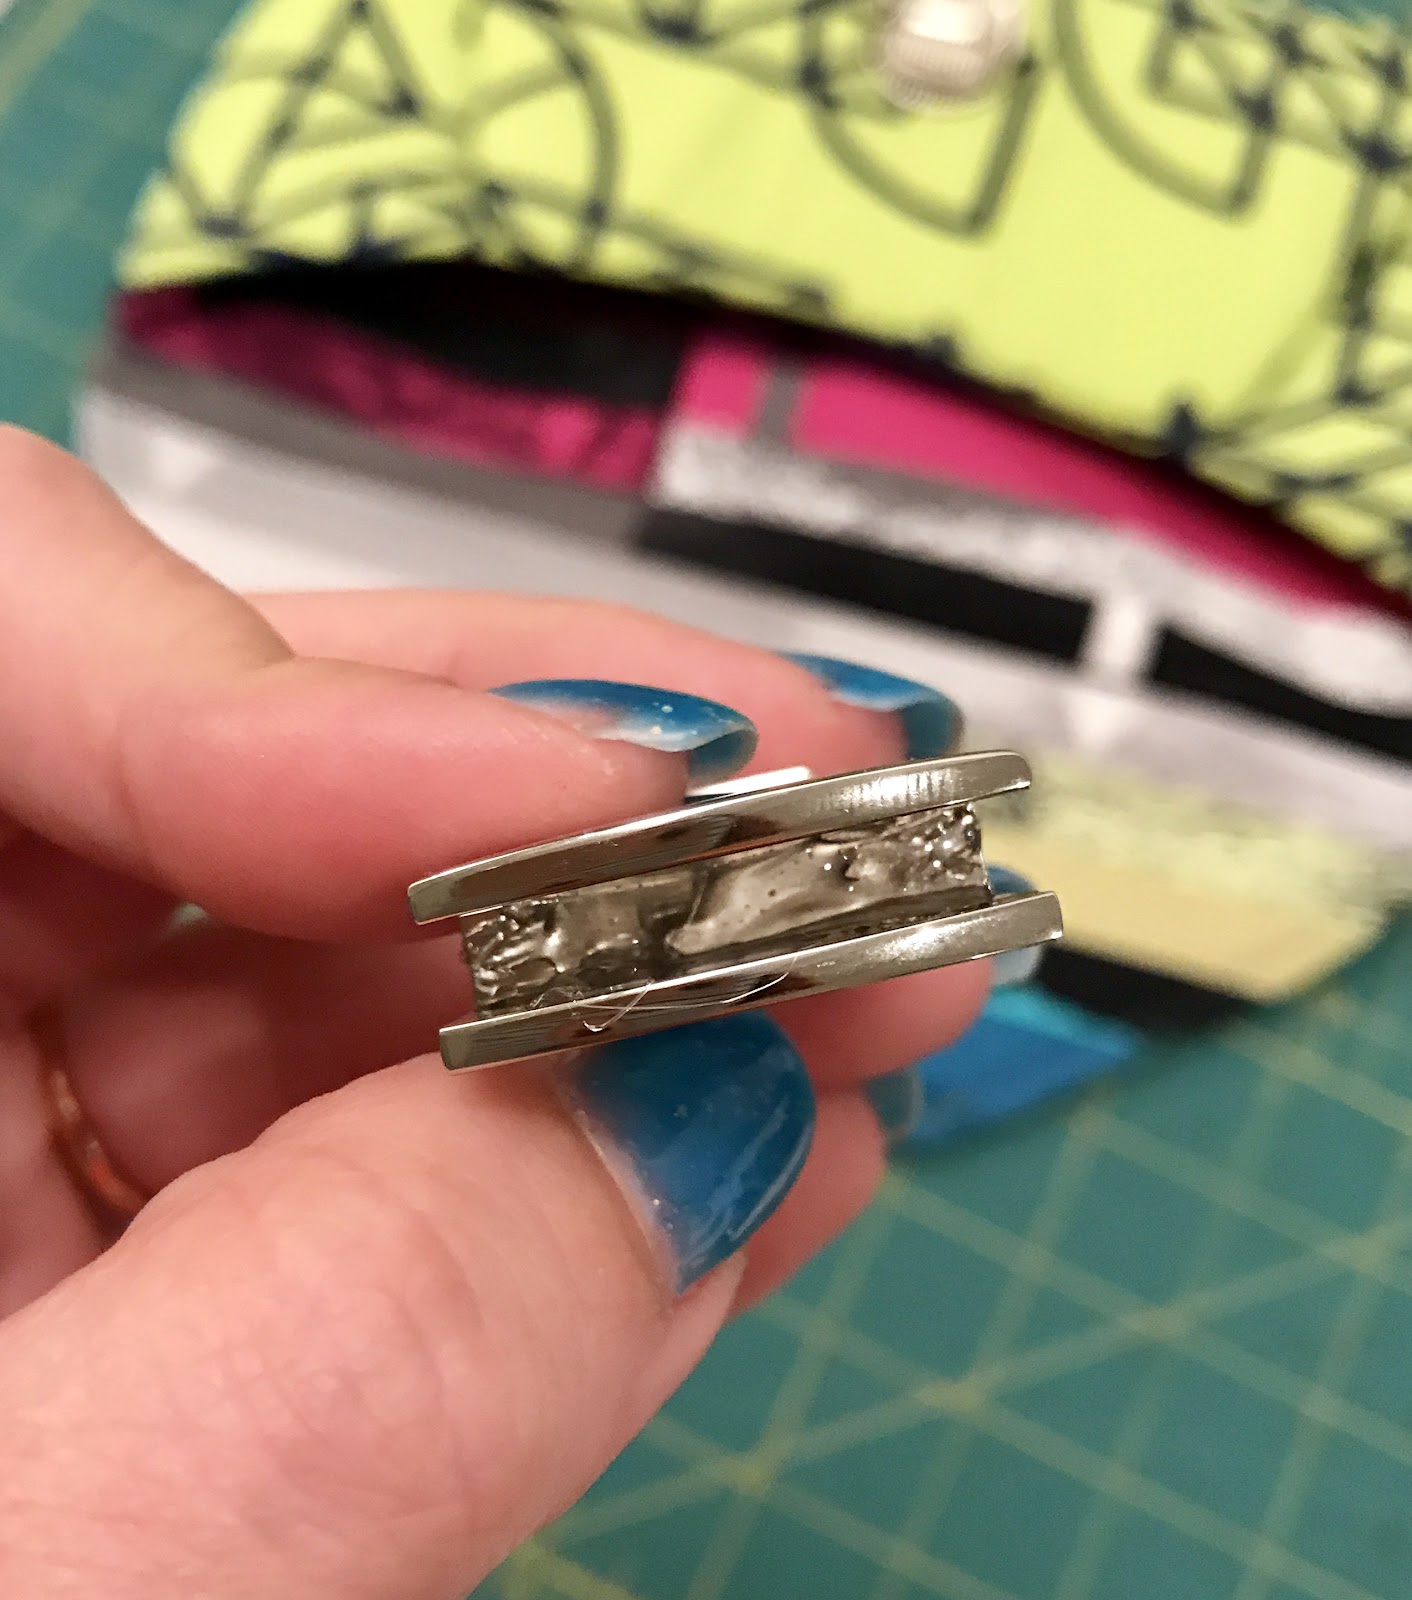
Tip: Don't use too much, or it will ooze out the sides, a few drops is plenty. If you find it's hard to apply the glue neatly, squeeze some on a piece of cardboard and use a pin to apply a few drops.
Slide your lock back on with the back side facing the lining side of your fabric in between the marks you made. I like to dab the area with a bit of Fray Check before I screw them in.

Grab your tiny screws and screwdriver and screw those little guys in. Start off gently to ensure they are threaded properly then use some gentle force to get them to bite into the flap as you screw them in place. They will strip out easily if they aren't threaded in properly so be careful you have them lined up correctly. Tip: If you are using thick materials such as leather or vinyl a small awl may be helpful to punch a small hole to start your screws.
That's it! Admire your fancy new lock!


-----------
Photos and content provided and written for Emmaline Bags by Cyndi Farfsing, from The Nosy Pepper. Cyndi's blog is chock is full of more bag photos and make making tips. Check out her bag series "It's in the Bag! Better Bag Making Series," to learn a ton of new bag making skills.
Share your projects made from Emmaline patterns and/or with Emmaline hardware in our facebook group Emmaline Sewing Patterns Group, or on instagram with the hashtags #emmalinehardware, #emmalinepatterns, #emmalinebags, or tag us @emmalinebags.


