
Bag Hardware


The Givenchy Antigona Leather Envelope Clutch Bag is a socialite's staple. It has withstood many seasons and many trends and can be found is a large variety of colors. New colors are released seasonally and discontinued quickly, like many of the high end designers do to keep their lineups fresh. How about this discontinued Tiffany Blue one? If you search hard enough you can scoop up one in your favorite color.

The Givenchy Antigona measures 8" H x 11.5" W x 1" D. It has a magnetic snap closure and an internal slip pocket under the flap. It's made with high end grained goatskin leather exterior and a canvas lining. This beauty could be yours for 1395 USD.
Like the look of The Givenchy Antigona? Lets be our own brand.
Pattern + Hardware + Fabric= Handmade Couture
Pattern:

Emmaline Bag's Quarter Note Clutch is the perfect doppleganger for the Antigona.

The Quarter Note Clutch is a very fast pattern to sew up, and is easy to make in a variety of different materials. The large flip lock makes a bold statement and the over all look of the pattern is every bit as elegant as our inspiration bag.
At 10.5" W x 5.5" H it is a very similar size to our inspiration bag. If you wanted a slightly larger bag, you could always enlarge the pattern to 110%. You can do this on your home printer with 8" x 17" paper or you can just take the pattern pieces to your local copy shop and have them do it for you.
Hardware:

As would the Snappy Edge Clasp, especially in gunmetal if you chose a dark leather:

Or even the Oval Flip Lock, which is available in all 5 finishes:

Fabric:
If you wanted to recreate our inspiration bag, you can find a similar leather like this from the Tannery NYC:

Or, choose your favorite color leather, I love this turquoise from the Tannery:

If leather isn't something that you aren't comfortable using, you can find a faux leather that would work well for the same look of our inspiration bag, like this faux leather available here.

Another great option is natural cork fabric, which is available from MM Cork Supply in Canada or from Sew Sweetness in the US. You can get cork in a various colors and finishes, like this black:

You can choose to do this in whatever fabric you are comfortable working with! A fun cotton print, canvas or even denim! That's the benefit of creating your own, it's what YOU want it to be. Handmade can be couture too!
-----------
Photos and content provided and written for Emmaline Bags by Cyndi Farfsing, from The Nosy Pepper. Cyndi's blog is chock is full of more bag photos and make making tips. Check out her bag series "It's in the Bag! Better Bag Making Series," to learn a ton of new bag making skills.
Share your projects made from Emmaline patterns and/or with Emmaline hardware in our facebook group Emmaline Sewing Patterns Group, or on instagram with the hashtags #emmalinehardware, #emmalinepatterns, #emmalinebags, or tag us @emmalinebags.

Curious how to install Emmaline metal zipper ends? They are quick to install and add some bling to your bag. The best part is you don't have to sew those tiny zip ends any longer! Emmaline carries these little gems in 7 finishes: nickel, gold, antique brass, gunmetal, rainbow, matte black and copper.
 |
| Picture by Clutchescollars on Instagram |
Here's what you need:

First, snip off the excess tape on your zipper, close to the metal stop. If your stop is particularly wide (like in some metal zips), you may need to remove the stop before installing your zip ends.


Fold over the corners of the zipper towards the back, so that you create a triangle:

From the back it will look like this:

Slide on your zip end to make sure that it's a good fit. Remove the end and add a drop of glue inside the metal zip end.
Slide your zipper into the zip end, making sure the hole is on the BACK or wrong side of your zipper:

Grab your screwdriver and screw and screw into place. These screws are tiny and strip easily, so start off slowing making sure the threads are lined up (if you prefer, you can start them before you slide on your end, just give it a couple turns before you slide your end on the zipper). Then you can add more force. Screw in until the screw is flush with the zip end.
That's it! Once you try these, you won't want to sew a zip end again. They also work perfectly at the end of cords like these on drawstrings bags:
 |
Bag by Karen.m.pi on Instagram
|


-----------
Photos and content provided and written for Emmaline Bags by Cyndi Farfsing, from The Nosy Pepper. Cyndi's blog is chock is full of more bag photos and make making tips.
Share your projects made from Emmaline patterns and/or with Emmaline hardware in our facebook group Emmaline Sewing Patterns Group, or on instagram with the hashtags #emmalinehardware, #emmalinepatterns, #emmalinebags, or tag us @emmalinebags.
Bag Hardware
HANDMADE COUTURE: Make this look too - A Burgundy Louis V Barrel Bag
3/20/2017 12:08:00 PM
Are you or someone you love a designer handbag enthusiast? Do you sometimes find yourself staring at bags you see in magazines, or even on someone's shoulder in the grocery store wondering how to recreate that bag? Then the Handmade Couture series is for you. We pick a designer bag and tell you how to recreate it using available sewing patterns, materials and hardware. You can have the same look, but make it totally "you" and for a fraction of the cost. When you sew your own bag you know exactly what is going into the bag and can add or modify features to suit your preferences. Today, we are going to show you how to recreate this Louis Vuitton Speedy Bandouliere Bag:


Pattern + Hardware + Fabric = Handmade Couture
Pattern:
The Swoon Blanche Barrel Bag is the perfect stand in for the LV Speedy:

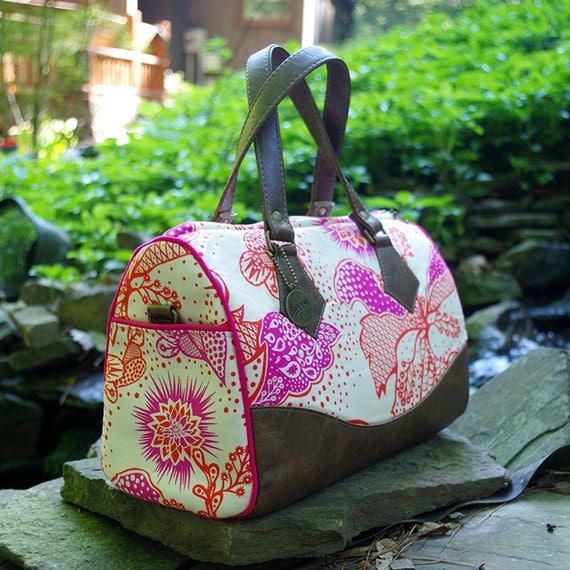

Hardware:
Blanche isn't a bag that requires a lot of hardware, but as well all know, some thoughtfully placed hardware can take a bag from simple to chic in no time flat. Here's what you need:(4) 3/4" Rectangle Rings


How about swapping out the leather tag on the Speedy for a metal hanging tag:


Fabric:
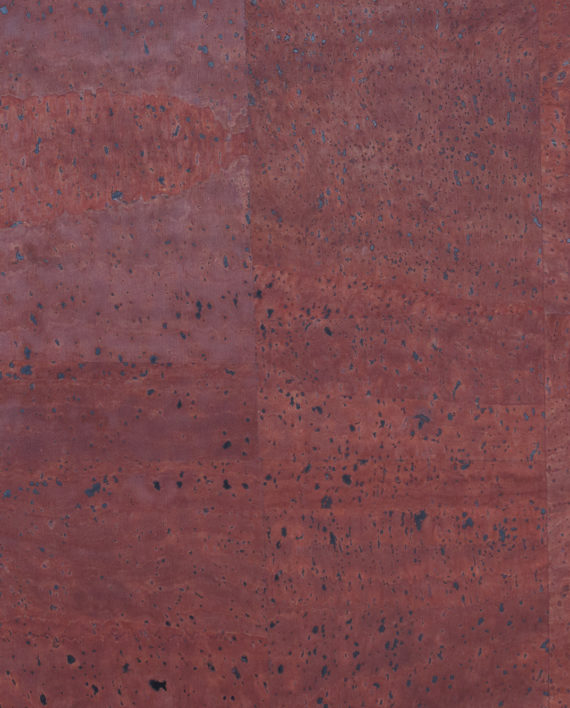
Instead of the LV monographed leather, why not try an embossed faux leather to get the same look without the LV name. Like this Poppy patterned embossed faux vinyl that is available from Etsy here:

Another great option for this bag would be a tweed, or similiar fabric with texture, like this availble here:

-----------
Photos and content provided and written for Emmaline Bags by Cyndi Farfsing, from The Nosy Pepper. Cyndi's blog is chock is full of more bag photos and make making tips. Check out her bag series "It's in the Bag! Better Bag Making Series," to learn a ton of new bag making skills.
Share your projects made from Emmaline patterns and/or with Emmaline hardware in our facebook group Emmaline Sewing Patterns Group, or on instagram with the hashtags #emmalinehardware, #emmalinepatterns, #emmalinebags, or tag us @emmalinebags.
Bag Hardware
How to Attach "Long John" Strap Anchors: A Hardware Installation Tutorial
9/21/2016 12:06:00 PM
Hello Bag Makers! If you are here because you bought some of our Long John strap anchors, or downloaded our free handbag pattern "Miss Maggie's Handbag", and need some installation tips, this tutorial is going to be exactly what you need to get those big, shiny, blingy gems attached firmly to your bag. Cyndi has written up an very helpful to tutorial for you:
Hello lovelies! I'm excited to be sharing a quick tutorial on how to use the Emmaline Long John strap anchors on your next bag. Not only do these strap anchors make your bag look professional they are super easy to install and take less time than you would spend making strap tabs for your bag. After using the strap anchors in a few bags I really don't want to go bag to making strap tabs.
  |
| Emmaline Bags "Long John" Strap Anchors |
All you need is your Long John hardware and a few supplies:
- an awl or leather punch
- a mini Phillips head screw driver
- a marking pen
- Fray Check or Fray Stop
- your favorite glue (I like e6000)
- a small sharp pair of scissors

(Optional but super helpful) Once you've gathered your supplies,
Tip: Make sure you print it from Adobe Reader "Actual Size"
The Strap Anchors are attached to the exterior of your bag before adding the lining. Add them to your exterior panel before sewing any side seams so you have a nice flat panel to work with. The anchors are secured by screws but you will need to make sure that you have properly interfaced your fabric. Depending on the size of your bag, and the weight of your fabric a good foam stabilizer, or a combination of shape flex 101 and a fusible fleece will work nicely.Make sure that you leave the protective plastic on your hardware until your bag is completed, if you were super excited to see your hardware and removed it before reading this warning, then just add a strip of masking tape to keep your shiny hardware protected.

Once you have a completed exterior bag panel. You can use the provided template to mark the holes for the anchors or decide upon your placement using the included backing washers.

You will be marking 6 holes for each anchor on the wrong side of your fabric.

Once you are happy with your placement, use your awl or hole punch at your marked spots. Be careful that you are going into your fabric at 90 degree angle. Especially with layers of interfacing, a small shift could cause your holes to be misaligned. You need to make holes just big enough to get your pins on the anchors and screws through. Start small, you can always take a bit more out but you can’t put it back!

Once you have your holes punched, note that the center hole of each section will be where the screws are going in. Grab your long washers align them with your holes and insert the screws. You may need to get those scissors and cut a few TINY snips to get those screws through, your screws will be going in through the wrong side of the fabric so check to make sure you aren't causing any snags on the right side as you push them through. (Note: Those screws are tiny, so work on one anchor at a time, or you might spend more time trying to find the missing screw than you did sewing your bag...not that I know anything about that).

Once you are sure the screws will fit through the holes, remove them and add a drop of fray check to each hole. (Hint: I've got it on authority that sometimes fray check discolours the fabric, but in this case the area will be covered so just be sure to not use too much).
Place your anchor wrong side down add a couple dabs of glue to the backs of the anchors around the pins to keep things from shifting. Now, grab your panel and place it carefully over your anchor, check for fit and adjust as needed. Add a couple dabs of glue to the back sides of your washers to keep them secure. Once you have everything lined, get your screwdriver and secure your screws (righty tighty, lefty loosey).


But your right side will look like this:


I am in love with tassels right now, and they pair so well with the hardware! You can pick up the hardware to make them from Emmaline here and the tutorial that I followed here.
Once you use these and the other strap anchors that Emmaline has to offer, you will be a convert! No more fussy strap tabs, these are so much easier and oh so pretty!

Happy Sewing!
------------
Share your projects made from Emmaline patterns and hardware in our facebook group Emmaline Sewing Patterns Group, or on instagram with the hashtags #emmalinehardware, #emmalinepatterns, or tag us @emmalinebags.
 |
| Emmaline Bags "Long John" Strap Anchors in Gold. |


