
How to Make Laundry Hampers with "Stay Open" Tops - A Free Tutorial
12/06/2016 02:03:00 PM
Let's Get Started!!

Laundry Hamper
I am so excited to finally be sharing this tutorial with you! When Janelle got in the curved frames, I knew I had to have them and originally I had planned a bag. Well if you saw that bag, you will know it was not a happy one ;)
One afternoon, it clicked and I dropped everything I was doing to try the first prototype of the laundry hamper! With no real measurements and winging it, it worked out and exactly how I wanted to! Even if my husband thought I was nuts for rushing through it!

What you will need:
- 1 paper pattern template for the base shape - DOWNLOAD IT HERE
- 1 meter/yard of 44” wide fabric. Any kind will do, but a canvas/twill will keep its shape the best! I’m using cotton
- 1 strip of fabric 10" x 20" (I used a fat quarter!)
- Curved frames (Style C from emmalinebags.com - Find them HERE.)
- 1 meter/yard of Double Fold Bias Tape
- Scraps of Velcro (approximately ½ inch by 1 inch)
- Optional - Rivets, I like the added strength and look they give!
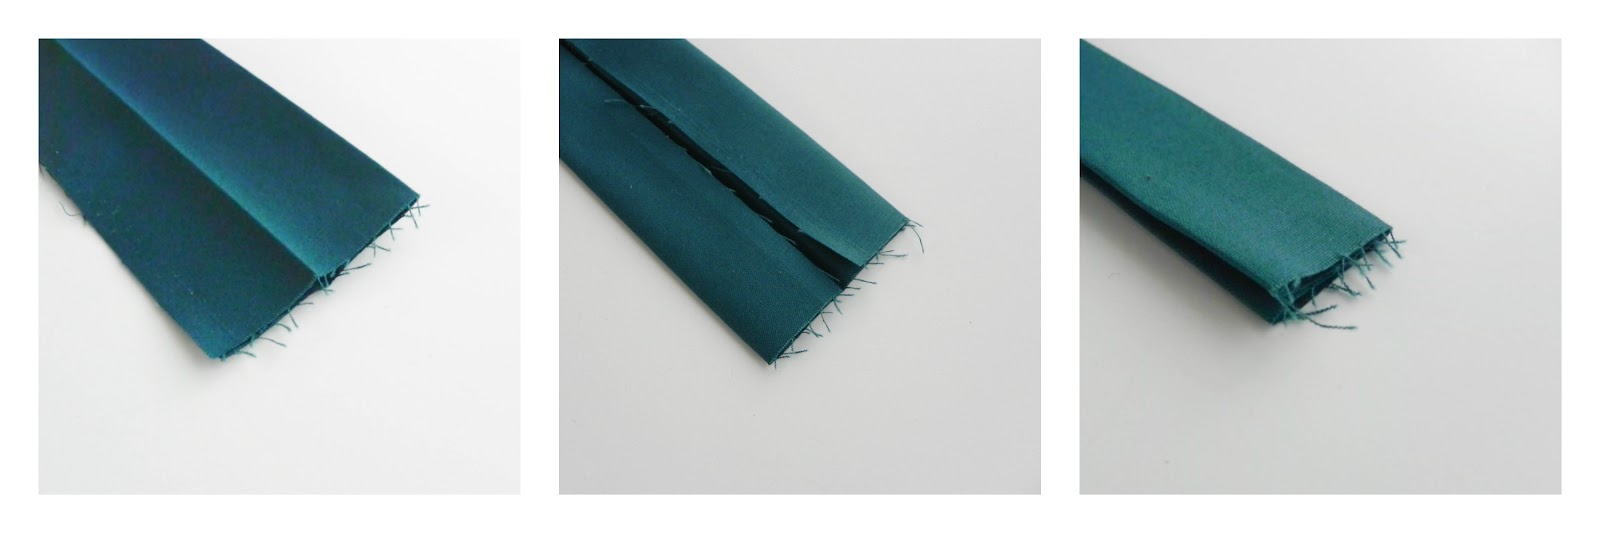
Fold each strap in half along the long edge, then open it up and fold those edges towards the center. Fold it shut so those raw edges are hidden.
Now to get rid of the raw edges, fold that raw edge backwards onto itself and sew ¼” along that end. Clip your corners and turn it out!
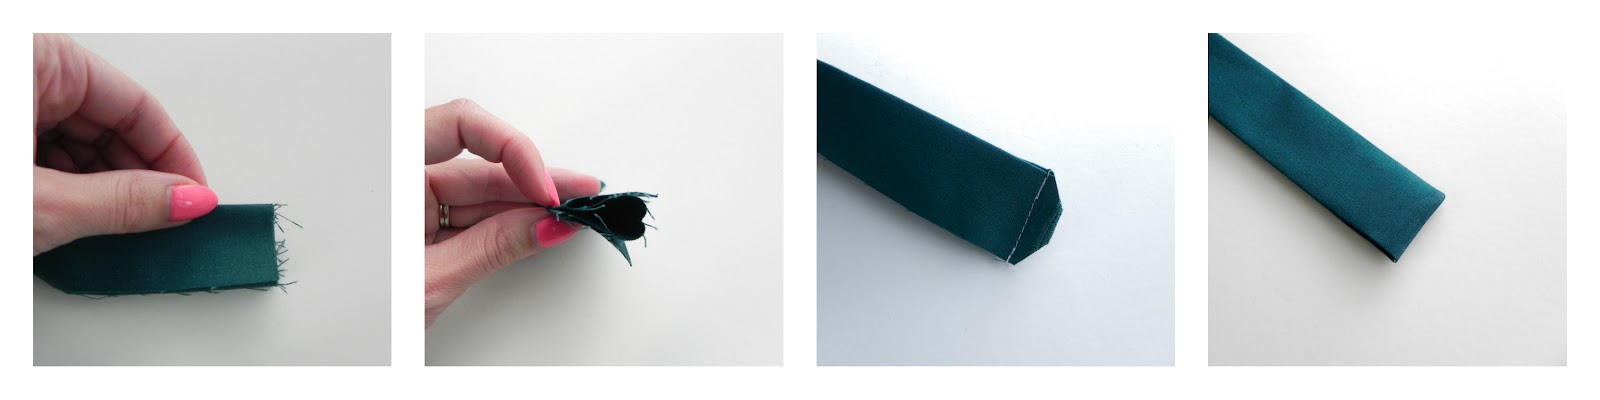
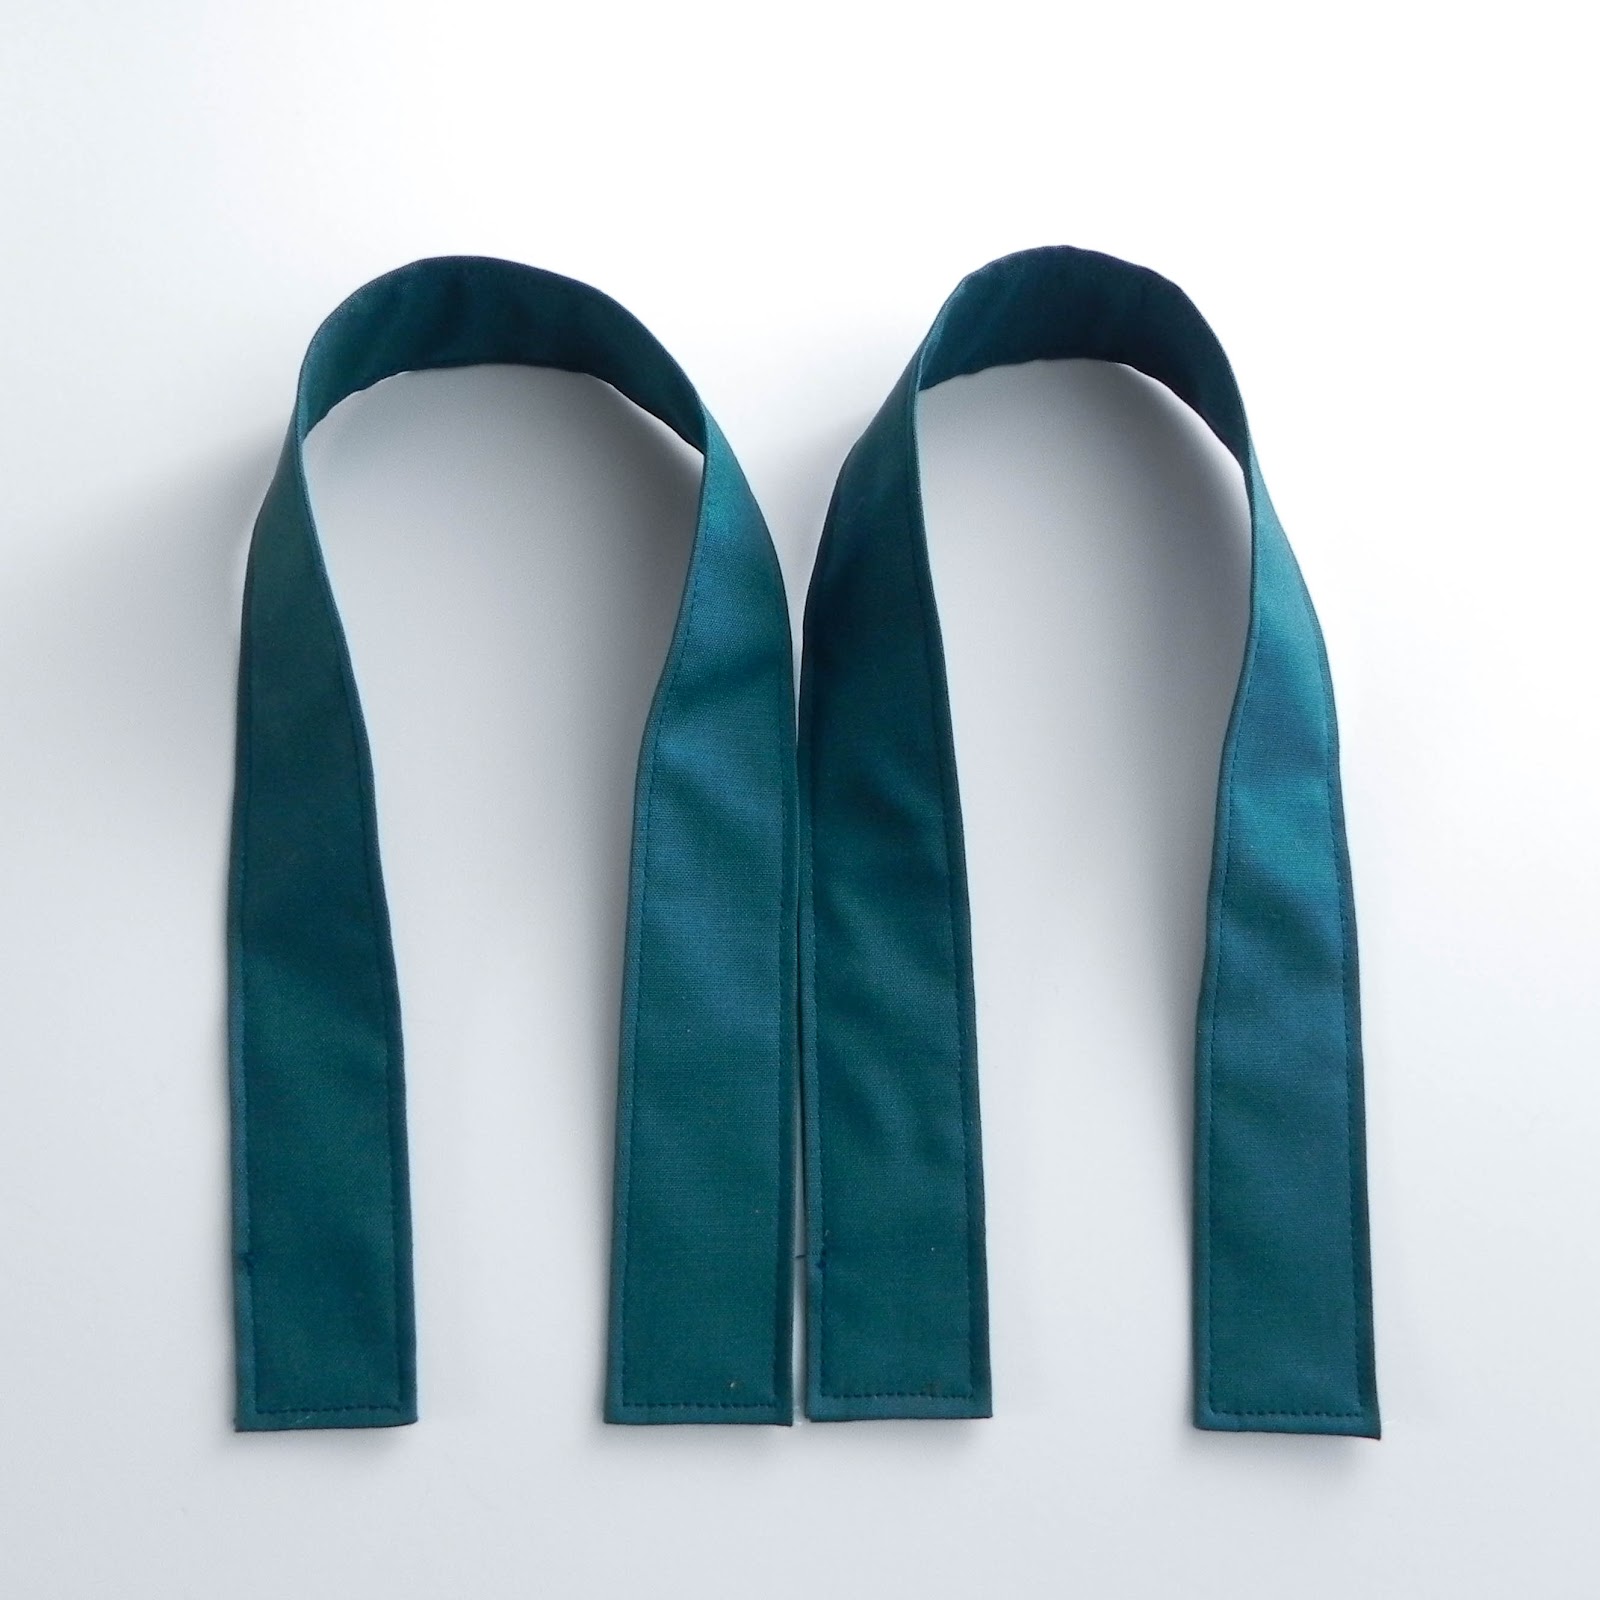
Topstitch around all sides of the strap and then set it aside for now!
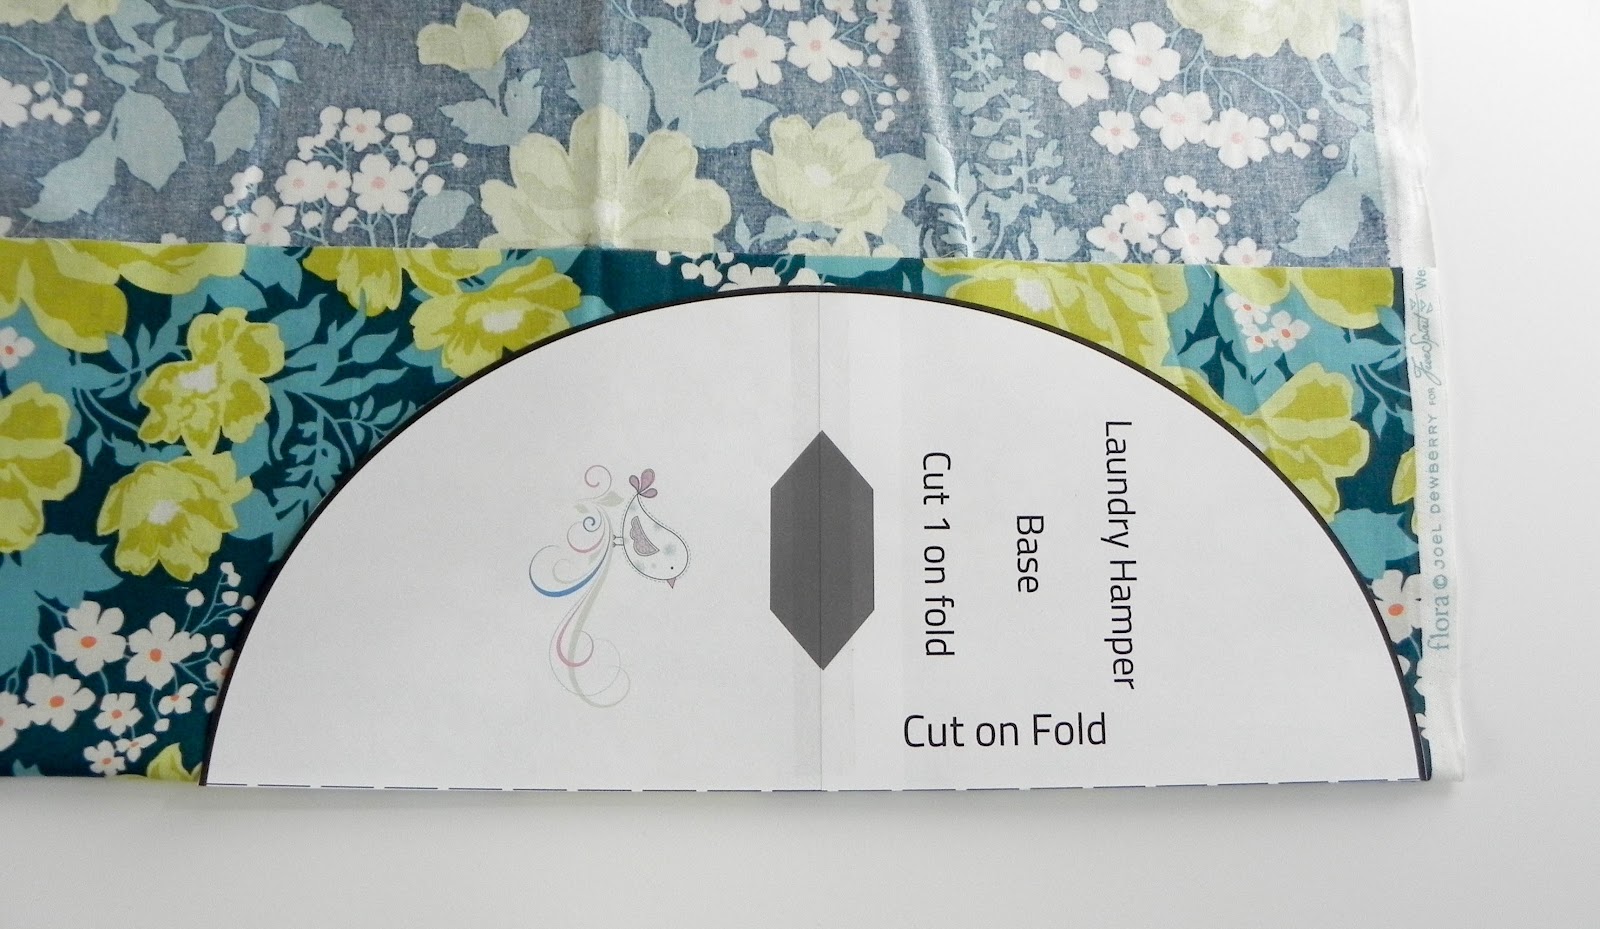
Using the provided template, cut out the base of your hamper. Make sure you are cutting it as the picture shows or you will not have enough fabric for the body! Cut your main body 27 in tall by width of fabric, out of the remainder of the fabric
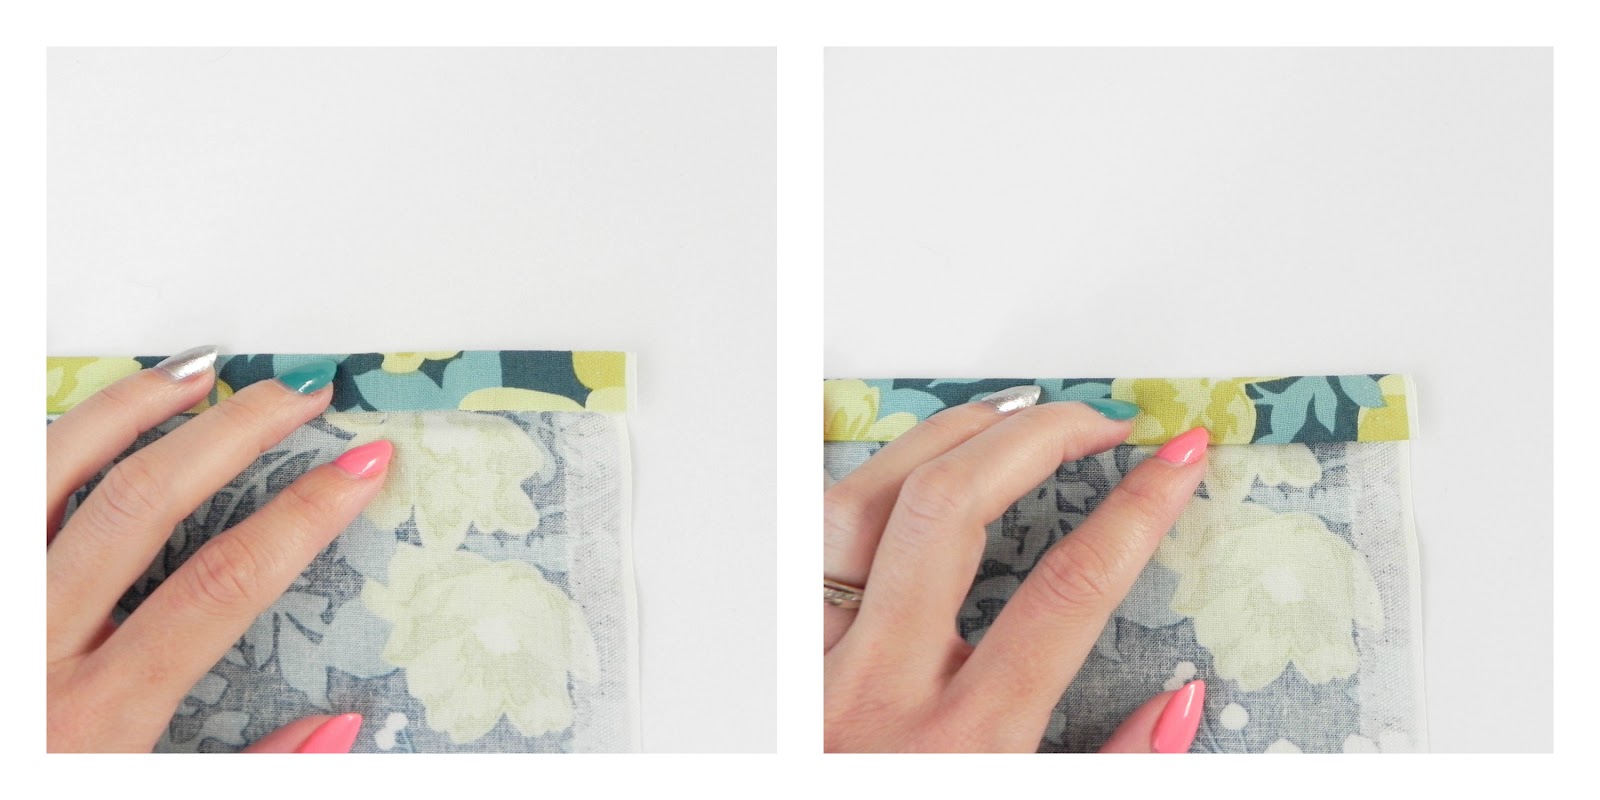
We are going to make the casing. Fold The long edge of the fabric down ½ inch and then fold that over again to end up with a casing that is ½ inch wide.
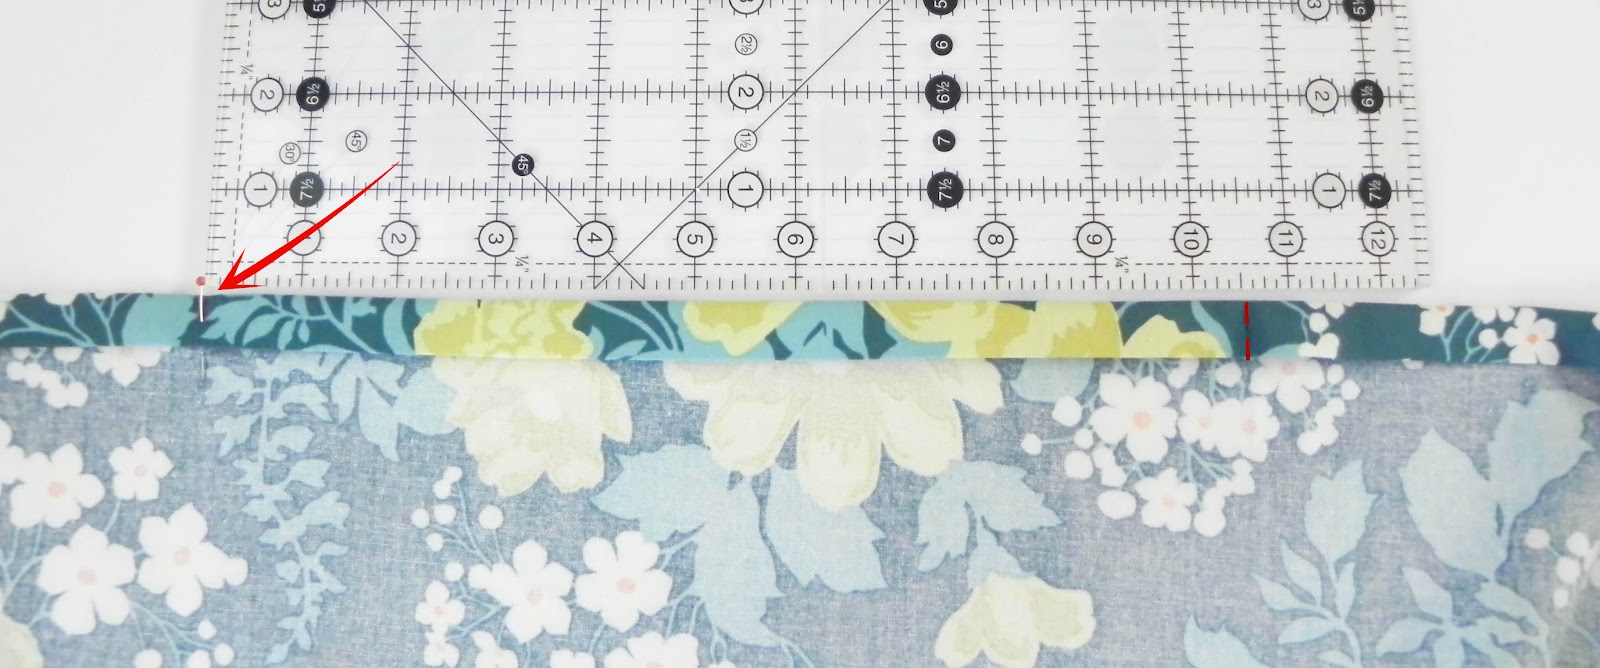
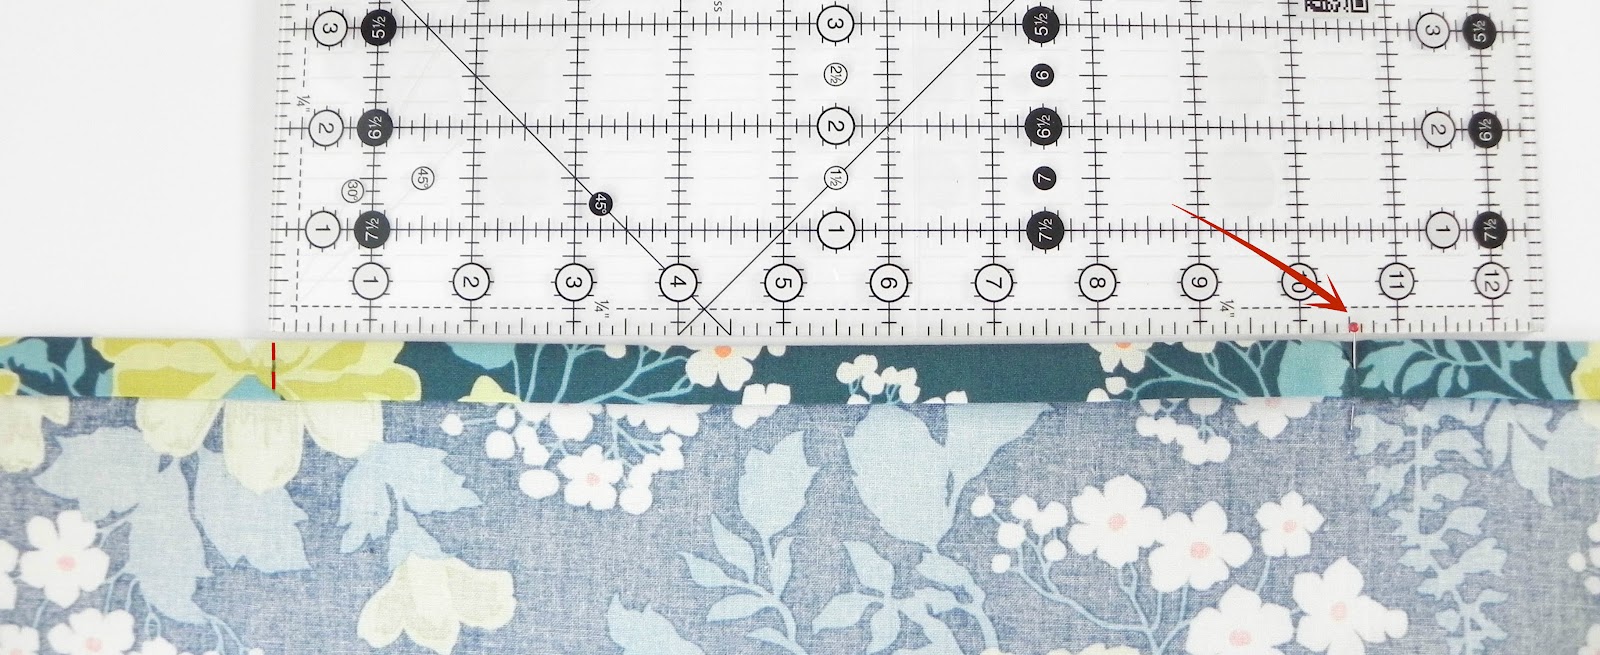
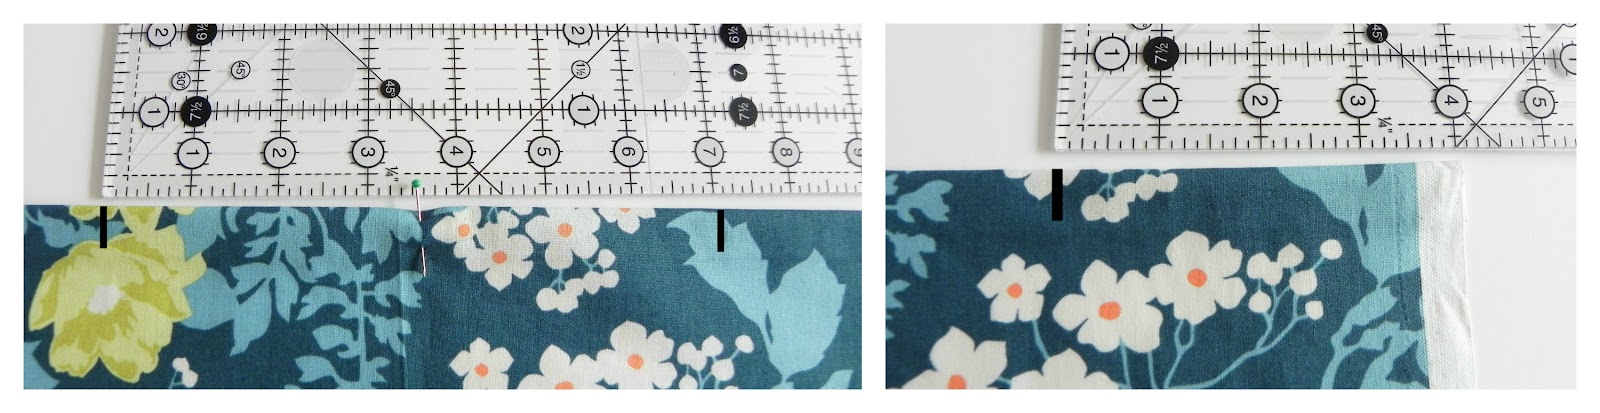
Now we are going to mark for the velcro and stopping points for the frames. Find the center along the long edge where you have made the casing (leave the center marked!). From there, on either side, mark 10 1/2" inches from the center arrow. Leave the pin/marking in the first spot we will come back to it!
On the mark you made on the right side of center, we will be marking the spot for our velcro
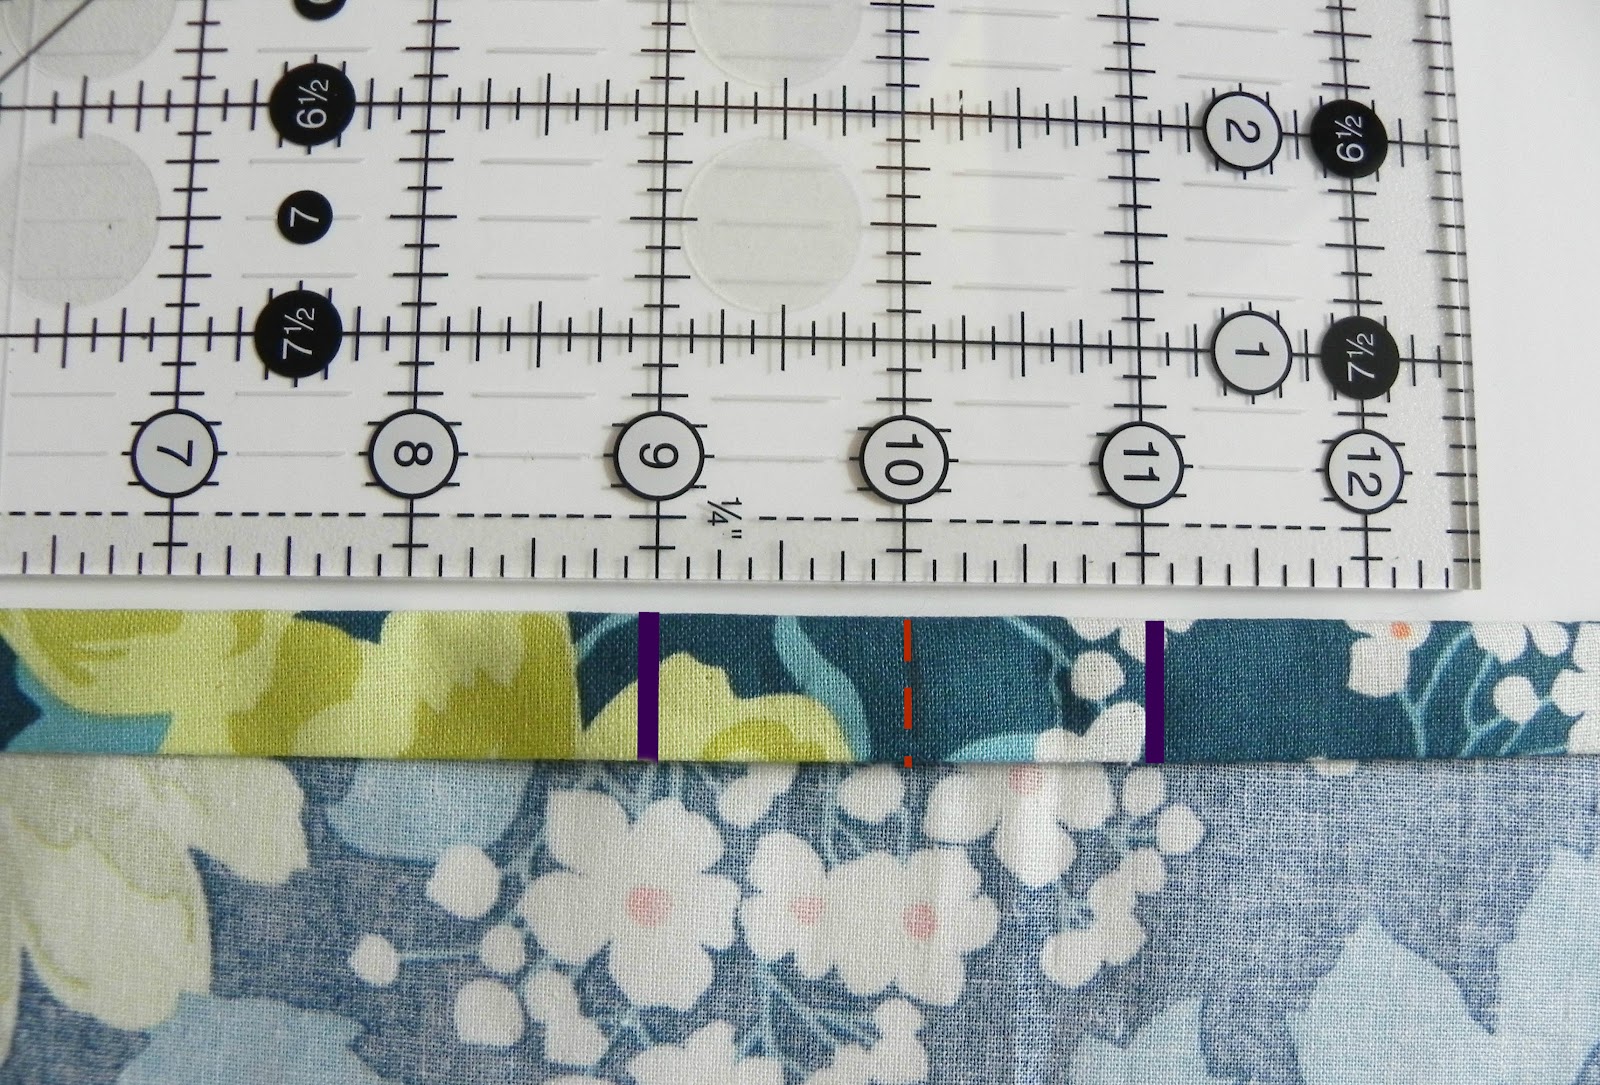
Measure 1 inch on either side of the dashed line. You will be putting the Velcro on the outer edge of the purple lines.
Open up the casing and pin your velcro bits down and sew around them. I just do the outer 4 sides but that is because I have a serious hate-hate relationship with velcro and it works for me ;) Close up your velcro and head to the next step. We will be sewing the casing down later!
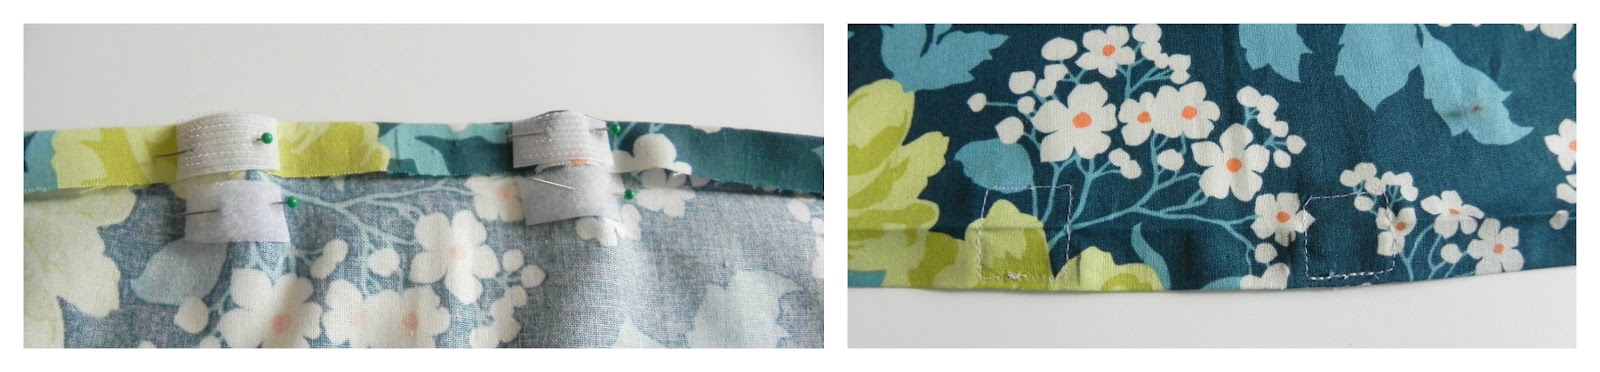
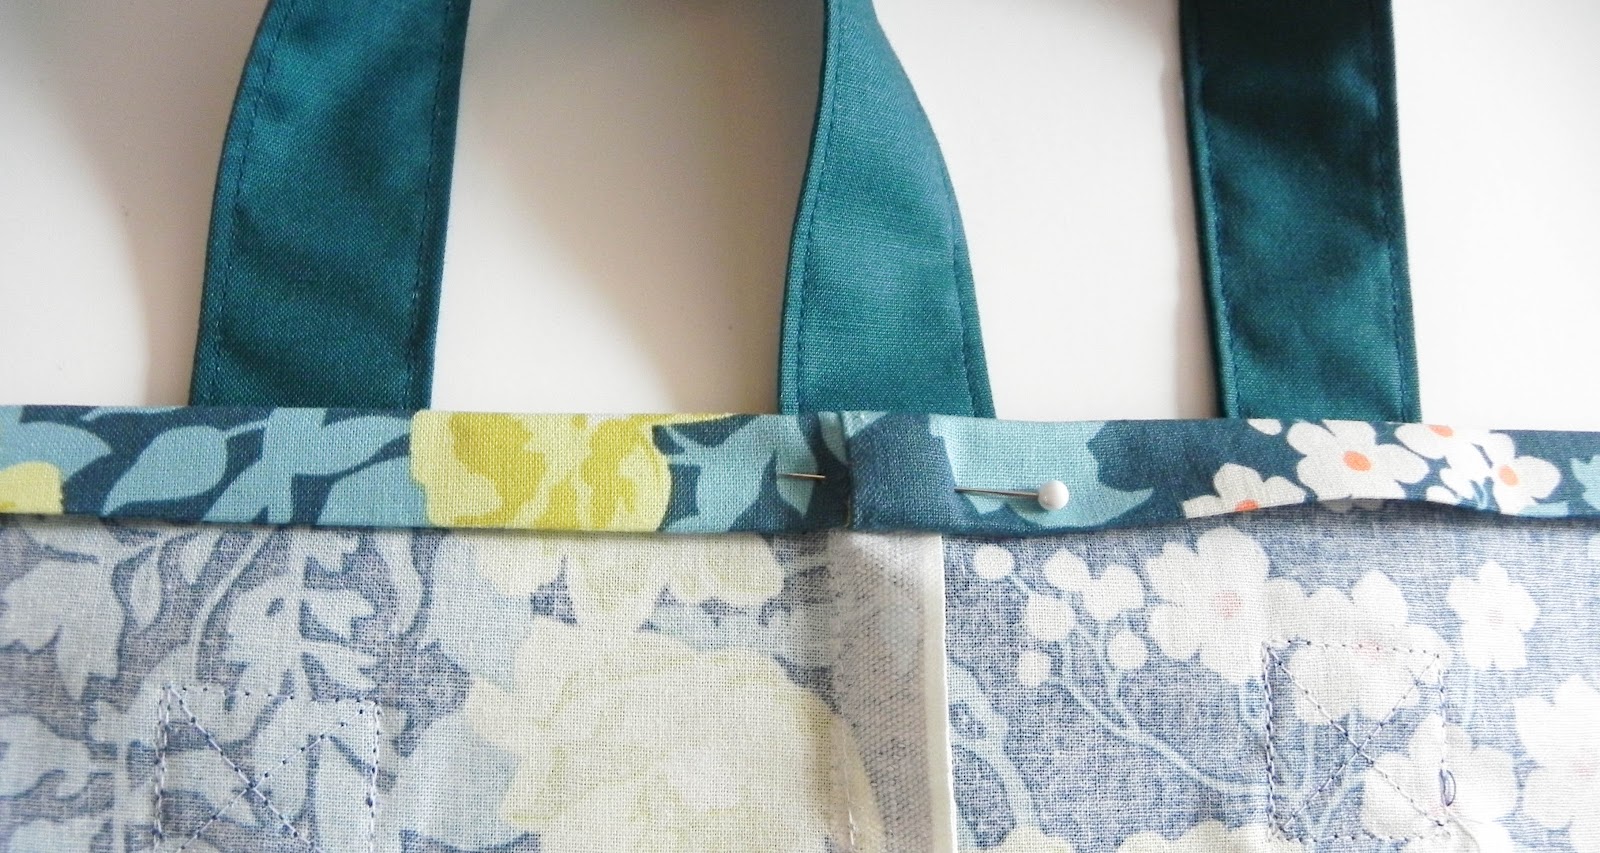
Now we are going to mark the strap placements! Measure 3.5 inches over from each side of the center point. You will also measure and mark 4 inches in from each of the selvage edges.
Measure 2.5 inches down from the edge of the casing. Mark it like an “L” as this is where your strap will sit! Pin your straps in place. One full strap will be on the front, the other will be on the selvedge sides with one end of the strap stitched on one edge and the other end of the same strap stitched down on the other edge.


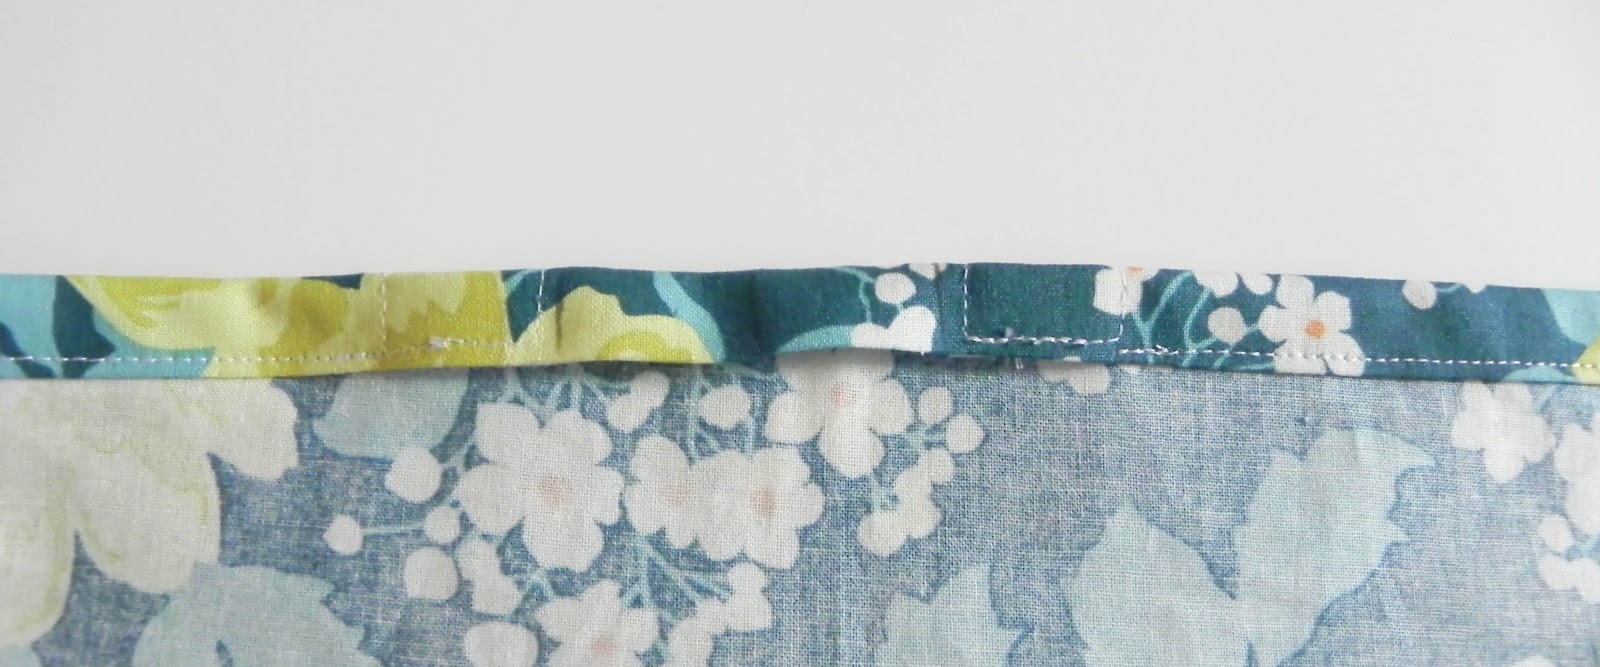
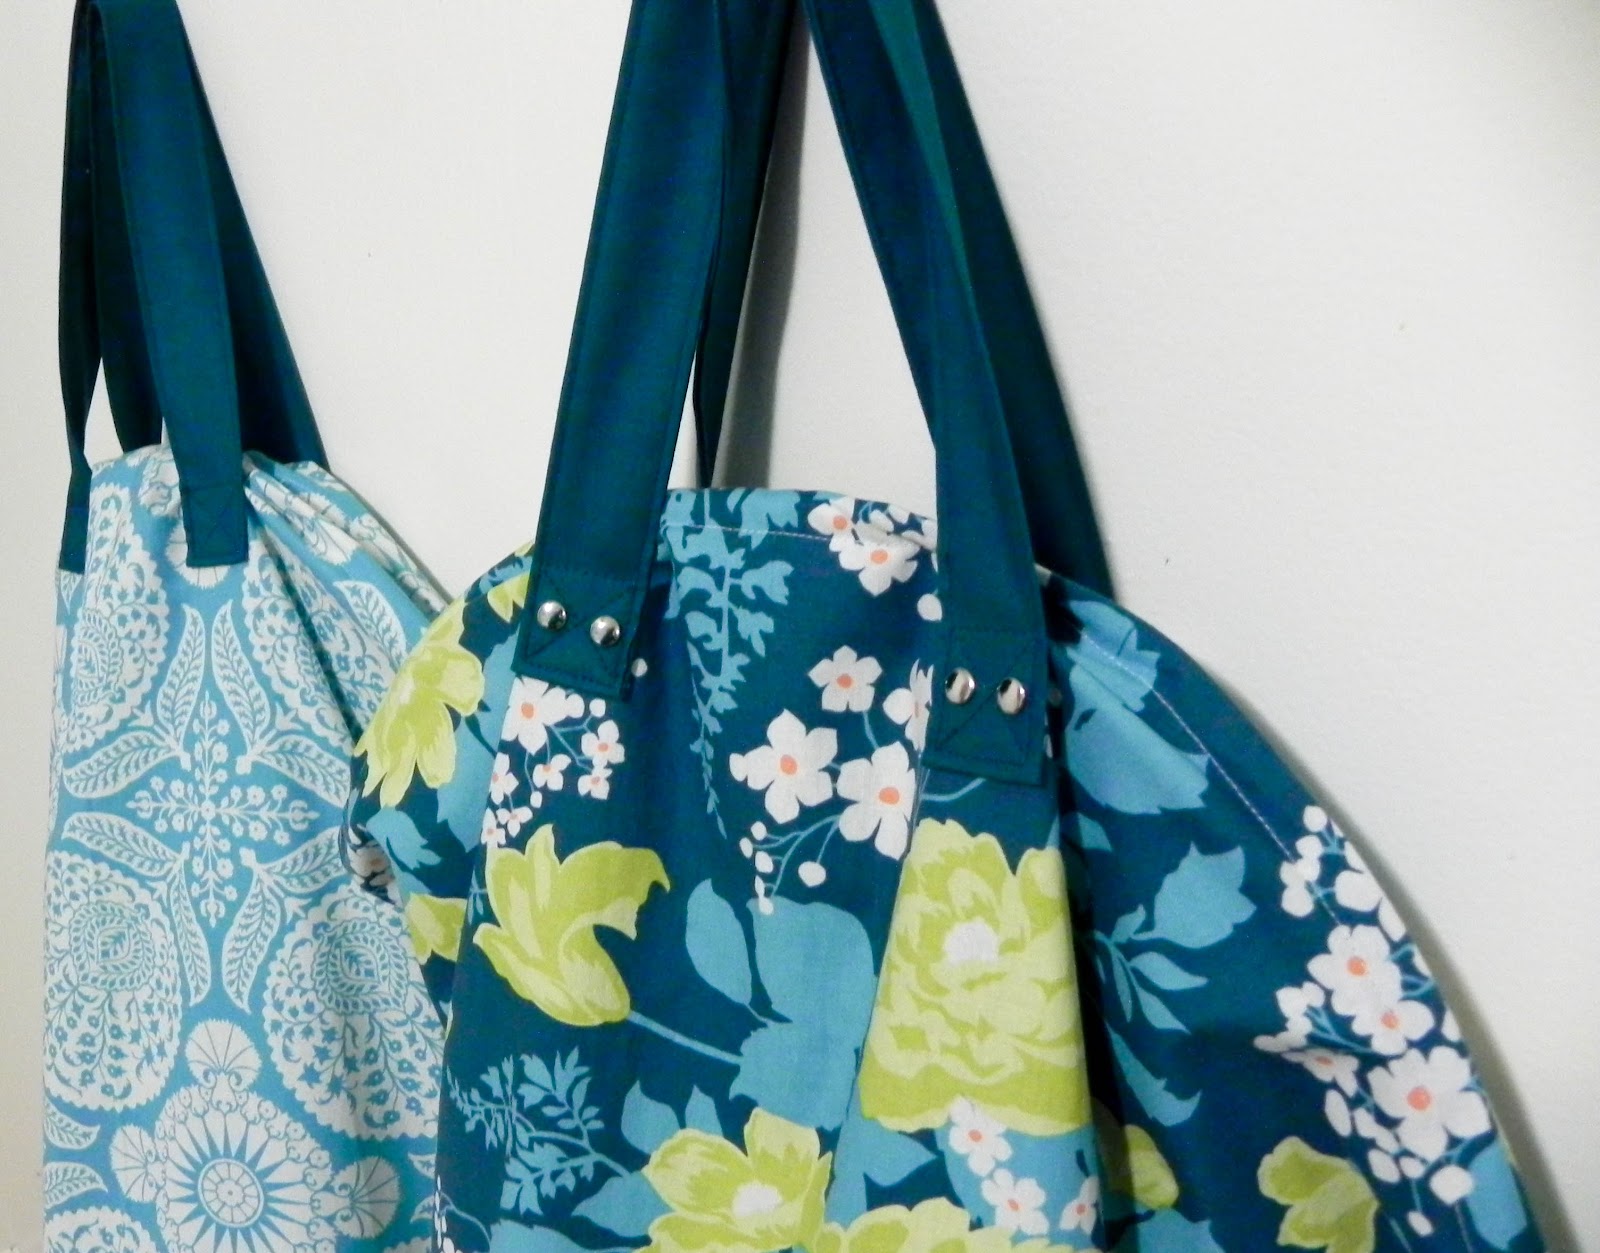
Stitch down your straps. You will want to do a 1 inch square with an “x” in the middle of it so it stabilizes the strap! When you are done, you will have a piece that looks like this. (Make sure your straps don’t twist when you sew the one that sits on either side of the casing!)

If you want to add rivets, do so at this point!
Open up your casing so we can sew the side seam shut!
If you are using fabric that happens to be 45” wide, you will be sewing right along that selvage edge (approximately a ½” seam allowance!) Bonus: There will be no need to finish the edges because the fabric has that done! If you want it to be extra durable, feel free to do a second line of stitching!
Now re-press that casing shut.
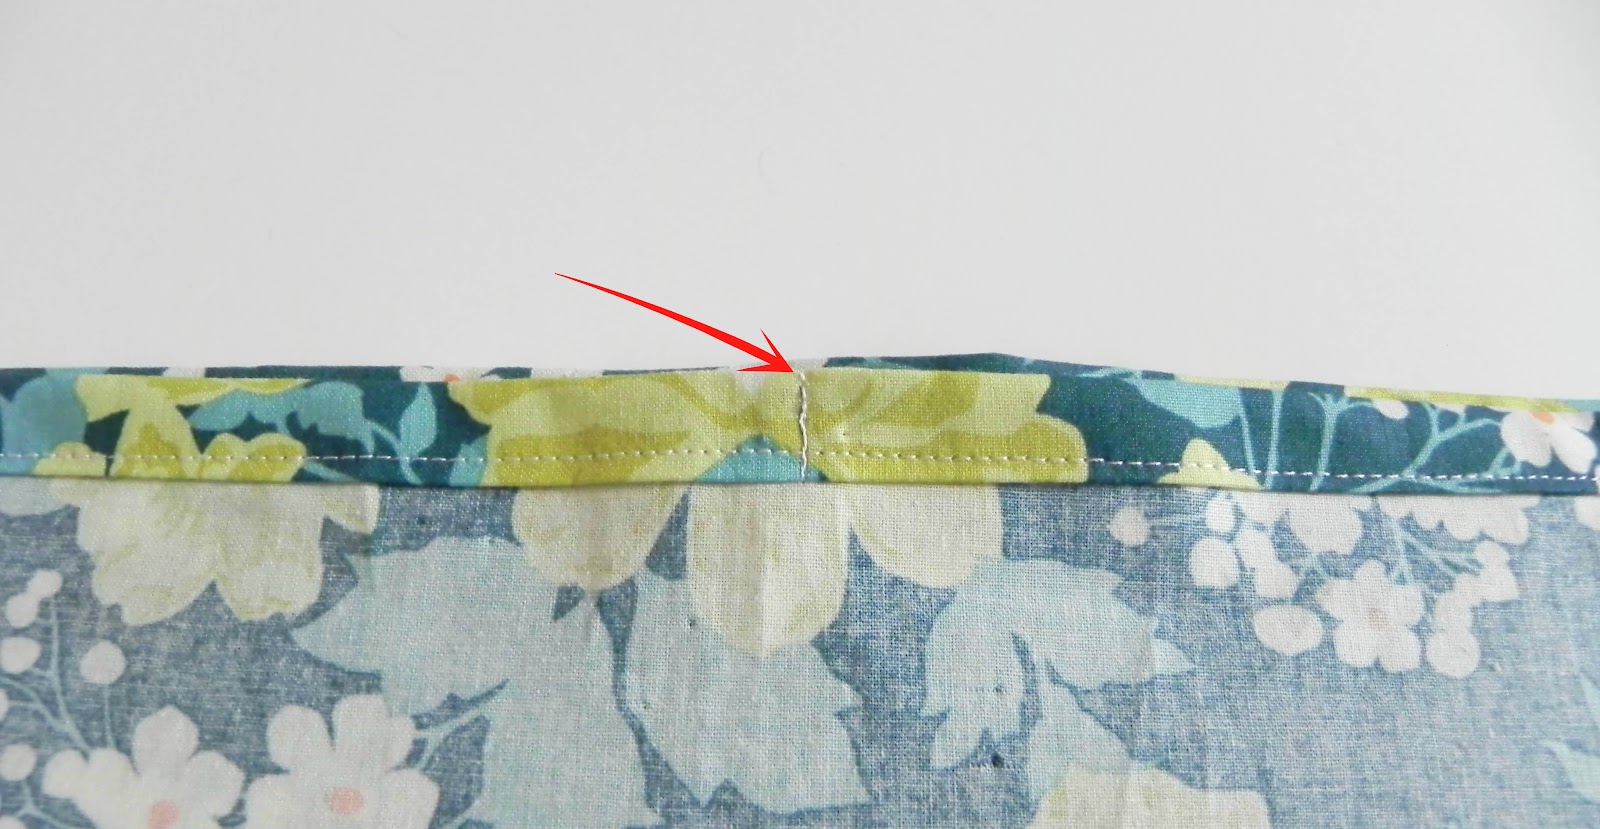
Let’s sew that casing shut! Start and stop your stitching right at the edge of your velcro.
Now back to the spot we first marked on the casing. Stitch a straight line to stop your frames from floating around
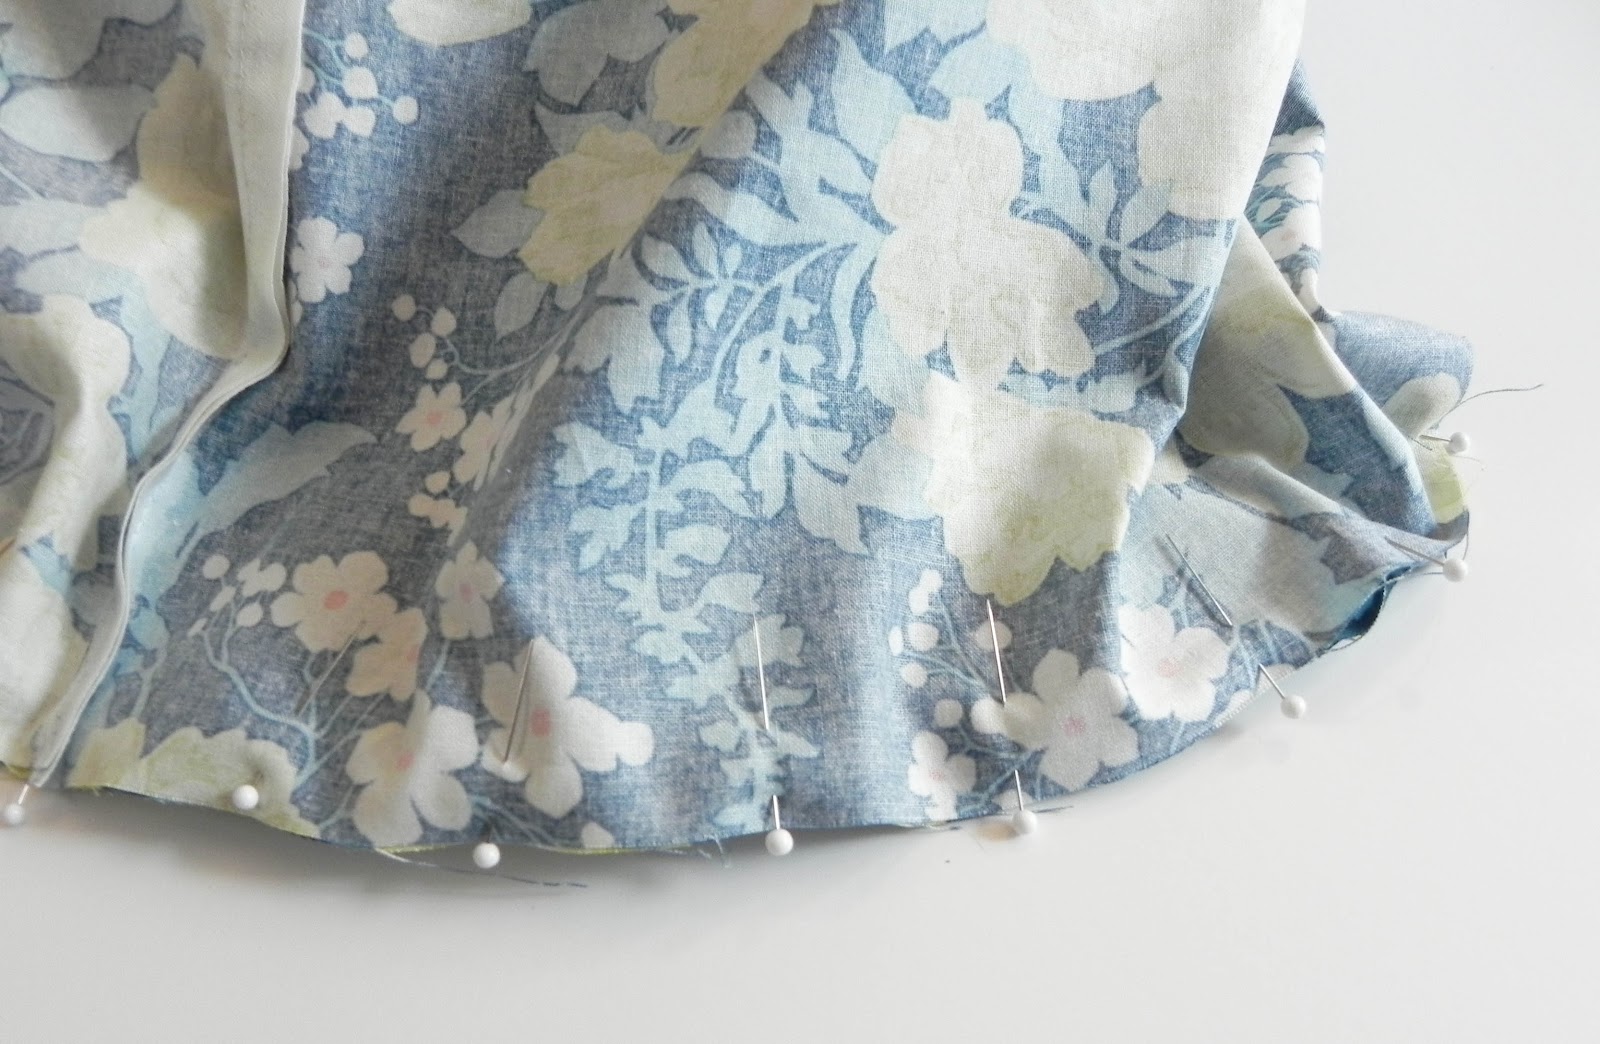
Take out your base oval again and fold it in quarters. Mark the 4 middle points as per the photo below.

Do the same with bottom edge of your body piece
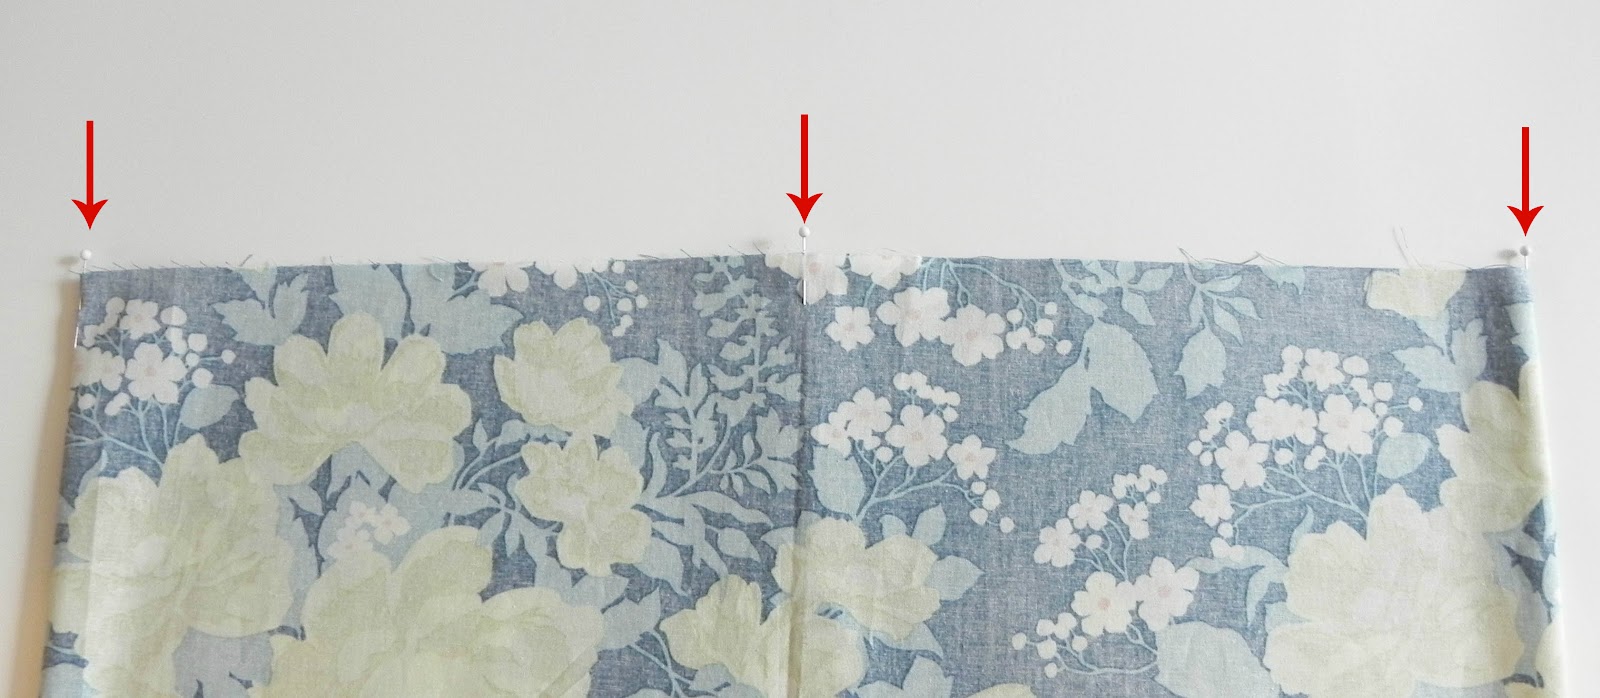
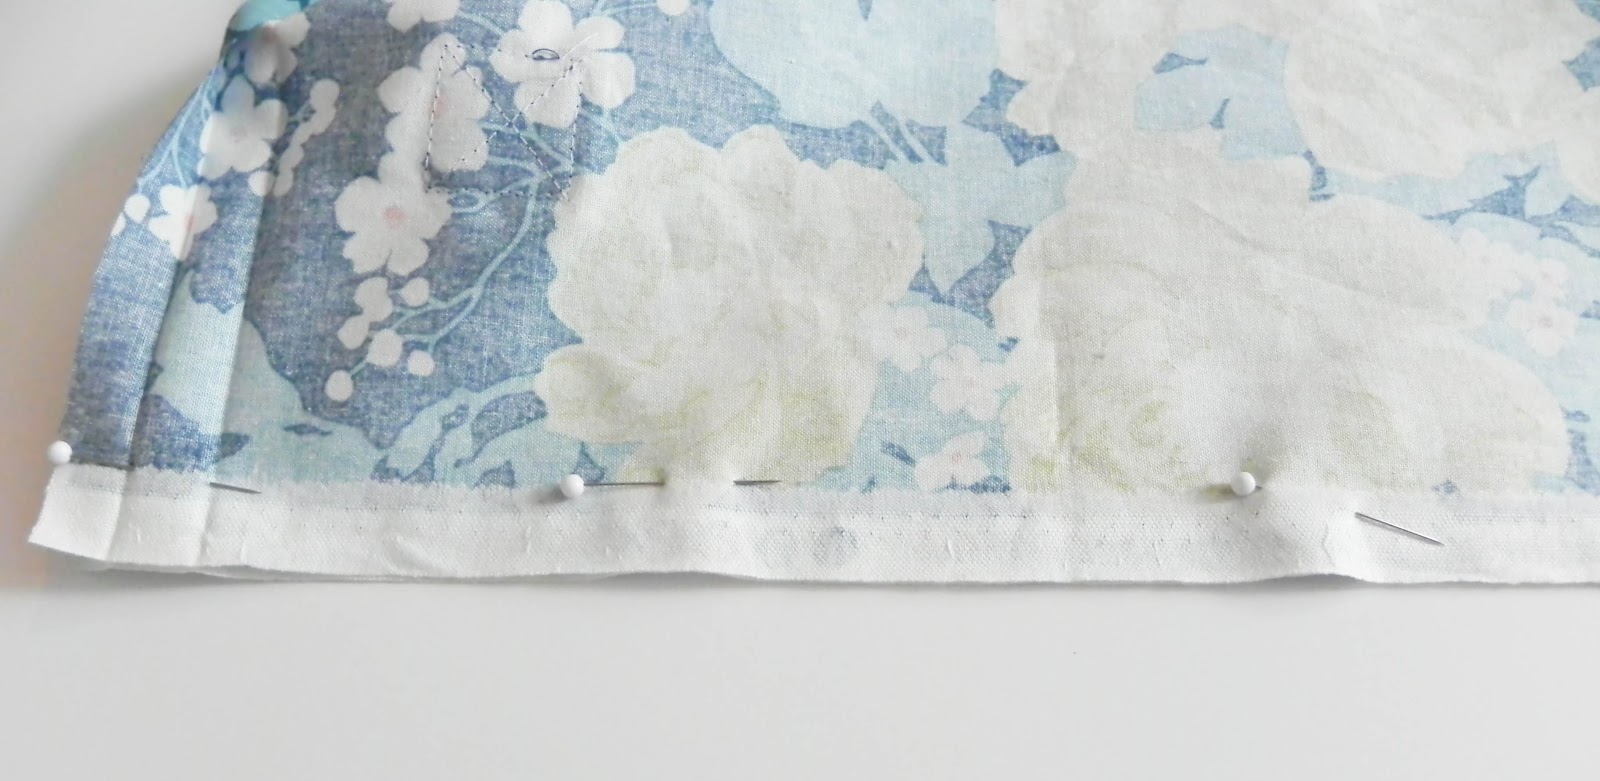
Start pinning by matching up those points first then easing the rest into place! (Place the sewn back edge at the back wide edge.) If needed clip the main body piece no more than ⅛” to help it ease more. I found I didn’t need it!

Stitch that down using a ¼ in seam allowance.
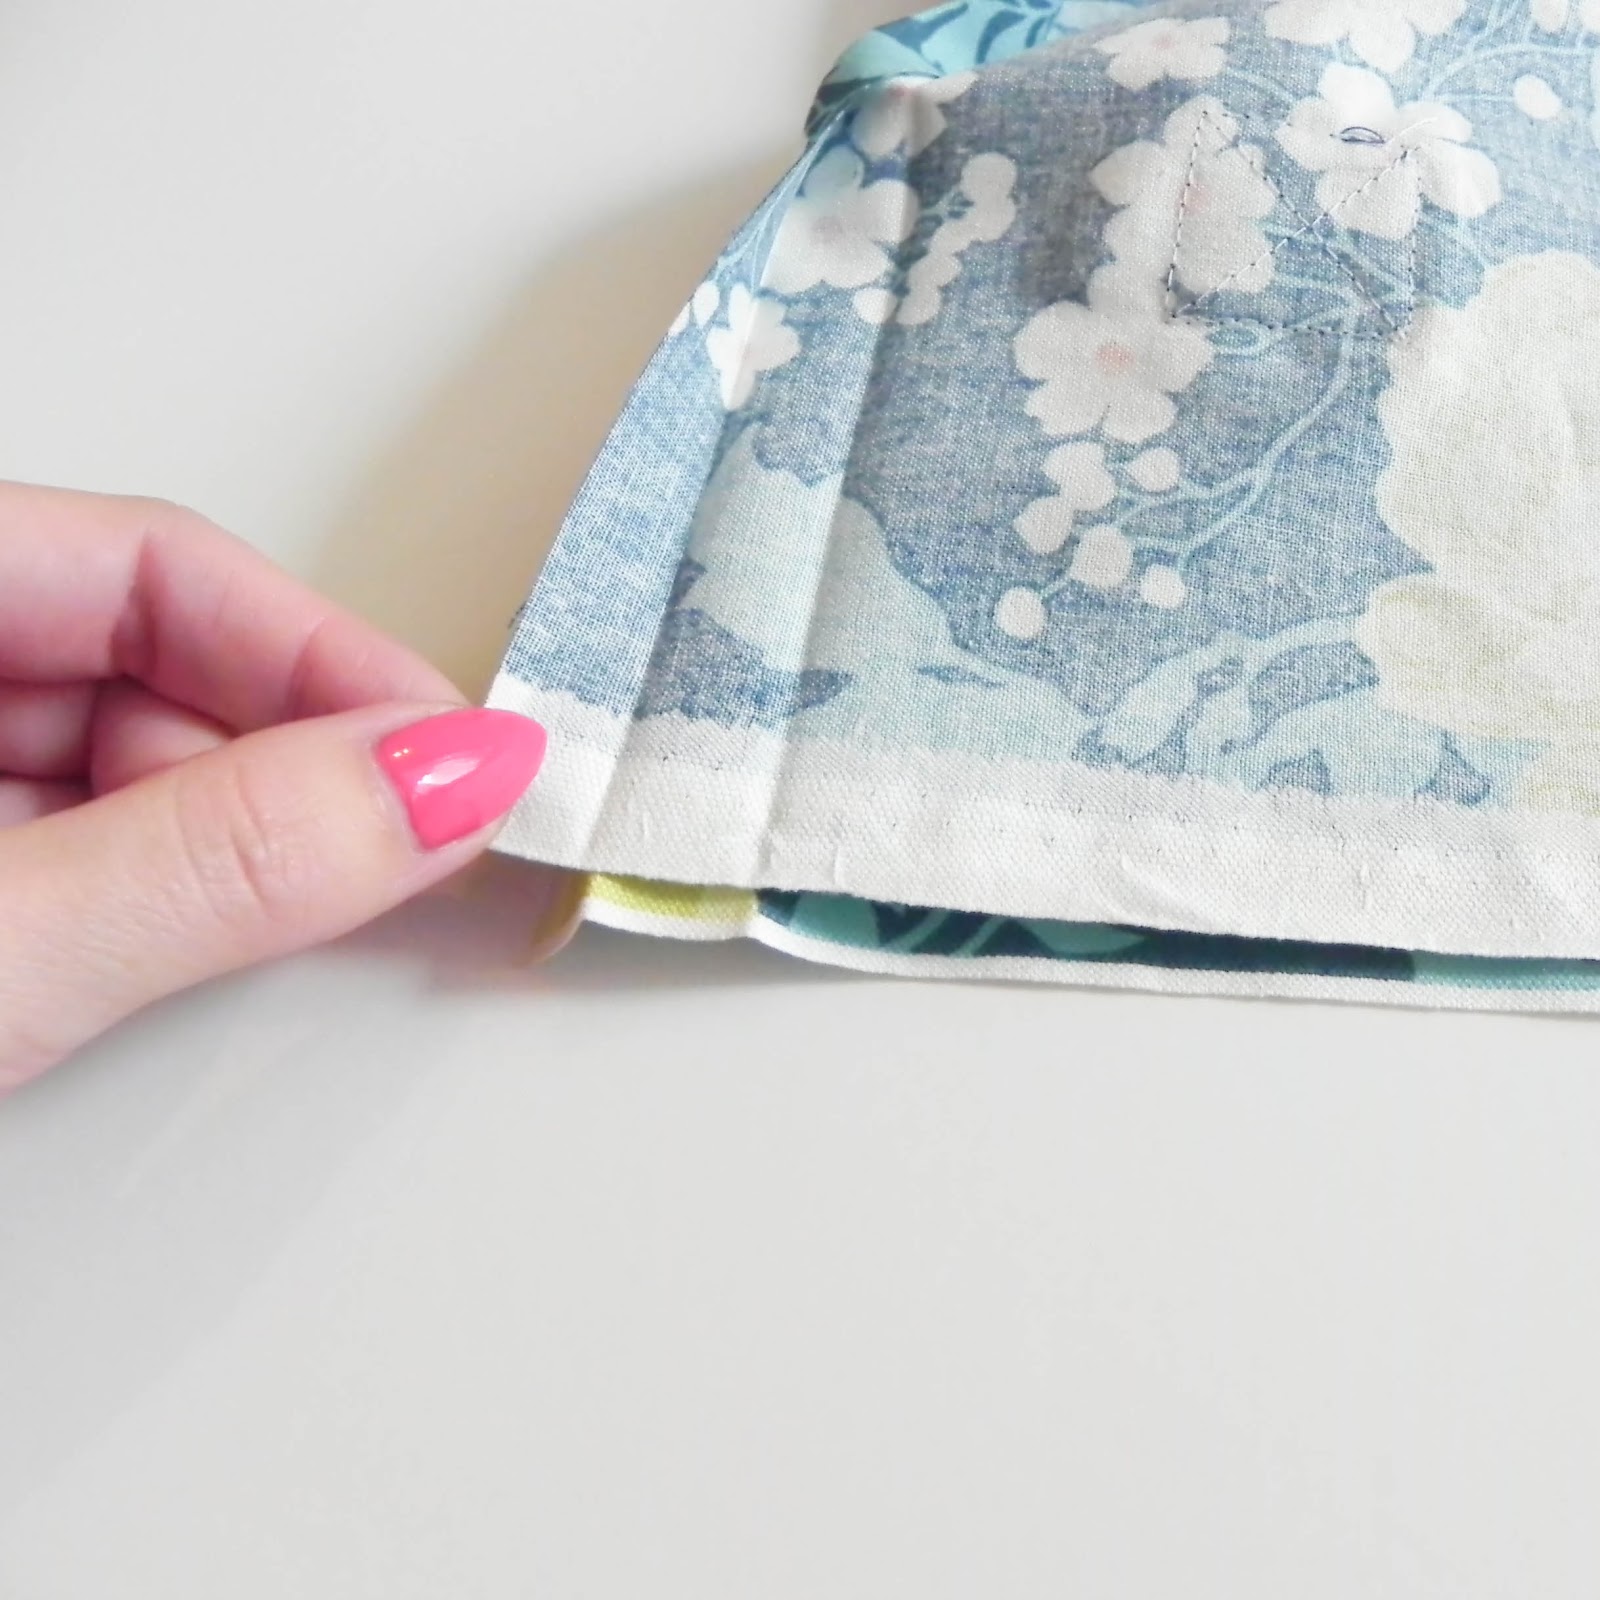
Now to finish up that raw edge, we are going to apply bias tape. First you will want to open it up completely and match up the raw edge with your curved edge. Starting 1 inch away from the end of the bias, follow that first fold line for your stitching. Stop when you get about ½” away from your starting point. Fold that starting piece over ¼ inch and pin the end back down and finish stitching. See the photo for a visual description!
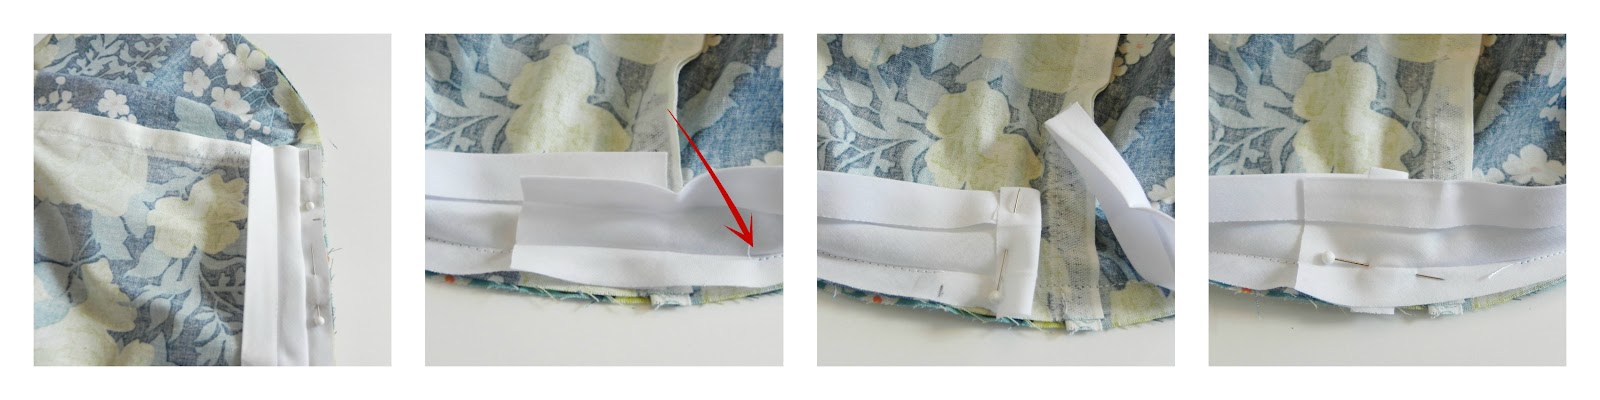
Fold the bias back over itself and over the raw edge and stitch it down.
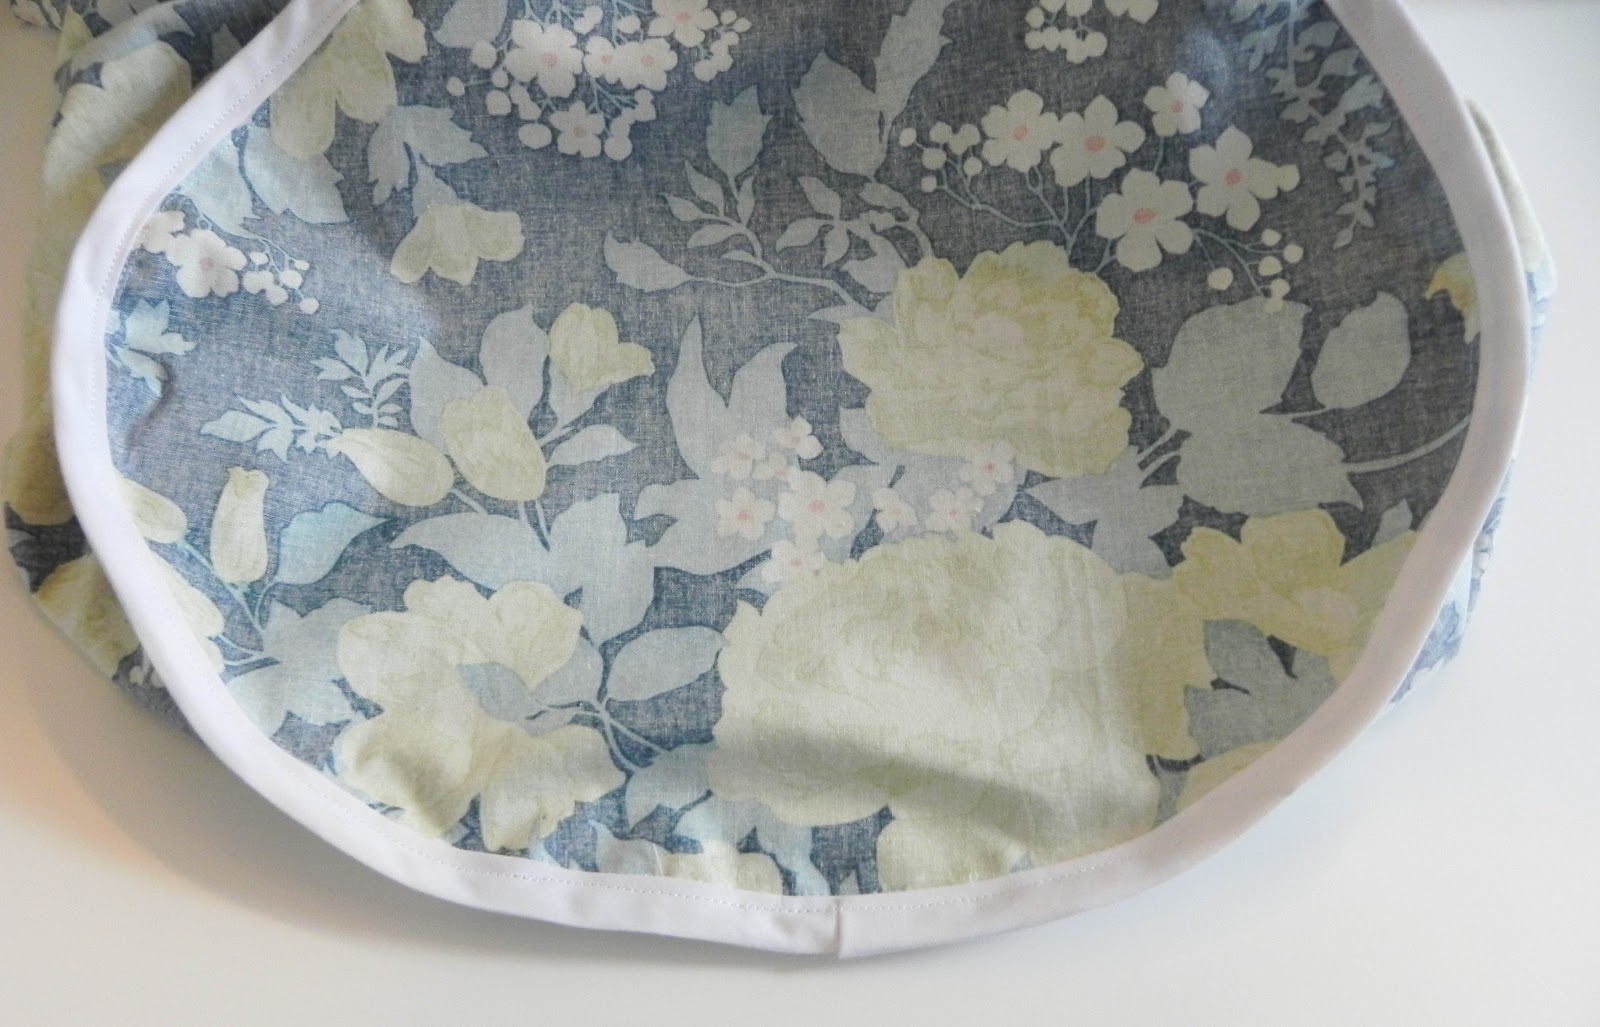

Now turn your bag, right side out, and open up your velcro and slide your frames in. You can now admire your stylish new hamper! I made two, one for lights and one for darks!

My husband doesn’t know it yet but his mountain hat rack has a new use ;)
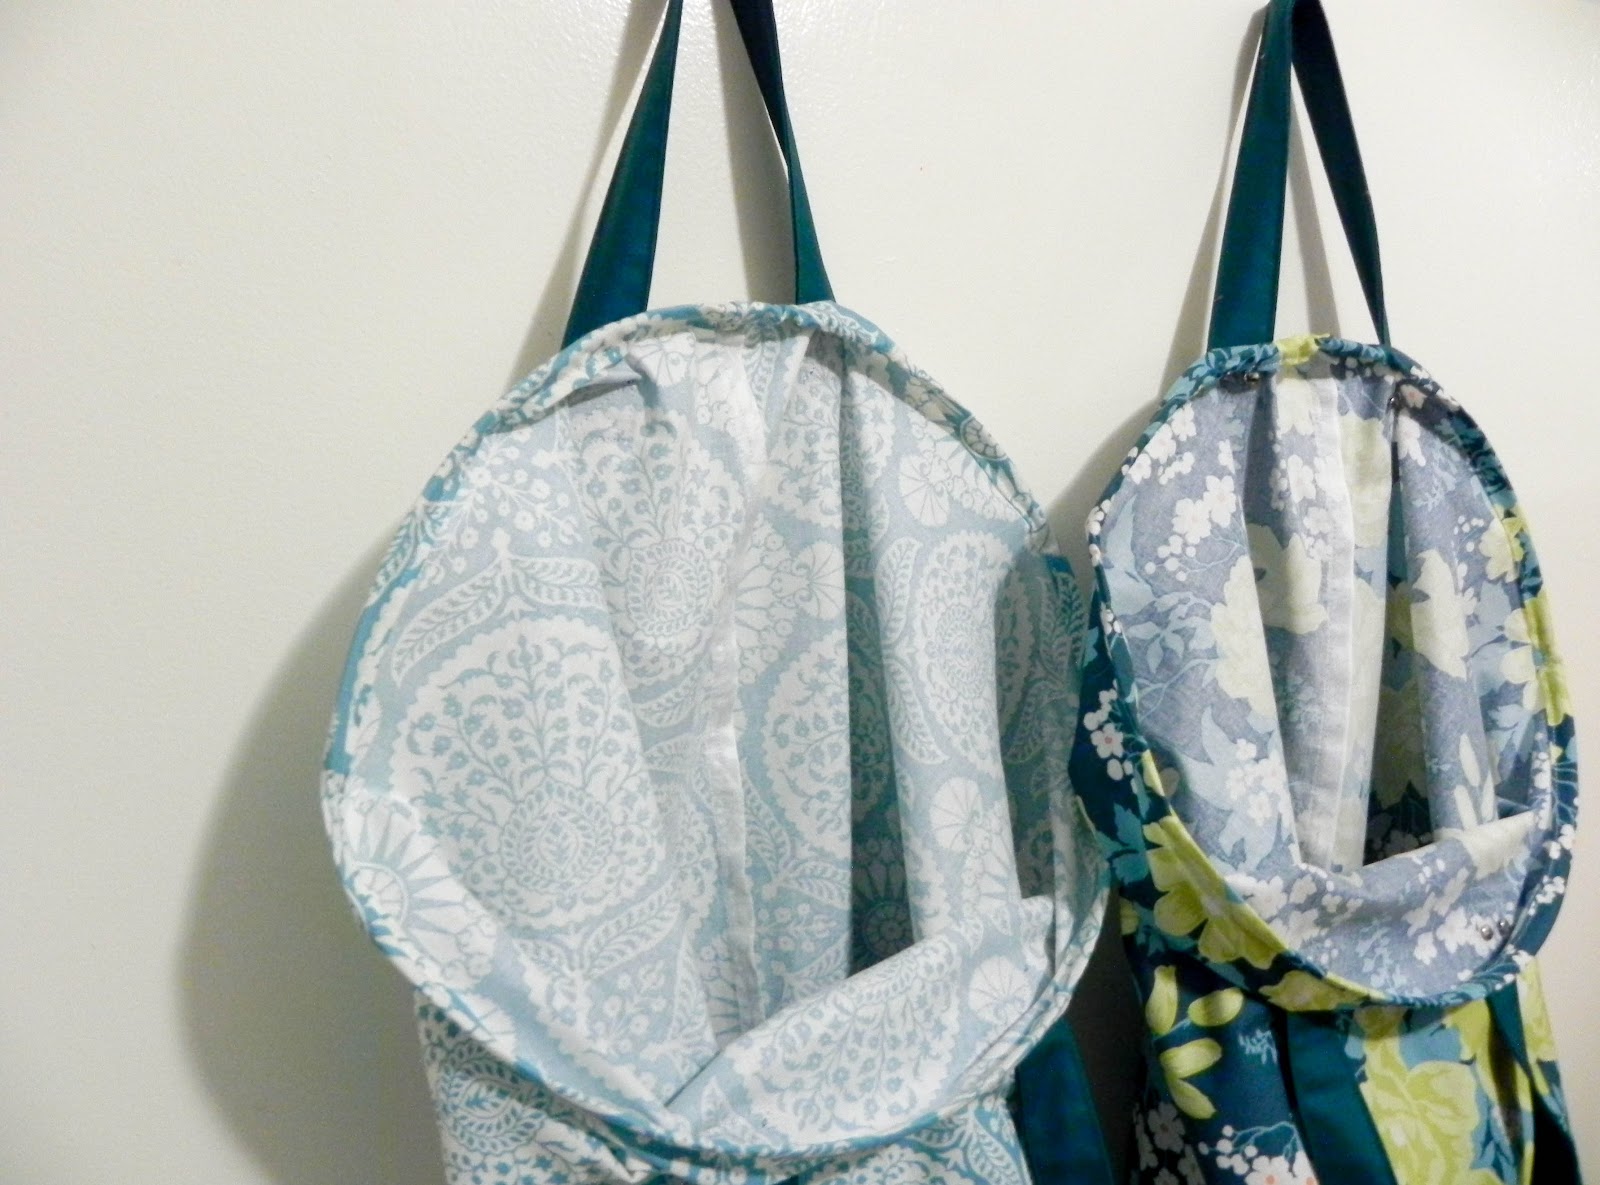
They even look great closed! Perfect for those college/university students to carry their laundry home!
I hope you have enjoyed this tutorial! I know it took me forever to finish but I am so happy to finally let you guys have it! Happy Hamper Sewing! - Aimee
_____________________________

A little something about Aimee Leptick, The Little Bird Designs:
I’m a fabric hoarding mom who is zipper obsessed! I love creating and sharing all things handmade and bag related! If I am not at home rolling in my fabrics, you can find me searching the internet for the next thing to sew! Come check out my tips and makes on my blog The Little Bird Designs and sign up for my newsletter HERE.
I’m a fabric hoarding mom who is zipper obsessed! I love creating and sharing all things handmade and bag related! If I am not at home rolling in my fabrics, you can find me searching the internet for the next thing to sew! Come check out my tips and makes on my blog The Little Bird Designs and sign up for my newsletter HERE.


4 comments
Love Love Love it!!!!
ReplyDeleteVery good website. I liked it very much.
ReplyDeleteWomen Bottoms
Women Maxi Dresses
Thank you for the pattern. I've been thinking about making hampers for grandsons or teaching them to sew with a project they could use and this is ideal. I was having difficulty envisioning enclosing the straps raw edges, so I made a sampler to keep for reference for this and any future strap making. This is so much neater than any I've sewn before.
ReplyDeleteThat is fantastic, Ann! I am glad it was useful for you!
DeleteNote: Only a member of this blog may post a comment.