
The Retreat Bag - A FREE Sewing Tutorial
2/14/2015 04:26:00 PM
UPDATED!!
The Retreat Bag is now available in 2 Sizes!! Please hop over to
THIS POST to read all about it and see new pictures!!

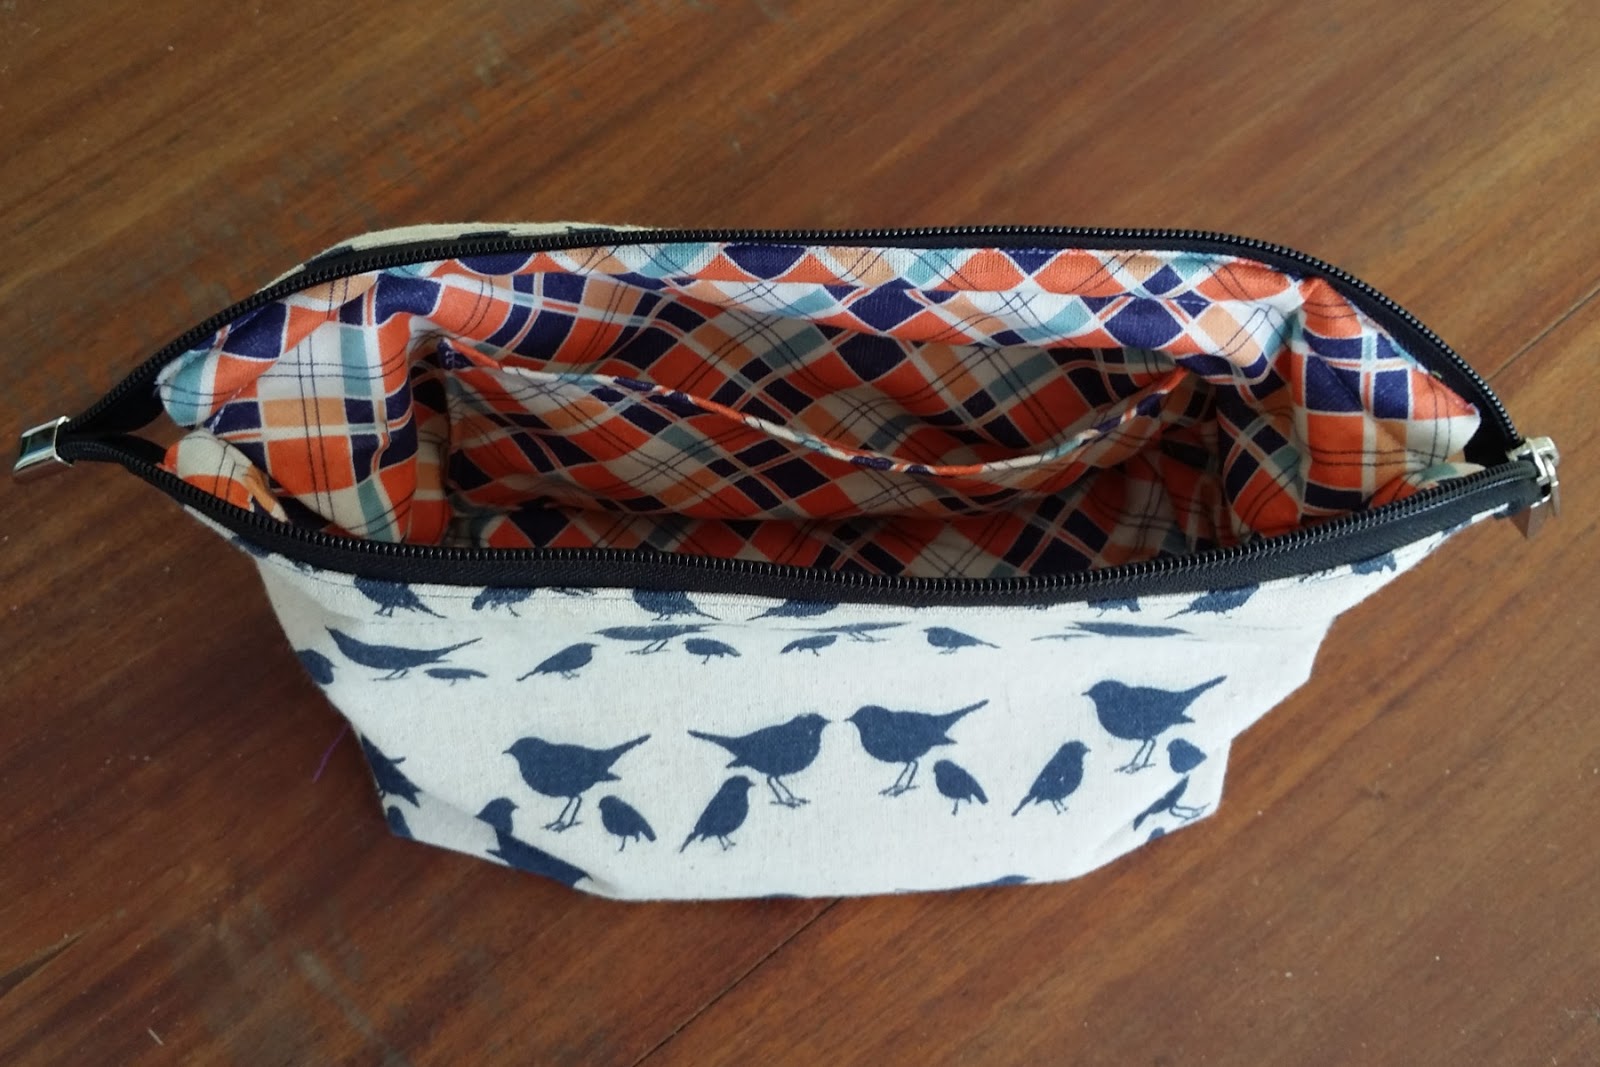
This cute boxy looking pouch is a gem! I am so pleased with how these turn out. It's just perfect for any retreat, or gift, or swap bag, or make-up bag, or wet bag, or shaving bag, or pencil bag, or toy bag…. did I say sewing bag?

The Retreat Bag is a simple zippered pouch with a wide base and a wide structured opening. There is a casing in the top where you insert two wire frames (one on each side), which helps it stay open when open, and helps turn the corners down when closed. It has two optional slip pockets inside and a long zipper that helps it open wide.


 |
| by Ellen Wiedman |
The girls at the 2015 NCW Retreat in NSW (yet to be blogged about) tried it out first and then helped me name it. Here are some of their photos!!
 |
| by Danielle from Paisley Avenue |
 |
| By Andrea from Bubs by Andie |
 |
| by Ellen Wiedman |
 |
| by Jodie from Three Little Chickens |
Simone added some of my cute metal zipper ends to her bag. I think they make an awesome addition!
You can find the Zipper Ends HERE.
 |
| by Simone Symonds |
 |
| by Simone Symonds |
 |
| by Nyssa Lesniak |
 |
| by Melisa from Melisa Jane Handmade |
 |
| by Melanie from Buntings & Things |
 |
| by Kristina Hambly |
 |
| By Cynthia Phillpotts |
 |
| By Cynthia Phillpotts |
 |
| by Gail Newman |
In these two pictures below, Simone has used some oilcloth and left the pockets out to make a wet bag! Perfect for traveling.
 |
| by Simone Symonds |

After I instructed them on how to make it, and promising to write a tutorial for it, I came home to Canada refreshed and retreated (actually very jet lagged) and made a few minor changes. Changing the way the zipper is constructed and the wires are put in helps it keep it shape a bit better and fold down nicer at the top.

(Scroll down to the bottom of the page)
If you haven't joined the Emmaline Facebook pages yet, please do so to stay up to date on the latest tutorials, patterns and bag hardware.
Here they are:
Emmaline business page and
Emmaline Sewing Patterns Group - fun Facebook group for chat, help and inspiration


27 comments
Oh those zipper ends!! What a great fun bag this looks like, thank you!
ReplyDeleteThanks Reece!!
DeleteHi Janelle, I've been searching the web for weeks to find a tutorial for a bag like is with extended, covered zipper ends and was so excited to find this page but am I missing something? I don't see any "tutorial" only some comments (blog) and photos of completed bags. Has the tutorial been removerd?
DeleteHi Jojo, in the post above, it says near the bottom in red letters "And download the free pattern HERE". That will take you to the download. Thank you!
DeleteYour frames are a good idea!
ReplyDeleteLiebe Grüße,
Kathrin
Thank you for the free tutorial :-))
DeleteYou all must have had a wonderful time at your retreat. This is a really neat pattern--thank you for making it complimentary, and thank you for being willing to carry the frames in your shop and making them available as well!
ReplyDeleteKrista
Thanks for the tutorial! Frames are out of stock :( Do you expect them in soon?
ReplyDeleteHi Patti!! Sorry the frames went too fast. Yes, more on the way. Much, much more! End of March. Sorry for then inconvenience.
DeleteDang,I just wish you had posted about these last week before I placed my order! Oh well,guess they will go on my wish list for the next order :)
ReplyDeleteThank you very much.. i'm very love it.. :)
ReplyDeleteThank you so very much for sharing this for free! I love your patterns, so far only tried the Necessary Clutch Wallet but I can't wait to try more =)
ReplyDeleteJanelle, this is exactly what I need, I'll make one soon. Promise, and thanks for the free tutorial. Great fabrics from some of the ladies as well.
ReplyDeleteDeb
Thanks Debbie!!
DeleteWhat a great design. Ive not seen those wire frames before, ill have to go and check them out. I can see this pouch being great for the guys in man-fabric.
ReplyDeleteSo,I know this is totally unrelated to this post but,can you tell me where you purchased your rivet setting tool? Thanks!
ReplyDeleteCan't find what I downloaded. Help
ReplyDeleteHope it's ok to pin this! The bags are fab
ReplyDeleteI am enjoying making these bags. Wonderful instructions. I have one question. Do you need a certain glue to hold the ends on the frame?
ReplyDeleteHi Janice! You can just put tape over the ends of the wires so they are not sharp, or use a permanent glue like E-6000. I hope that helps!
DeleteCan I attend one of ur retreats or classes...Love these bags! U do a BEAUTIFUL job, EXCELLANT work!!
ReplyDeleteHi Noelle! thank you for the kind words. I don't have any retreats or classes plannedin the future, but I will make sure I let everyone know if I do ;-)
DeleteHi, The bag looks amazing, where can I buy it? I just got my dad a shaving kit (http://www.wowfreestuff.co.uk/free-dorco-razor/) Now I am looking for a shaving brush and bag as part of his Christmas present, can you please let me know, he will love it.
ReplyDeleteGreat blog. Thanks for share this post. It may helpful for all newbie bloggers, i really appreciate.Shaped Stand Up Pouch
ReplyDeleteThank you so much for the wonderful tutorial! I was wondering where I could get the pretty navy/paisley/floral fabric that you used in the first pic. I absolutely love this pattern and the fabric! Thanks!
ReplyDeleteThank you! I am sorry, but actually I don't recall the name of that fabric and I don't have it anymore. I regret that I didn't write it in the blog post! Janelle
DeleteSuch a nice blog and very nice you work and sharing this wonderful article about the purses and handbags well done.
ReplyDeletepurses and handbags
Note: Only a member of this blog may post a comment.