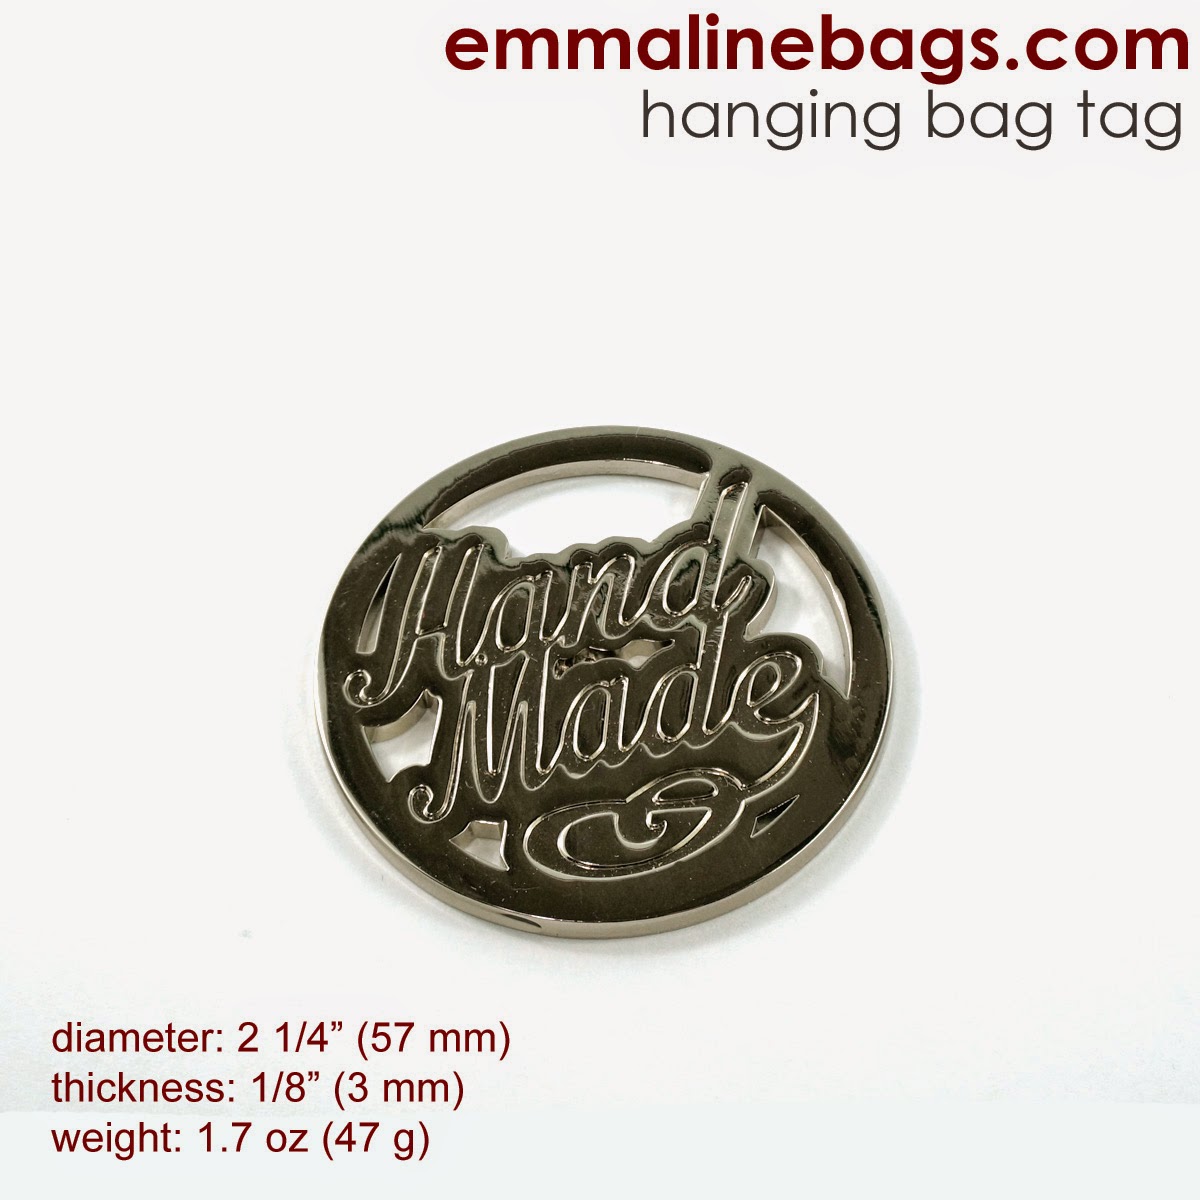
How to Make a Strap for a Metal Hanging Tag - A Tutorial
11/04/2014 01:30:00 PM |
 |
| Metal Hanging Tags from emmalinebags.com |
At first, I just designed these because I love the sparkle and shine and the addition of a focal point, that is often missing on a bag, but then I realized that these will actually help custom bag makers attract customers too! If you sell gorgeous looking bags, sometimes its hard to carry your own and advertise at the same time, because they look so professional. Customers will first love the bag, see the tag and probably ask you if you made it yourself.
I don't sell bags, but I love to carry handmade and I don't think the commercial bag designers should be the only ones to make and carry something shiny. I like my bag jewellery!
You could hang them from a leather cord, some recycled vinyl or leather straps or make some professional looking fabric straps from some fabric that coordinates with your new handmade bag.
Here's a quick and easy tutorial on how to make a slender fabric strap of your own. It ends up only 1/4" wide!
Fabric Requirements & Cutting:
Cut 1 rectangle 1" x 14" of coordinating light to medium quilting weight cotton, decor cotton, or sateen.
Instructions:
Press your fabric strip like you would for an open-ended 4-fold strap.
1) Press the the strip in half, wrong sides together, down the length of the strap.
2) Fold the outside edges to meet the center at the fold line you created in step 1.
3) Fold the strip in half, once again, meeting the long pressed edges together. Press.
4) Open out the strap folds and fold in half, right sides together to form a loop. Important: Make sure the strap is not twisted!
5) Sew across the ends with a 1/4" seam allowance. Press seam open and refold strap. **See an alternative for thicker fabrics below.)
**Alternative for Joining:If you are using thicker fabric, or want a smoother joining seam with less bulk, join the ends of the strip using a 45-degree seam. (This would be the same method you use for joining bias binding strips.) Fold the strip so that the ends are crossed at a 90-degree, right sides together. Make sure the ends of the strap extend about 1/4". Sew across the straps at a 45-degree angle starting and stopping where the strips meet at the edges - not at the end points of the strap. See diagram (1) below. Trim off the corners, leaving a 1/4" seam allowance. Press seam open and refold strap.
6) Sew the open edge of the loop closed, edgestitching about 1/16" away from the edge. Go slow and make it neat! If you are uncomfortable being so close to the edge, you could always move over ;).
 |
| Perfect Edgestitching! |
7) Insert a small section of the loop through the opening in your Metal Hanging Tag and the take the other end of the loop and pass it through the loop that is poking up through the tag.
8) To attach this to a strap ring on a bag - repeat Step 7, inserting the end of the loop without the tag through the strap o-ring, making it big enough to allow the hanging tag to go through, and pass the hanging tag through the loop.
Get a 10% discount on quantities of 10
Thank you for reading!
Make sure you join the Emmaline Sewing Patterns Group to get some great bag inspiration from items sewn from Emmaline patterns. It's such a wonderful group!


7 comments
Thanks for sharing this tutorial
ReplyDeleteyou are welcome!
DeleteThe Handmade tags are awesome! I'd use them on Christmas gift purses and totes. Thanks for the tutorial!
ReplyDeleteĐơn Vị Ship Cấp Tốc Hàng Hóa Từ Việt Nam Sang Thái Lan Giá Thấp
ReplyDeleteDịch vụ ship nhanh hàng hóa từ việt nam
Công ty giúp order hàng từ trên Taobao
At one time I was able to buy the hanging metal tag that you would have to make the strap for it and I loved them so much. They looked so nice on my tote bags. However, I haven't been able to find them now. They are the 2 1/4" tags. Don't you sell them any more? Because I cannot find them.
ReplyDeleteHI Margie, we no longer carry them because they may have been just a bit too large for our customers! Maybe I will try to create a version that is at bit smaller and it will be more popular! I will look into it. Janelle
ReplyDeleteThank you. I hope you do create another version. Although, I thought they were great before. I will be anxious to see what you come up with for the next version.
ReplyDeleteNote: Only a member of this blog may post a comment.