It's October again, which brings Autumn to the northern hemisphere, but also is breast cancer awareness month. I've been doing some reflecting this year about how this has affected women I know; friends my age, and even my own cousin. It hits home, and it is a reality many of us will face. We can help make a difference to those that are affected by breast cancer, and with initiatives like this we can also make a cure a reality too.
I've been asked to host a stop on the #SewPink initiative blog hop again, and I have a fun pink project to share with you! I am going to sew something PINK, and while you are reading all about it, I hope you are reflecting on the seriousness of testing and screening for breast cancer. Read my blog post, & see how you can win 1 of 2 gift cards worth $50.00 at emmalinebags.com.
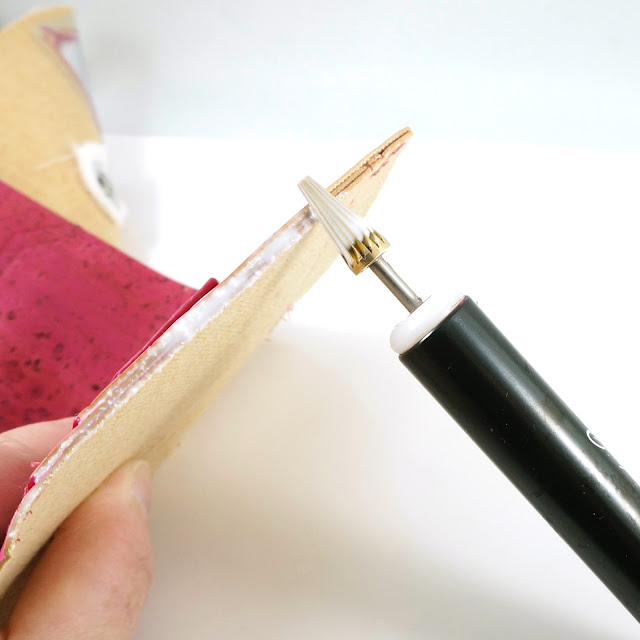
Last time I was in the #SewPINK Blog Hop, I stitched up one of Annie's fabulous patterns and had a lot of fun with it. This time I really wanted to work with some bright pink cork fabric so I could sew, but also do some painting on the edges with some bright pink edge paint. Working with edge paint always makes me feel like I have been doing some crafting as well as sewing, so this project ticks all of the "crafty" boxes for me - cut, sew, & paint!
I have been wanting to make a Key Fob Wallet, pattern by SewGnar, for ages. (We have the printed paper pattern in the shop, or you can get the PDF right from SewGnar.) SewGnar patterns are such excellent cork scrap busters, and I do have a lot of cork!
The small wallet has a swivel hook for keys and a wristlet strap, a little zipper pocket on the back for coin, an ID pocket, and a few card slots and pockets inside. It closes tightly with a magnetic snap. So cute!The Key Fob Wallet
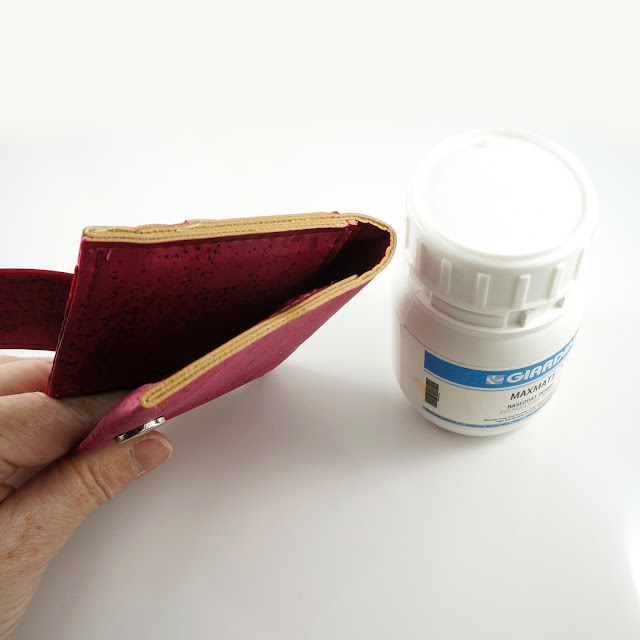
For this project I used some scraps of our Honeysuckle Pink cork, a 14" zipper in Pink Frosting, some of our nickel bag hardware from the shop. I used the Pink edge paint from the Girardini Basic Colour set, as well as the Dense Basecoat. I also added a piece of the RFID fabric to block credit card scanners. We sell this in the shop as well. It's not a lot of supplies, but put it together and I am really just so impressed with what a nicely finished wallet it is! It's so cute, but it also looks so nicely done. Yes, I am pretty proud of it. Pretty in Pink!
Some comments before you start!
Let's Get Painting!
- all sides of the snap tab except the bottom edge
- top & right sides of card slot pockets
- 1 of the 1" sides of each of the zipper tab ends
- bottom edge of the zipper pocket (not the sides or top)
- 1 long side edge of the strap for the key fob (wrist strap)
- 2 long side edges of the D-ring attachment
- the 4 sides of the ID pocket, and top edge of the Main Body
Some Construction Tips!
Here is a picture of the zipper pocket done and stitched in place. The bottom edge of the zipper pocket is finished with edge paint!
Let's get back to the instructions!
Finishing up!
Thank you for reading and following along with my PINK project! These are very handy little things and although you can definitely make them without edge paint, they do look so good with it. A little bit of planning is required if you want to make sure the right edges are pre-painted and the right edges are left until the end. I love putting a bit of extra thought into what I am doing, as it make a fun challenge.
If you make any of these, please be sure to tag us on your social media so we can see!
During the rest of October 2021, we'd like to offer a chance for you to win 1 of TWO $50.00 gift cards to shop at emmalinebags.com. Join our giveaway below. Winners will be announced on Nov 1, 2021.
Blog Hop 2021 Schedule
✂ Oct. 1 (Fri):Fat Quarter Shop - The Jolly Jabber
✂ Oct. 2 (Sat):Sallie Tomato
✂ Oct. 4 (Mon): Hugs ‘N Kisses
✂ Oct. 6 (Wed): Sewfinity
✂ Oct. 11 (Mon):Beyond the Reef
✂ Oct. 13 (Wed): Great Heron Thread Co.
✂ Oct. 15 (Fri): Love You Sew
✂ Oct. 15 (Fri): Emmaline Bags
✂ Oct. 16 (Sat): Meadow Mist Designs
✂ Oct. 18 (Mon): OklaRoots
✂ Oct. 20 (Wed): Suzn Quilts
✂ Oct. 20 (Wed): Teresa Coates
✂ Oct. 22 (Fri): Knot and Thread Design
✂ Oct. 23 (Sat): Shannon's Studio
✂ Oct. 25 (Mon): The Littlest Thistle
✂ Oct. 27 (Thur): Mister Domestic
✂ Oct. 27 (Wed): Sookie Sews
The #SewPink Initiative was created by ByAnnie.com LLC to raise awareness for breast cancer throughout the year. Our efforts culminate in an annual blog hop during October’s Breast Cancer Awareness Month to promote self-care, awareness, early detection, and support for those affected by breast cancer.
To learn more and see the calendar of events visit: https://www.byannie.com/SewPink
To find screenings available near you:
In addition to participating in the #SewPINK Initiative, Fat Quarter Shop invites you to support the National Breast Cancer Foundation with the goal of raising $10,000.
To find the #SewPINK donation to Fat Quarter Shop’s fundraiser visit: https://fundraise.nbcf.org/SewPINK


No comments:
Post a Comment
Note: Only a member of this blog may post a comment.